

To connect ServiceNow to a knowledge base, you must either provide the required configuration parameters for Knowledge Hub to NiCE Professional Services or enter them in Knowledge Hub yourself. This page describes how to configure the ServiceNow integration with Knowledge Hub. Setting up ServiceNow takes two steps:
- Step 1: Create the OAuth Application in ServiceNow: You register an application in ServiceNow, set how long its tokens last, and copy the Client ID and Client Secret.
- Step 2: Configure the Connector in Knowledge Hub: You enter those details in Knowledge Hub, click Authenticate, and sign in to ServiceNow.
Three tasks are the same either way: opening the Application Registry, setting the token lifetimes, and giving the integration user the right permissions.
Complete each of these tasks in the order given.
Before You Begin
Make sure you have the following:
- Admin access to the ServiceNow instance you want to connect.
- Access to the Knowledge Hub application in NiCE CXone.
- A basic understanding of how OAuth works in ServiceNow.
Configure OAuth in ServiceNow
Everything on the ServiceNow side starts here. This is the same whichever setup method you use.
-
Open your ServiceNow account in web browser and Sign in.
-
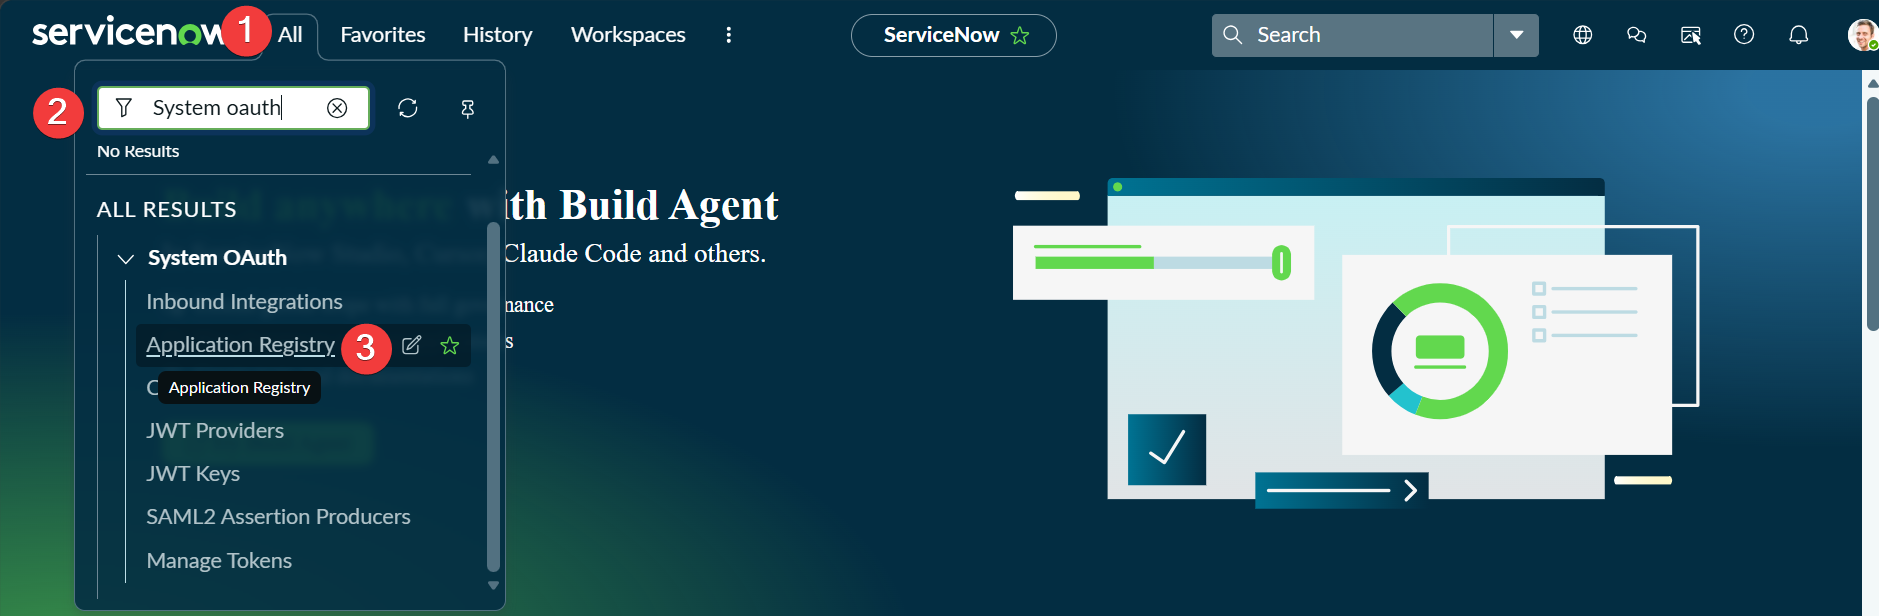
In the top navigation bar, click All.
-
Navigate to, System OAuth > Application Registry.
Alternatively, search for System OAuth.
-
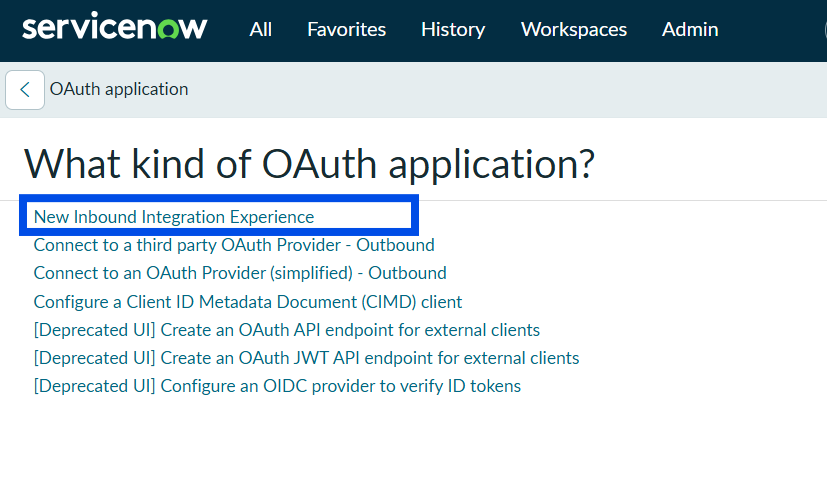
On the Application Registries page, click New at the top right.
-
Click New Inbound Integration Experience.
-
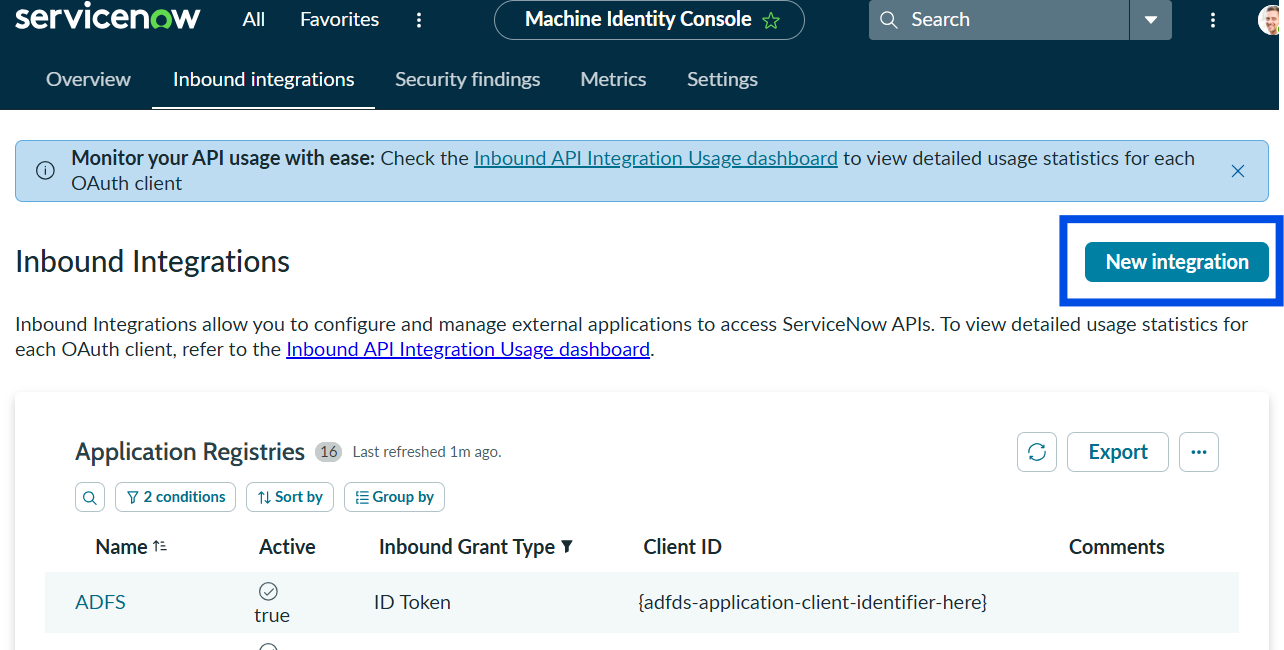
Click New integration at the top right of the page.
-
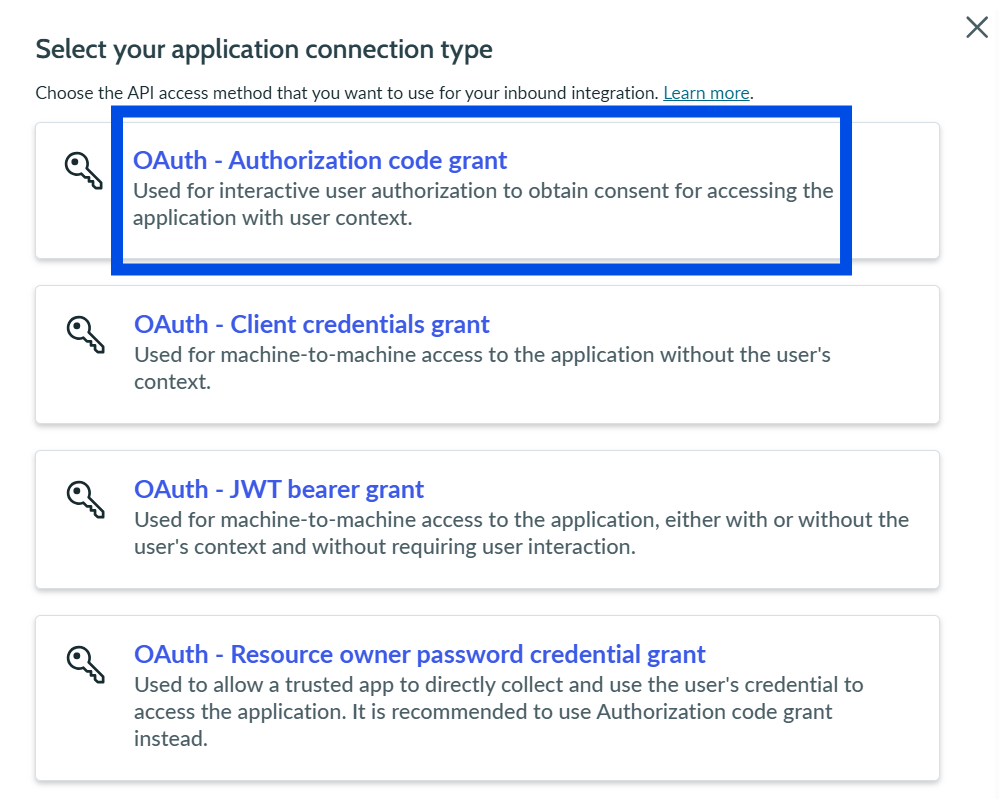
Click OAuth - Authorization code grant.
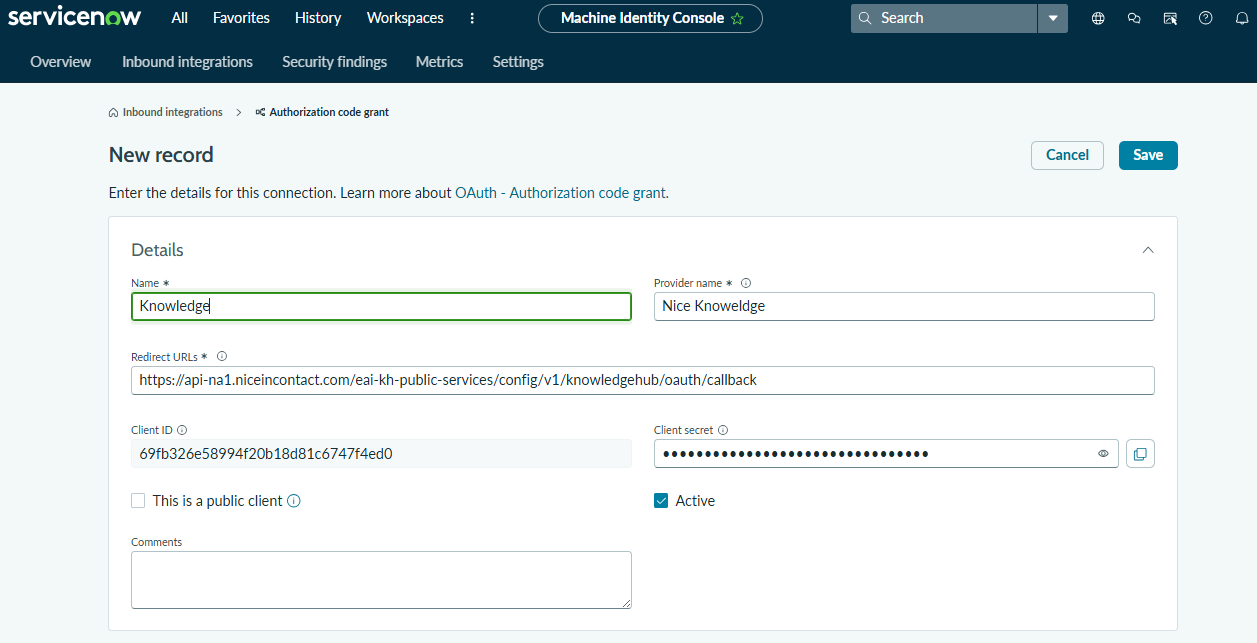
- Fill in the fields on the New record page.
Field
What to enter Name A name for the OAuth entity. For example, Knowledge. Provider name The name of the service you are connecting to. For example, NiCE Knowledge. Redirect URLs The redirect URL for your region. Find yours in Redirect URLs by Region. Client ID ServiceNow fills this in for you. Copy it and keep it handy. You need it in Knowledge Hub. Client secret ServiceNow fills this in for you. Copy it and keep it handy. You need it in Knowledge Hub. ServiceNow shows the client secret only once. If you lose it, you have to reset it and set up the connector again.
This is a public client Leave this box clear. Active Leave this box selected. The connection does not work if you clear it. Comments Notes about this configuration. This field is optional. - Under Auth scope, add useraccount.
 View image

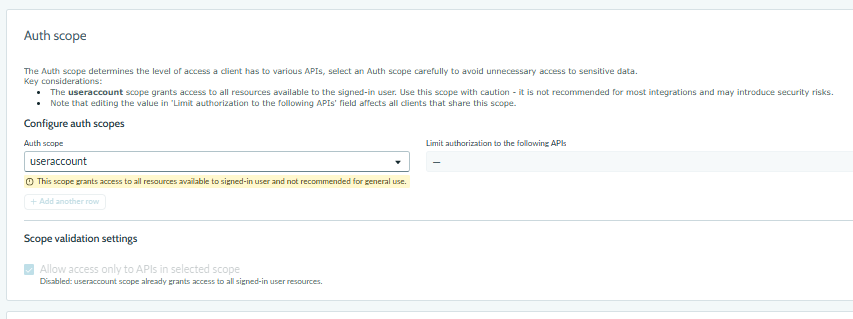
Leave this page open. You set the token lifetimes on it next.
Redirect URLs by Region
The redirect URL is where ServiceNow sends the tokens after it approves Knowledge Hub. It must match the region your NiCE CXone system runs in. Find your region in the table and enter that URL exactly.
Copy the URL character for character. An extra space, a missing slash, or a URL from the wrong region all cause a redirect URI mismatch error when you authenticate later.
|
Region |
Redirect URI |
|---|---|
| NA1 | https://api-na1.niceincontact.com/eai-kh-public-services/config/v1/knowledgehub/oauth/callback |
| NA2 | https://api-na2.niceincontact.com/eai-kh-public-services/config/v1/knowledgehub/oauth/callback |
| CA1 | https://api-ca1.niceincontact.com/eai-kh-public-services/config/v1/knowledgehub/oauth/callback |
| AU1 | https://api-au1.niceincontact.com/eai-kh-public-services/config/v1/knowledgehub/oauth/callback |
| AU2 | https://api-au2.nicecxone-sov1.au/eai-kh-public-services/config/v1/knowledgehub/oauth/callback |
| DE and EU1 | https://api-eu1.niceincontact.com/eai-kh-public-services/config/v1/knowledgehub/oauth/callback |
| UK1 | https://api-uk1.niceincontact.com/eai-kh-public-services/config/v1/knowledgehub/oauth/callback |
| UK2 | https://api-uk2.nicecxone-sov1.uk/eai-kh-public-services/config/v1/knowledgehub/oauth/callback |
| JP1 | https://api-jp1.niceincontact.com/eai-kh-public-services/config/v1/knowledgehub/oauth/callback |
Configure the OAuth Token Settings
Tokens are what let Knowledge Hub keep reading your articles after you sign in. Each one has a lifespan, and when it runs out the connection stops working. These values are the same whichever setup method you use.
ServiceNow does not renew or replace refresh tokens. Whatever lifespan you set here is a hard deadline. When it passes, syncing stops and someone has to authenticate again. Do not leave the refresh token at the 100-day default on a production instance.
-
Open the OAuth application record that you created.
If it is not already open, navigate to, System OAuth > Application Registry, and then select your application.
- On the same page, expand Advanced options.
-
In Refresh Token Lifespan, enter the number of seconds before the refresh token expires.
-
Recommended value:31,536,000(1 year)
-
Default value:8,640,000(100 days)
-
-
In Access Token Lifespan, enter the number of seconds before the access token expires.
-
Example value:7,200 (2 hours)
-
Default value:1,800 (30 minutes)
-
-
Click Save at the top right of the page.
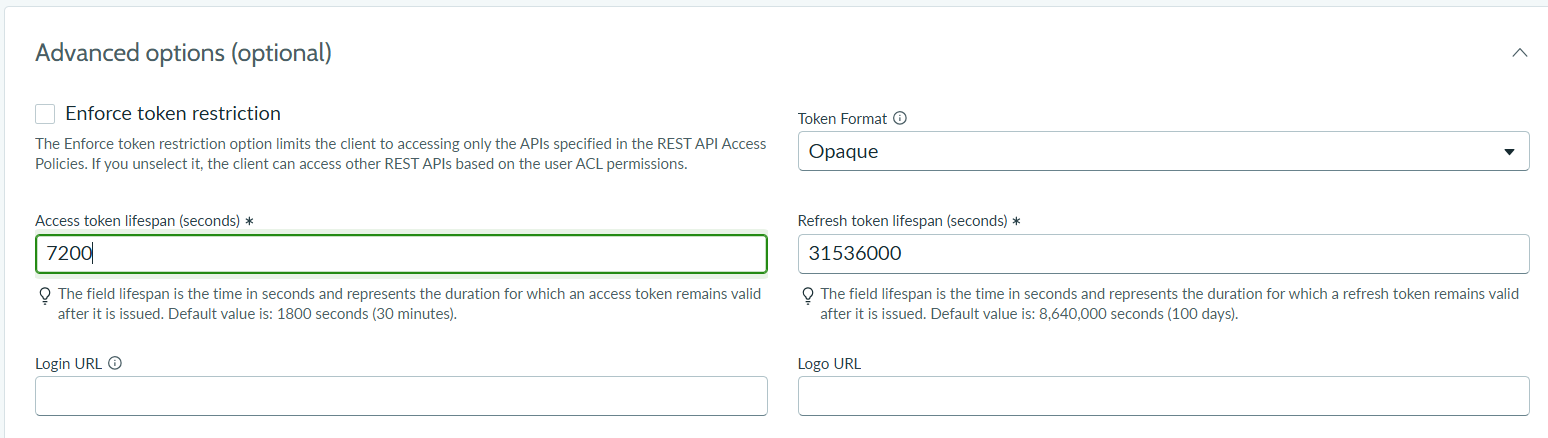
Make a note of the date your refresh token expires. Authenticate again in Knowledge Hub before that date to avoid a gap in syncing.
Least-Privilege Access (Optional)
This section is only needed if you want to authenticate using a dedicated, restricted integration user instead of an administrator account.
-
If you are authenticating with an administrator account, you can skip this section and proceed directly to Connect ServiceNow to Knowledge Hub.
-
Knowledge Hub reads ServiceNow with the access of the user who signs in when you click Authenticate. The OAuth token inherits that user's data access. To limit what Knowledge Hub can read, sign in with the integration user you create in this section, not with an administrator account.
The account you authenticate with needs permission to read your knowledge articles and the tables that describe them. Roles on their own are not enough, so you also create access control rules. These requirements are the same whichever setup method you use.
Create the Integration User
-
Go to User Administration > Users and click New.
-
Enter a User ID, for example, kh_integration. First and last names are optional, but they help you identify the user later.
-
Select Active. Leave Internal Integration User cleared. The user must be able to sign in to ServiceNow in the window that opens when you authenticate.
-
Click Submit.
-
Open the user you created and click Set Password. Generate a password and copy it. You need it when you sign in from Knowledge Hub.
Leave Password needs reset cleared. If it is selected, ServiceNow asks for a new password during sign-in and authentication does not complete.
Create the Integration Role
The access control rules you create later require a custom role. Create it first.
-
Go to User Administration > Users and click New.
-
In Name, enter a name for the role, for example, x_kh_integration.
-
Click Submit.
Start by giving the integration user these two roles:
- snc_platform_rest_api_access: Lets the account use the REST Table API.
- oauth_user: Lets the account authenticate with OAuth.
Both roles exist on every ServiceNow instance. To assign them, open the integration user, click Edit under Roles, move the roles to the right-hand list, and click Save. You add your custom role in Add the Role to the Integration User.
-
ServiceNow may also add the snc_required_script_writer role automatically. This is a default ServiceNow security role. You do not need to remove it.
-
These two roles on their own are not enough. ServiceNow still blocks access to the system tables until you create the access control rules described below. Skipping this task is the most common reason a connector authenticates successfully but finds no articles.
Elevate to the security_admin Role
You must elevate your own role before you can view or create access control rules.
-
Click your profile picture at the top right and select Elevate role.
-
Select security_admin and click OK.
-
Refresh the page.
If you do not elevate, the Access Controls list has no New button. Elevation lasts only for your current session. If the session times out, elevate again.
Check That the Table API Rule Is Active
If this rule is turned off, the connection fails with a 403 error.
- Go to System Security > Access Controls (ACL).
- In the filter, enter Name contains Table API.
- Open the record and check that Active is set to true.
Create Read Rules for the System Tables
Knowledge Hub reads three system tables to work out which of your tables hold knowledge articles. Create a read rule for each one.
|
Table |
Why Knowledge Hub needs it | Required |
|---|---|---|
| sys_db_object | Lists your tables. Knowledge Hub reads it first when it checks the connection. | Yes |
| sys_dictionary | Finds the fields in your knowledge tables. | Yes |
| sys_glide_object | Reads the data type of each field. | Recommended |
- Go to System Security > Access Controls (ACL).
- Click New.
- Set Type to record and Operation to read.
-
Set Decision Type to Allow If.
- In the first Name drop-down, select Table [sys_db_object]. Leave the second drop-down set to --None--.
-
If you select a field in the second drop-down, ServiceNow creates a field-level rule instead of a table-level rule, and the connection keeps failing.
- Under Requires role, double-click Insert a new row and select your integration role. For example, x_kh_integration.
- Click Submit.
- Repeat these steps for Table [sys_dictionary] and Table [sys_glide_object].
Add the Role to the Integration User
Create a named anchor AddRole for this section. Creating the rules is only half the job. The user needs the role as well.
- Go to User Administration > Users.
- Open the integration user.
- Under Roles, click Edit and add your integration role.
- Add the personalize_dictionary role as well. ServiceNow can still block access to the dictionary tables without it, and this fixes most permission problems.
- Click Save.
Role and access control changes take effect immediately. You do not need to authenticate again in Knowledge Hub after you change them.
The following table summarizes the minimum the integration user needs.
|
What the account needs to do |
Role or access control rule |
|---|---|
| Read sys_db_object | A custom rule and role, or personalize_dictionary |
| Read sys_dictionary | A custom rule and role, or personalize_dictionary |
| Read sys_glide_object | A custom rule and role |
| Use the REST Table API | snc_platform_rest_api_access |
| Authenticate with OAuth | oauth_user |
| Sign in when you authenticate | An active user with a password. Internal Integration User cleared. |
Verify the Integration User's Access (Optional)
Before you connect in Knowledge Hub, you can check that the integration user can read the system tables. Run this command from any computer with curl. Replace the user ID, password, and instance name with your own.
curl -s -o /dev/null -w "%{http_code}" -u 'kh_integration:<password>' "https://<instance>.service-now.com/api/now/table/sys_db_object?sysparm_fields=update_access,create_access&sysparm_limit=1"
|
Result |
What it means |
|---|---|
| 200 | ServiceNow is ready. Continue to Connect ServiceNow to Knowledge Hub. |
| 403 | The read rule is not working. Check that the second Name drop-down is --None--, the rule is active, Operation is read, and the role is assigned to the user. |
| 401 | The user ID or password is wrong. This is not an access control problem. |
Your ServiceNow setup is now complete. The rest of the work happens in Knowledge Hub.
Connect ServiceNow to Knowledge Hub
You cannot change the configurations after authentication completes. You can edit them only if source creation or the sync has failed.
-
In NiCE CXone, click the app selector
 and select General > AI Studio > Knowledge Hub.
- Select ServiceNow from the Knowledge Source drop-down.
- Enter your ServiceNow parameters in the corresponding fields.
- Click Authenticate at the bottom right of the page.
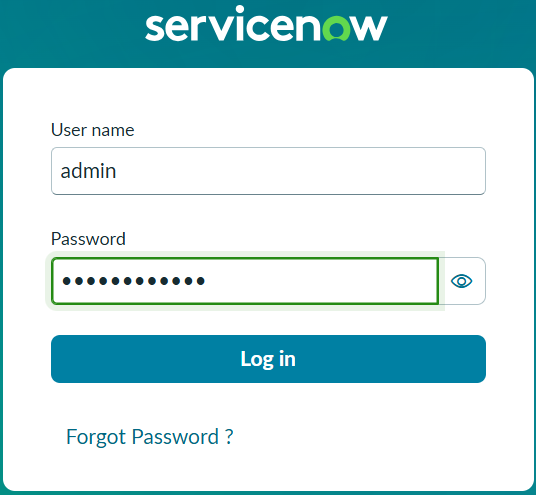
- Log in to ServiceNow in the window that opens. If you completed Least-Privilege Access, log in as the integration user, not as an administrator.
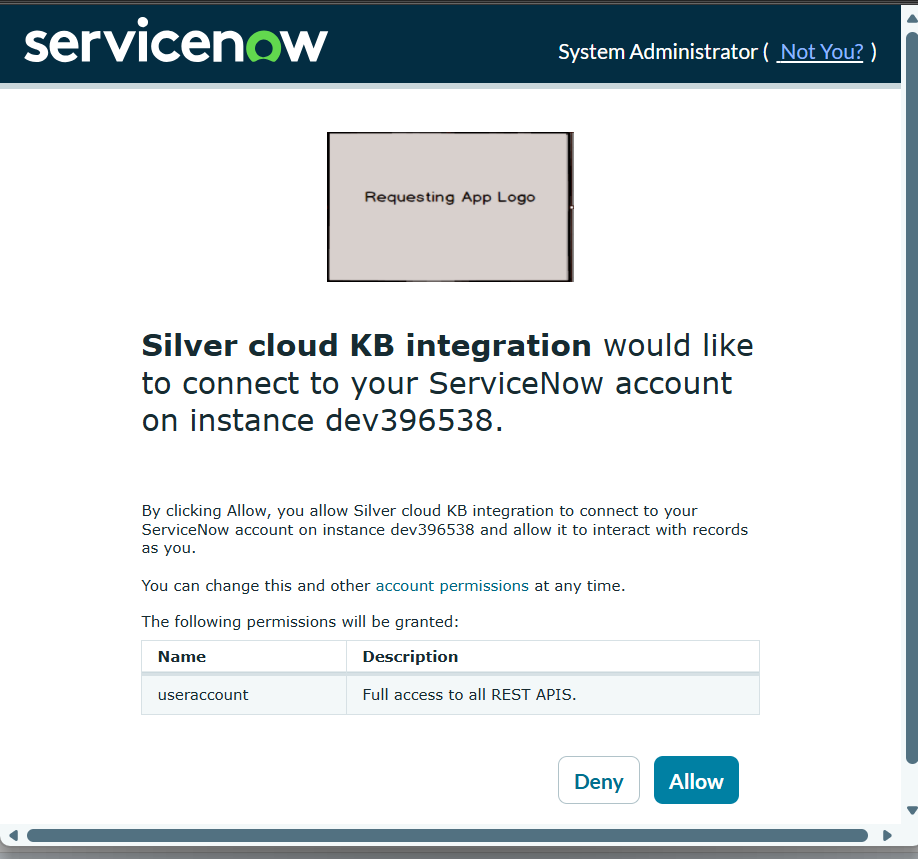
- Click Allow to give Knowledge Hub access to your ServiceNow account.
- Wait for the ServiceNow window to close and the Authentication Completed message to appear.
- Click Next.
- Review the summary, then click Create and Ingest.
- The connector status changes to Pending. After five to seven minutes, refresh the page. Manual Sync becomes available.
- Click Manual Sync
 .
- Wait for the sync to finish.
A large knowledge base can take several hours to sync. You do not need to stay on the page while it runs. Come back later and refresh to check the status.
- Click Manual Sync
- When the sync finishes, the status changes to Active. Your ServiceNow articles are now available in Knowledge Hub.
Troubleshooting
Use the following table to resolve common ServiceNow connector problems.
|
Problem |
Possible cause | Solution |
|---|---|---|
| Invalid client | The client ID or client secret is wrong, or the app is not active in ServiceNow. | Check both values against the ServiceNow app, and make sure the Active box is selected there. |
| Invalid scope | The useraccount scope is missing or misspelled. | Open the ServiceNow app and check the Auth scope section. |
| Invalid grant | The refresh token expired. | Authenticate again in Knowledge Hub. |
| Redirect URI mismatch | The redirect URL in ServiceNow does not match your region. | Compare the URL in ServiceNow against Redirect URLs by Region. It must match character for character. |
| Syncing stops after months of working | The refresh token reached the end of its lifespan. | Authenticate again in Knowledge Hub. To stop this happening again, raise the refresh token lifespan in ServiceNow. |
| 403 error: User is unauthorized to access table: sys_db_object | The account you authenticated with is not an administrator and has no read rule for the system tables. | Create the read rules and assign the role to the user. See Least-Privilege Access. |
| Authentication succeeds, but no articles are found | The integration user has the roles but not the access control rules. | Create the read rules for the system tables and add the integration role to the user. |