Set up NiCE Digital messaging in Salesforce
NiCE Digital vmessaging brings chat, WhatsApp, SMS, and Facebook Messenger conversations into the same Omni-Channel widget agents already use for Salesforce Voice. NiCE CXone routes each digital interaction to an agent alongside their voice work, so agents handle all channel types from one console. This section walks a Salesforce admin through connecting a NiCE Digital messaging channel and confirming agent access.
Prerequisites
-
System Administrator access to Salesforce Setup.
-
A NiCE CXone contact center already configured for Salesforce Voice.
-
The NiCE Digital connector app and NiCE Digital Channel Definition already installed in the org.
-
At least one available Messaging User license, and Digital Engagement enabled in the org.
Limitations
-
The WhatsApp channel currently supports inbound messages only. Outbound support is planned for a future release.
-
The channel supports private messages only. Public messages aren't supported.
Review the NiCE Digital connector app
The messaging channel you create in the following task connects to this app, so confirm it's active before you continue.
-
In Salesforce Setup, enter External Client Apps in the Quick Find box, then select External Client App Manager.
-
Select NiCE DigitalConnectorApp.
-
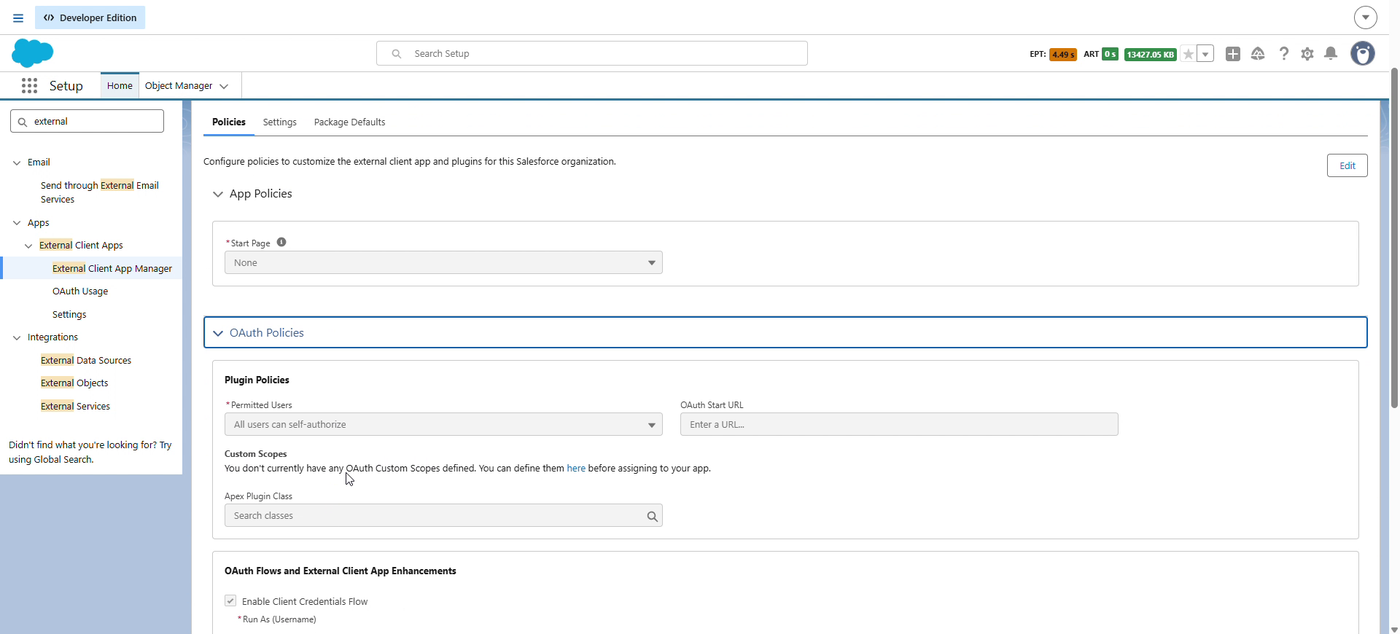
Expand OAuth Policies to confirm the Permitted Users setting and the enabled OAuth flow.
-
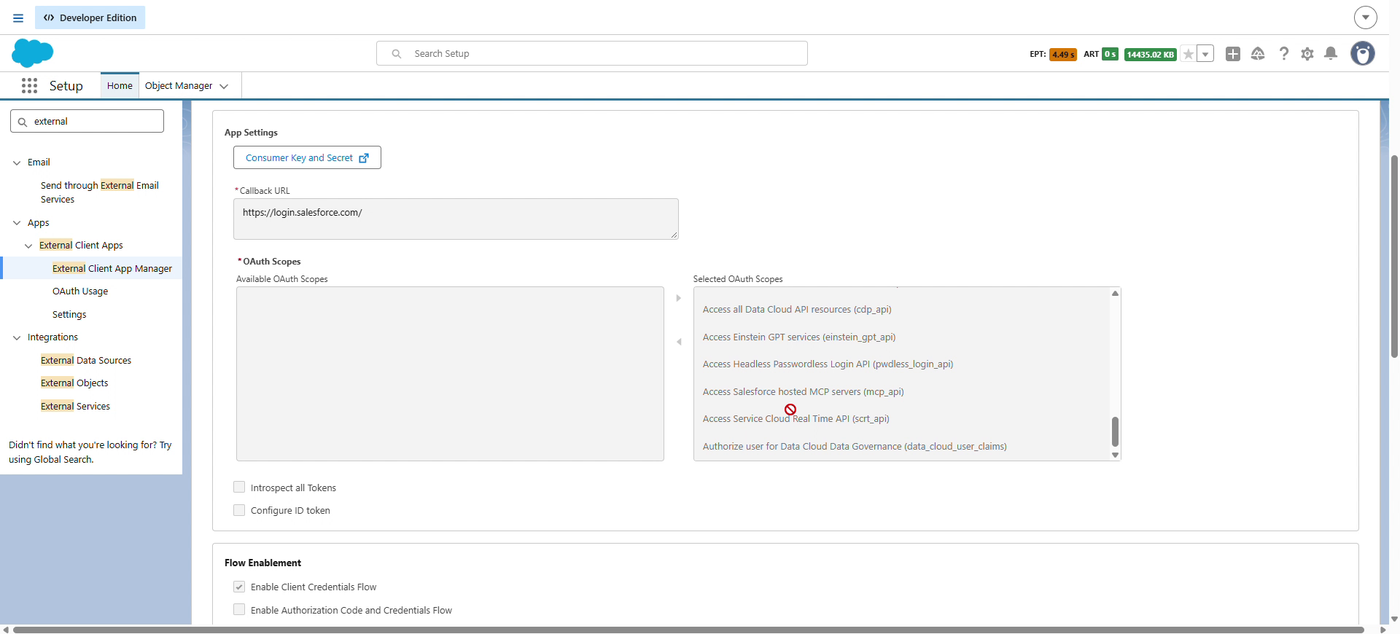
Select the Settings tab, then expand OAuth Settings to confirm the Callback URL and the scopes listed under Selected OAuth Scopes.
 View image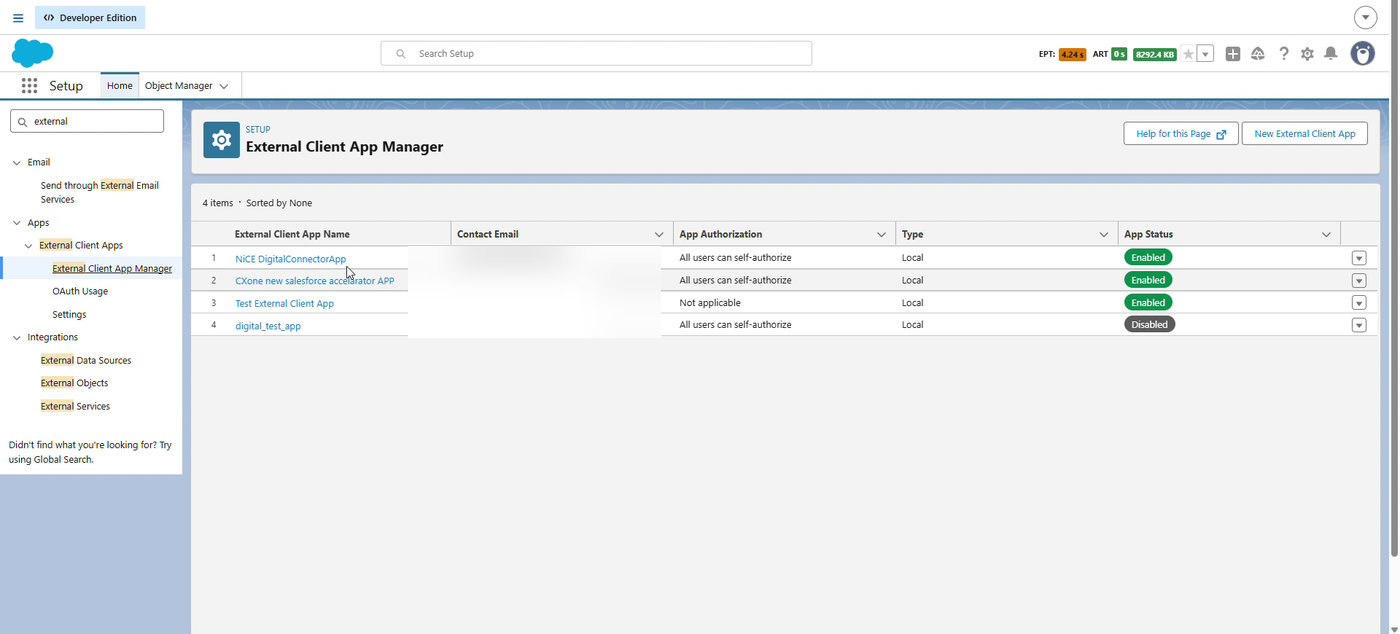
Add a NiCE Digital messaging channel
-
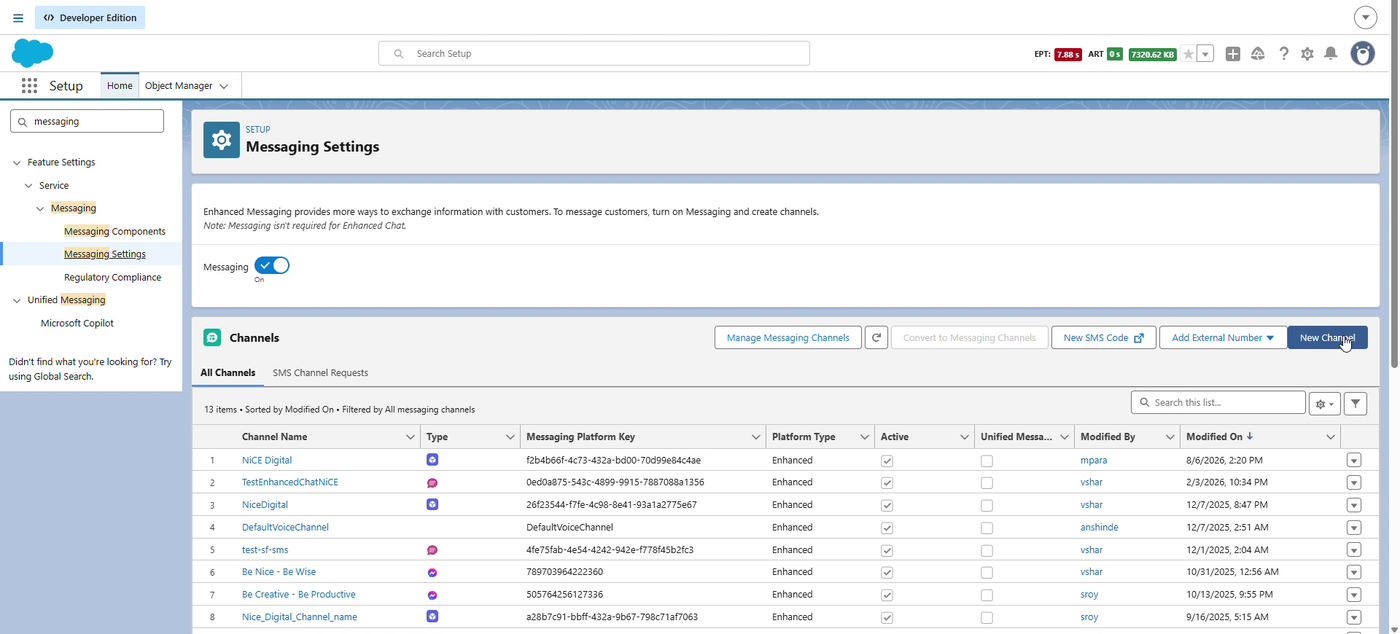
In Setup, enter Messaging Settings in the Quick Find box, then select Messaging Settings under Feature Settings > Service > Messaging.
-
Confirm the Messaging toggle is turned on.
-
Under Channels, click New Channel.
-
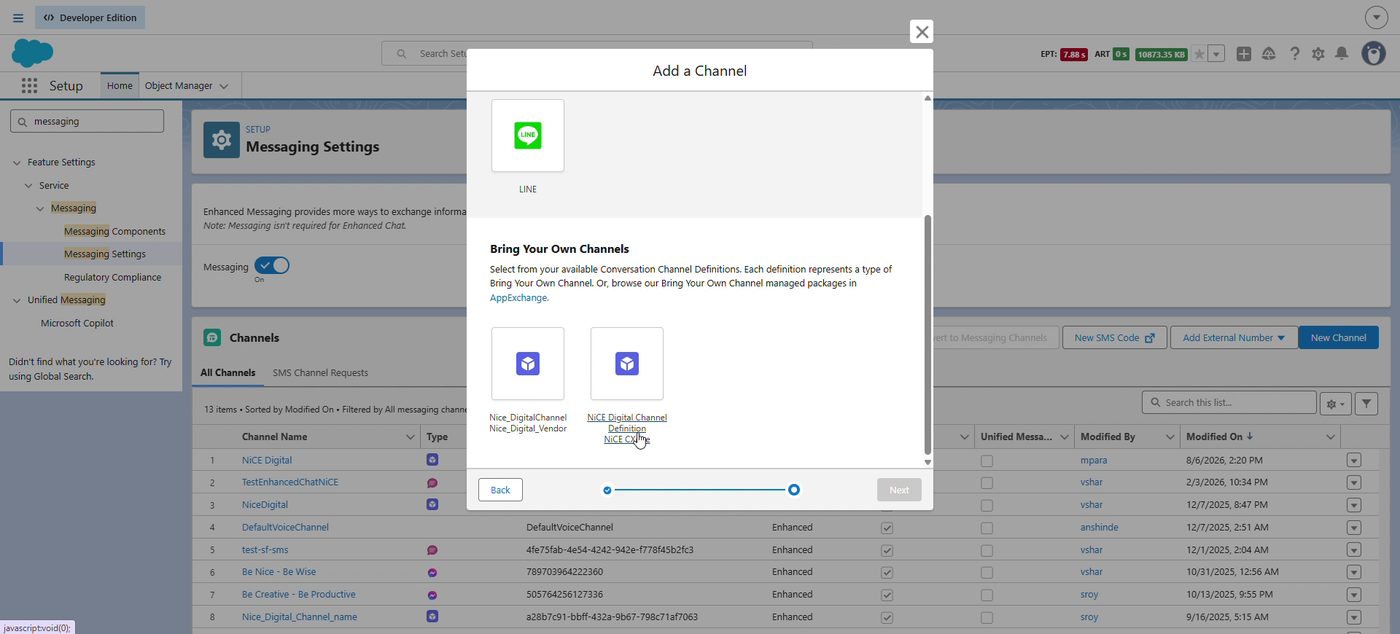
In the Add a Channel window, under Bring Your Own Channels, select NiCE Digital Channel Definition, then click Next.
-
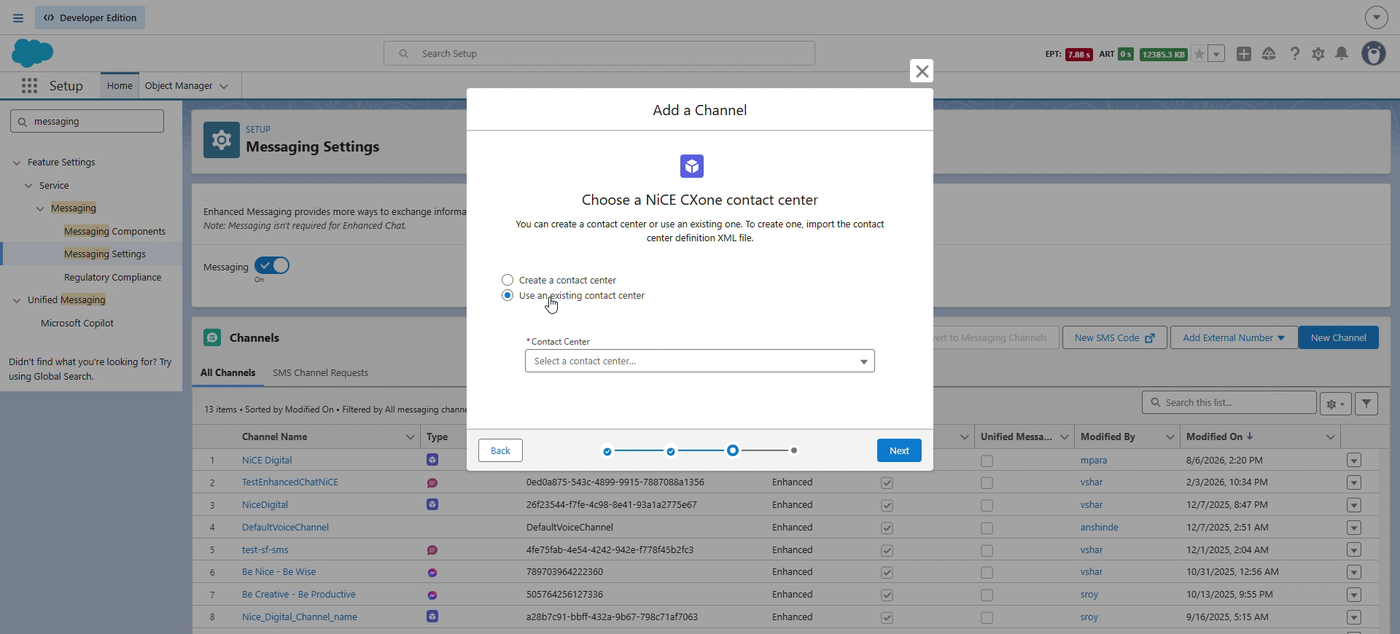
Select Use an existing contact center, choose your NiCE CXone contact center from the Contact Center dropdown, then click Next.
-
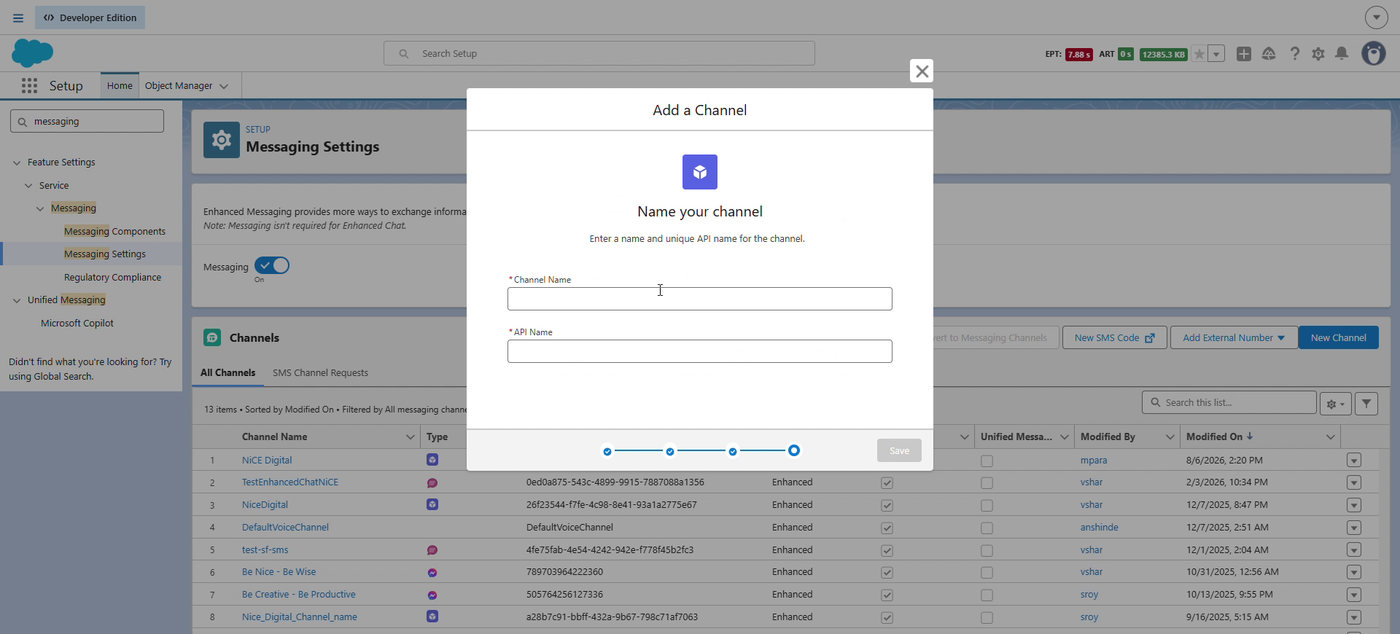
Enter a Channel Name and API Name for the channel, then click Save.
-
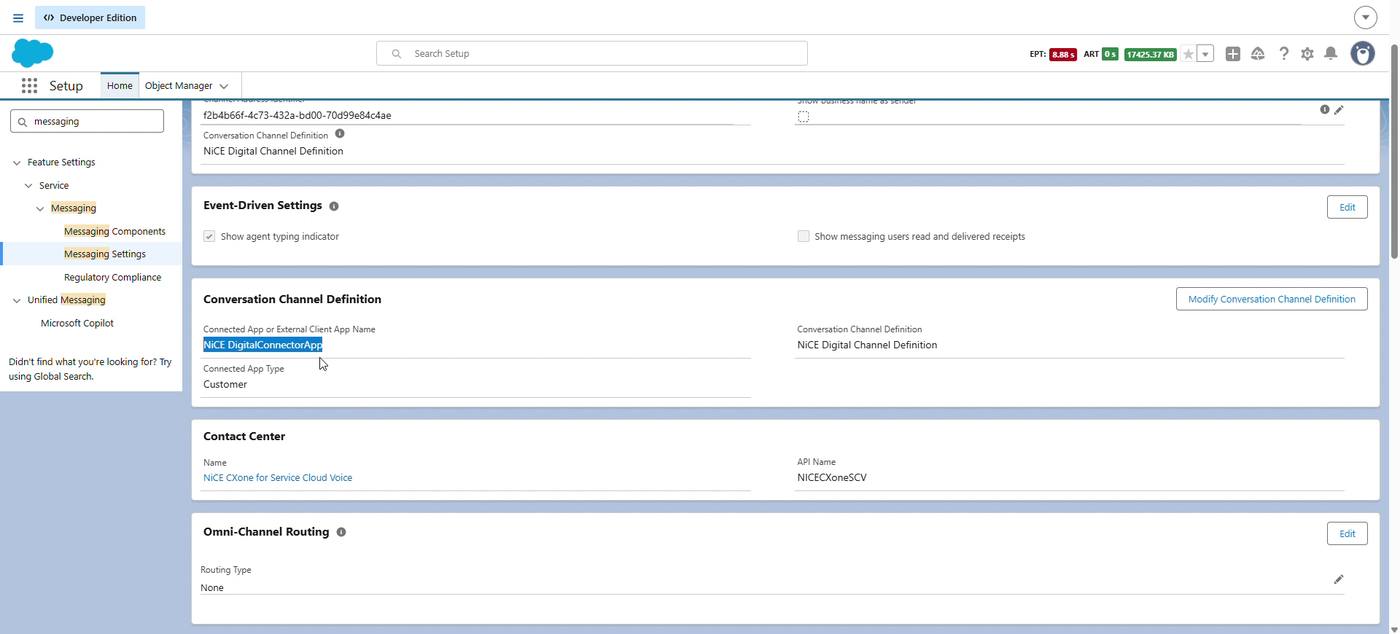
On the channel's detail page, confirm the Conversation Channel Definition section lists NiCE DigitalConnectorApp as the connected app and your NiCE CXone contact center under Contact Center.
Confirm agent permission assignments
Agents need the right permission set and permission set license to work the new channel.
-
In Setup, enter Users in the Quick Find box, then select Users.
-
Select the agent's user record.
-
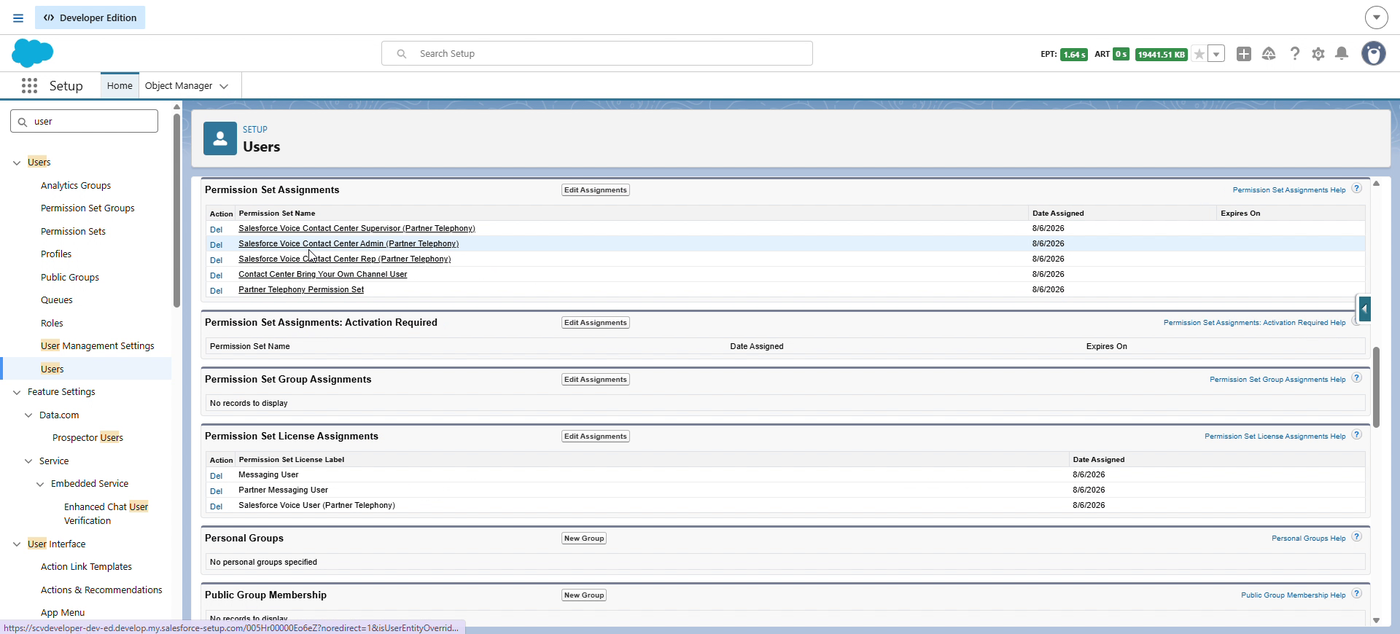
Under Permission Set Assignments, confirm the user has Contact Center Bring Your Own Channel User and the Salesforce Voice contact center permission set that matches their role.
-
If Contact Center Bring Your Own Channel User (or the matching Salesforce Voice contact center permission set) isn't already listed under Enabled Permission Sets, add it:
-
Click Edit Assignments next to Permission Set Assignments.
-
In Available Permission Sets, select Contact Center Bring Your Own Channel User, then click Add to move it into Enabled Permission Sets.
-
Click Save.
-
-
Under Permission Set License Assignments, confirm the user has the Messaging User license. If it isn't already selected, add it:
-
Click Edit Assignments next to Permission Set License Assignments.
-
Select the checkbox next to Messaging User.
-
Click Save.
-