Call Transcript Configuration(ServiceNow)
This section describes how to configure the Call Transcript feature in the ServiceNow Agent Workspace integrated with NICE CXone (OpenFrame). After you complete these steps, voice conversations are transcribed and displayed to agents during and after calls.
Before You Begin
Verify that you have the following access before you start the configuration:
-
Administrative access to the Tenant Management (TM) portal
-
Administrative access to the CXone Mpower portal
-
Access to CXone Studio for script creation
Enable the Call Transcript License in Tenant Management
Enable the Continuous Stream Transcription license for your tenant so the system can generate real-time call transcripts. To enable the license:
-
Sign in to the Tenant Management Portal (CXone Mpower).
-
Go to TM > Tenants.
-
In the search box, find and select your tenant.
-
Select the Applications & Features tab.
-
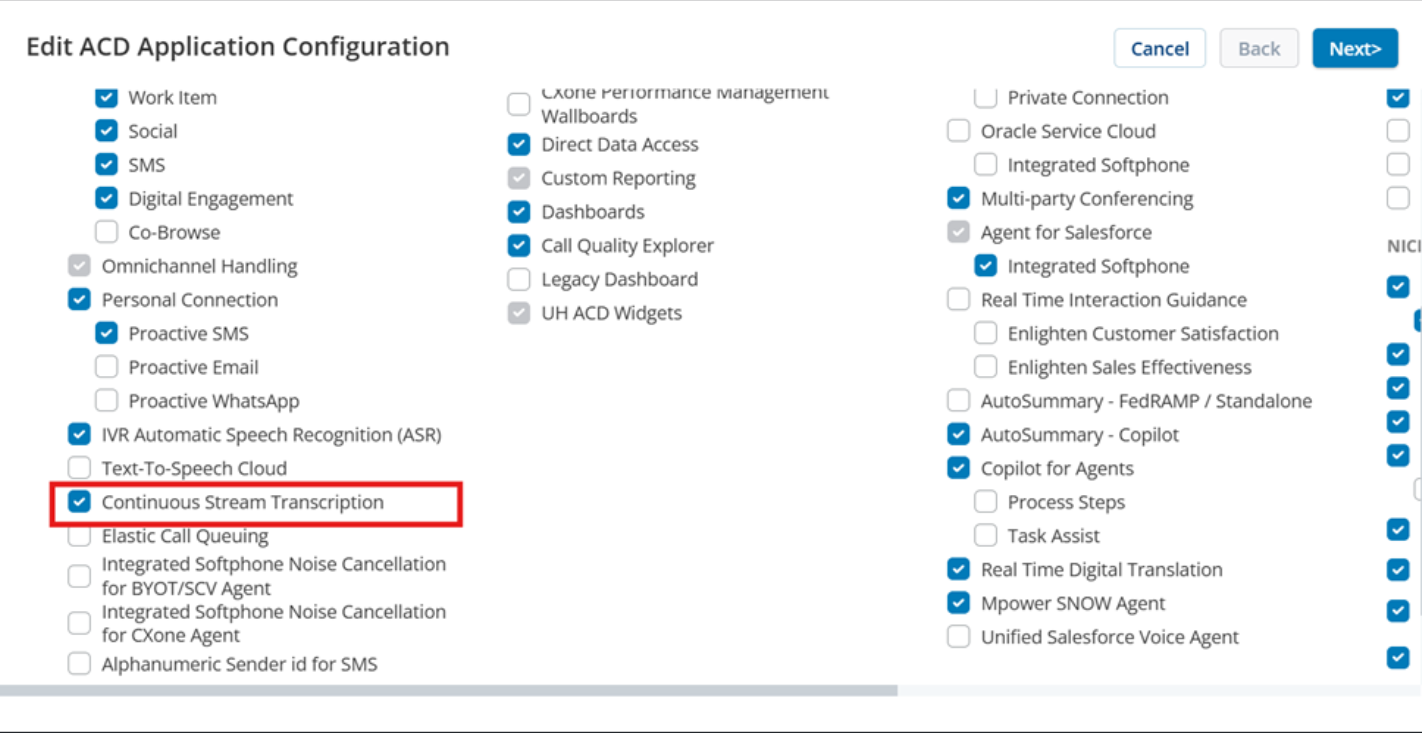
Locate ACD (Automatic Call Distribution), and then select the Configure icon.
-
In the ACD Configuration screen, select the Continuous Stream Transcription checkbox.
-
Select Next, and then select Save.
 View image
 config icon.png)
Enable Voice Transcript Permission for Roles
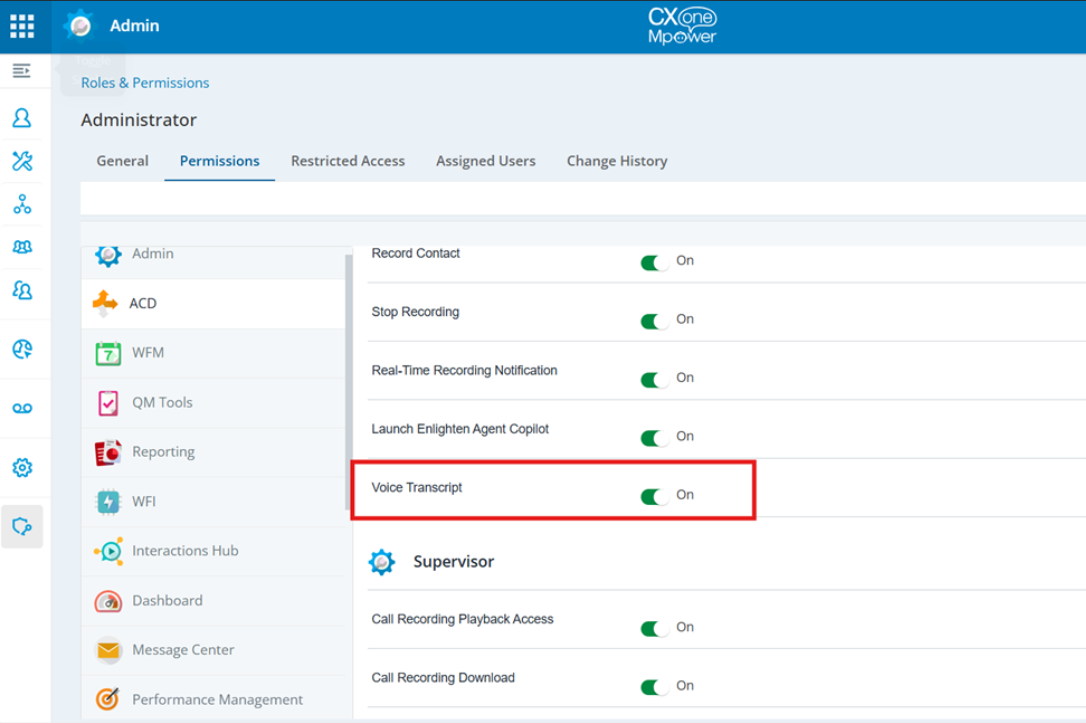
Grant the Voice Transcript permission to the appropriate roles so that agents can view call transcripts in ServiceNow. To enable the permission:
-
Sign in to the CXone Mpower portal using a user account from the required Business Unit (BU).
-
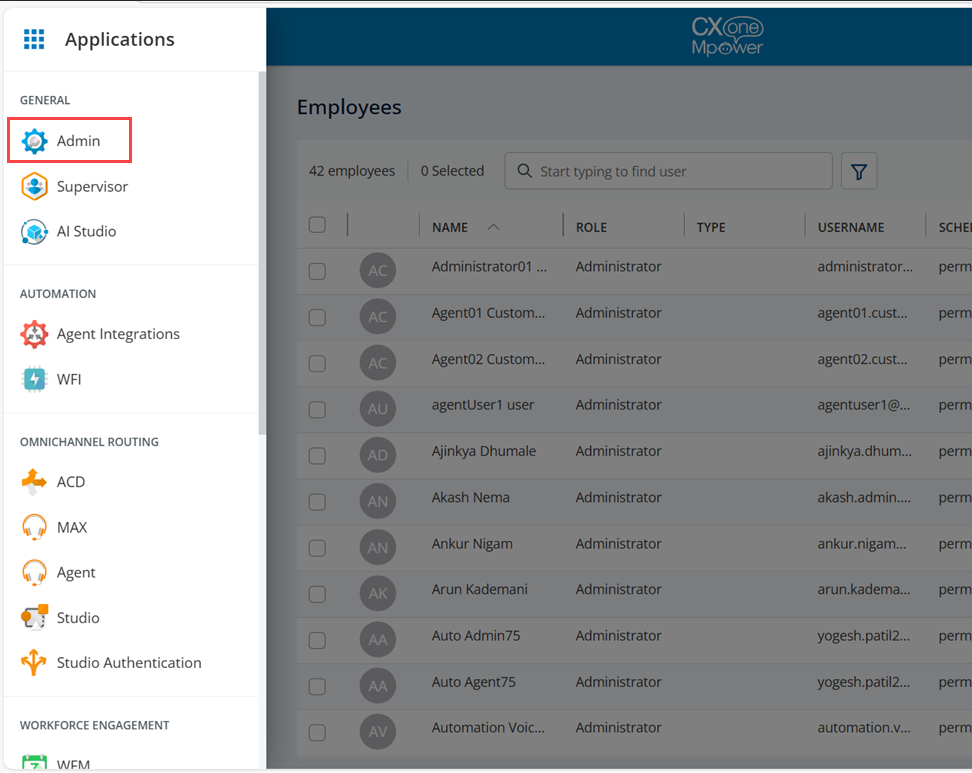
Go to Applications > Admin.
-
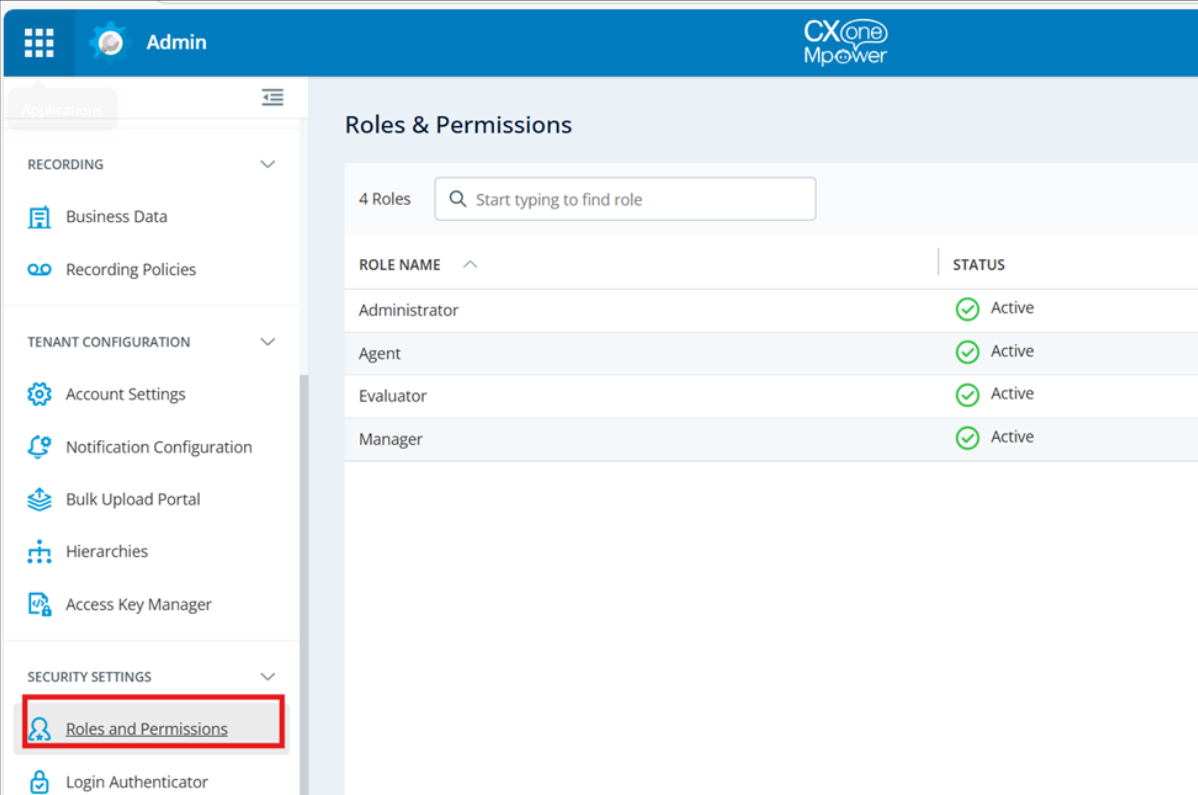
Select Roles and Permissions.
-
Select the role assigned to the target user (for example, Agent or Administrator).
-
Select the Permissions tab.
-
Expand the ACD section.
-
Select the Voice Transcript checkbox.
-
Save the changes.
Set Up a Transcription Profile (Connections Hub)
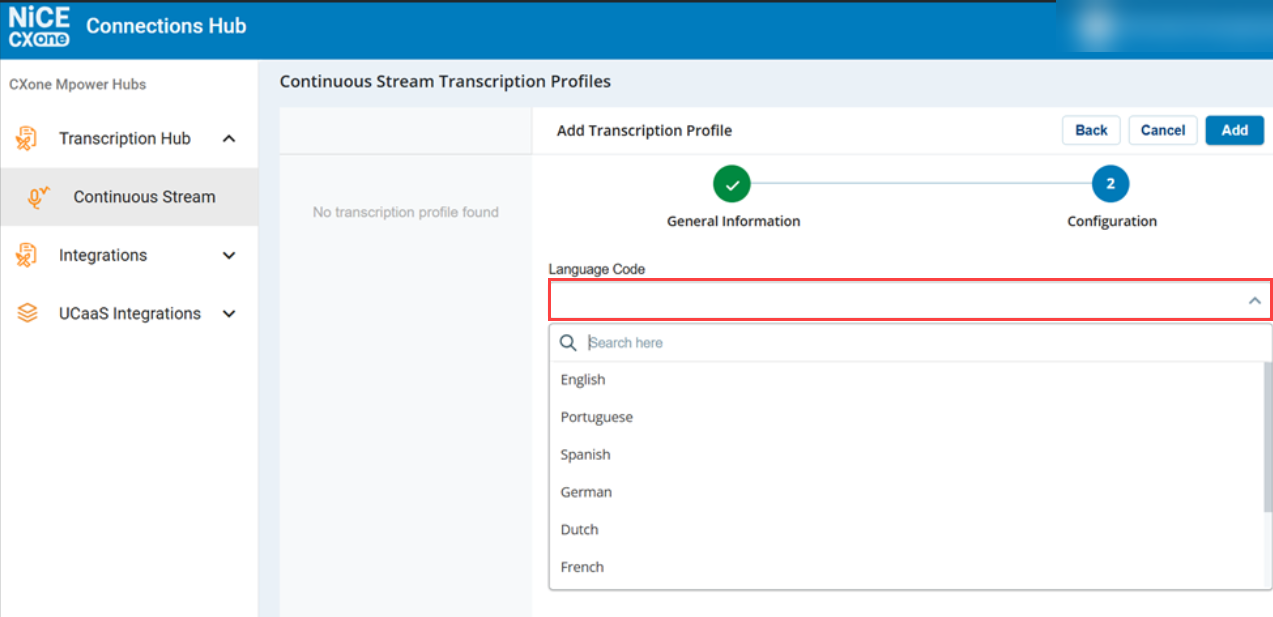
Create a Continuous Stream Transcription Profile in CXone to enable real-time call transcription. To create a transcription profile:
-
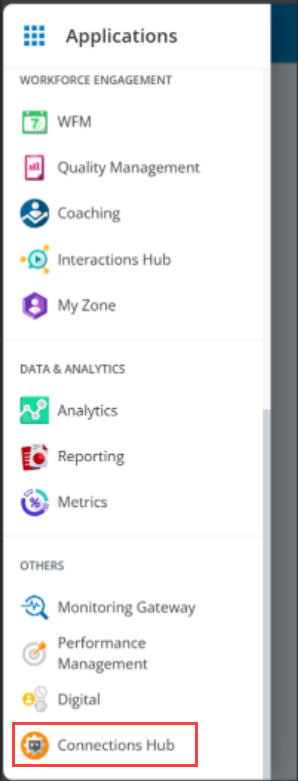
Sign in to CXone UserHub.
-
Go to Applications > Connections Hub.
-
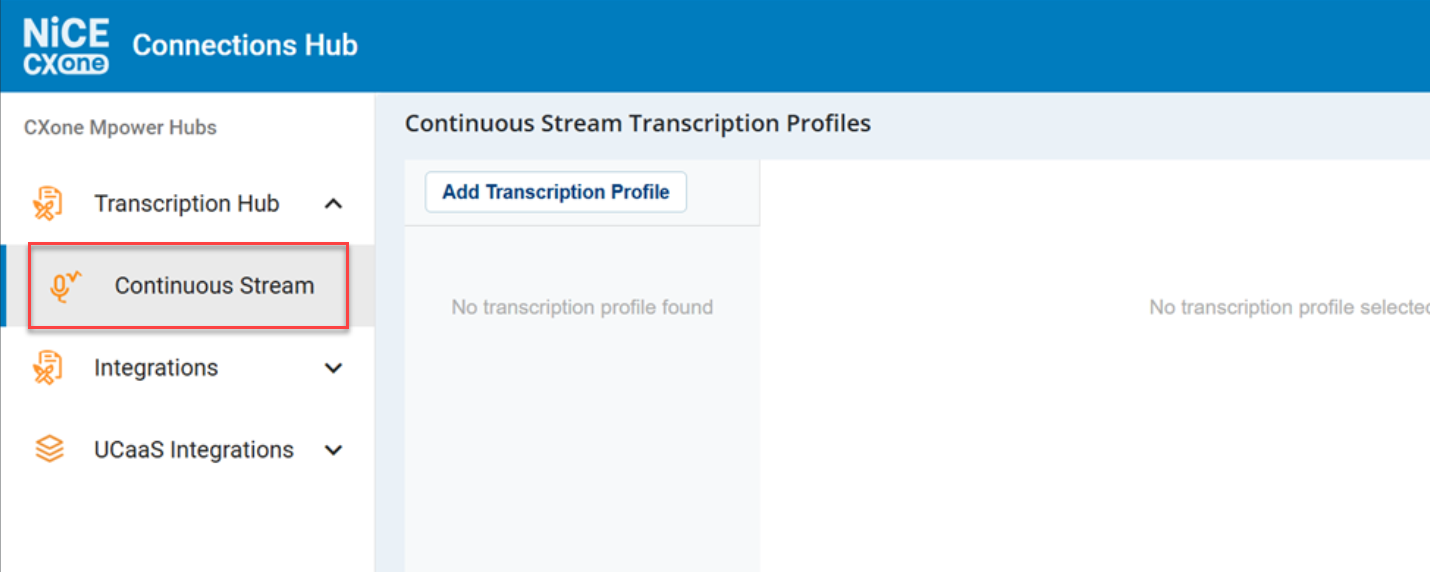
In Connections Hub, go to Transcription Hub > Continuous Stream.
-
Select Add Transcription Profile.
-
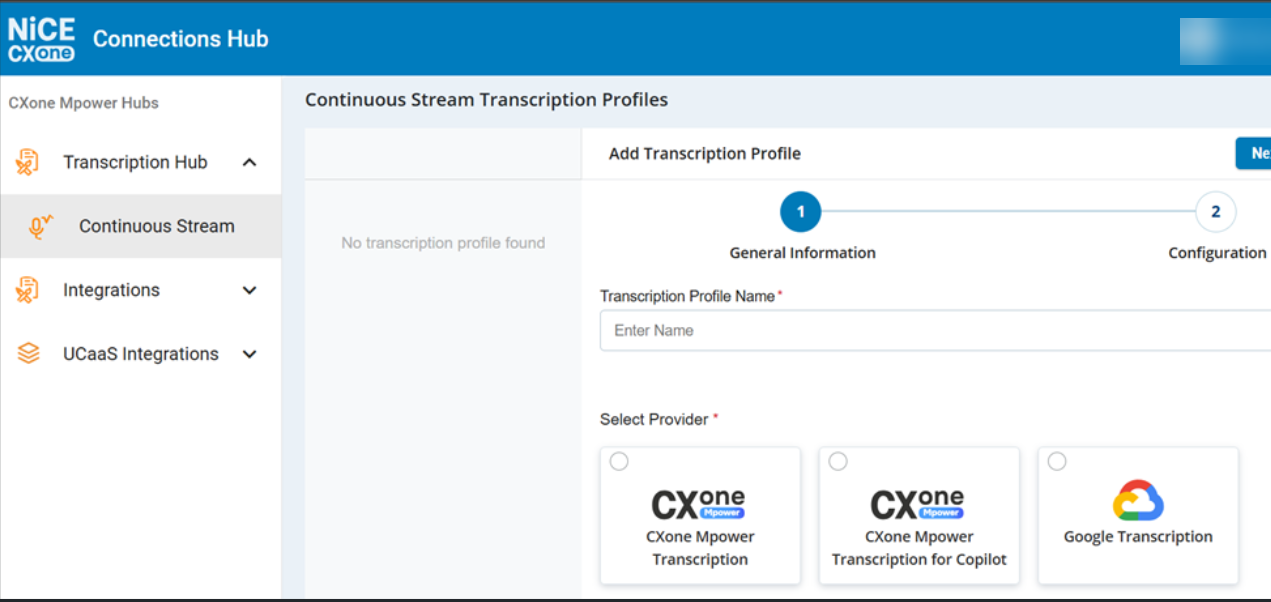
In the General Information section:
-
Enter a Transcription Profile Name (for example, SNOW_Transcript_Profile).
-
Select a Provider.
-
-
In the Configuration section:
-
Select a Language Code for transcription.
-
-
Select Add to save the profile.
Create a Studio Script for Call Transcription
Download the Studio script used in this step: TranscriptScript.XML. The full script is included in Appendix A of this guide, and the file is delivered alongside this document.
Configure a Studio script to activate call transcription during inbound calls. To configure the Continuous Transcription component:
-
Open the call transcript script TranscriptScript.XML in CXone Studio .
-
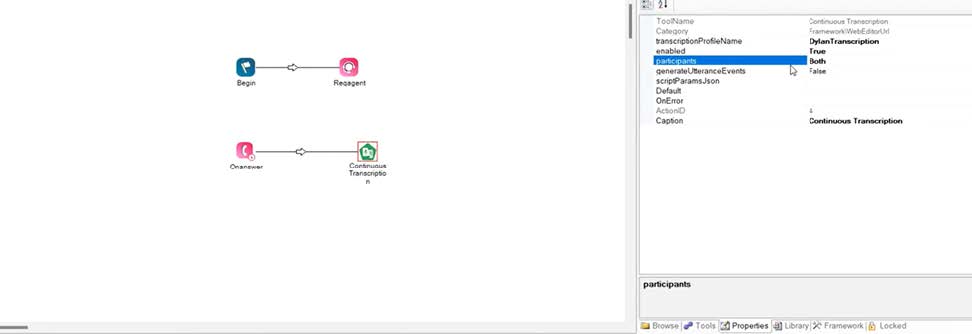
Select the Continuous Transcription component on the canvas.
-
In the Properties panel, configure the following settings:
Property Value Description TranscriptionProfileName Select the profile you created (for example, SNOW_Transcript_Profile) Links the script to the transcription profile. Enabled
True
Activates transcription for the call. Participants Both Captures both agent and customer conversation. generateUtteranceEvents False Disables individual utterance events. -
Select Save.
To configure the Reqagent action
-
In Studio, open the IB Transcript Script.
-
Select the Reqagent action.
-
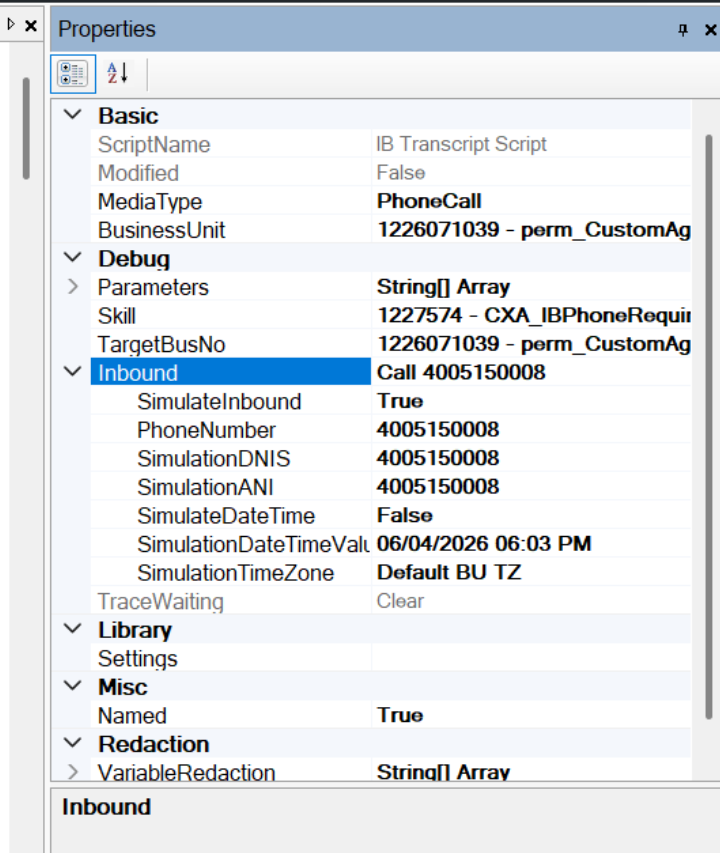
In the Properties panel, configure the following values:
Field Value Skill Enter the required skill ID TargetBusNo
Enter the target Business Unit number
SimulateInbound True PhoneNumber Enter the inbound phone number -
Under Inbound, update the following fields:
-
PhoneNumber — Enter the inbound phone number.
-
SimulateInbound — Set to True.
-
-
Select Save to save the script.
To verify the configuration
-
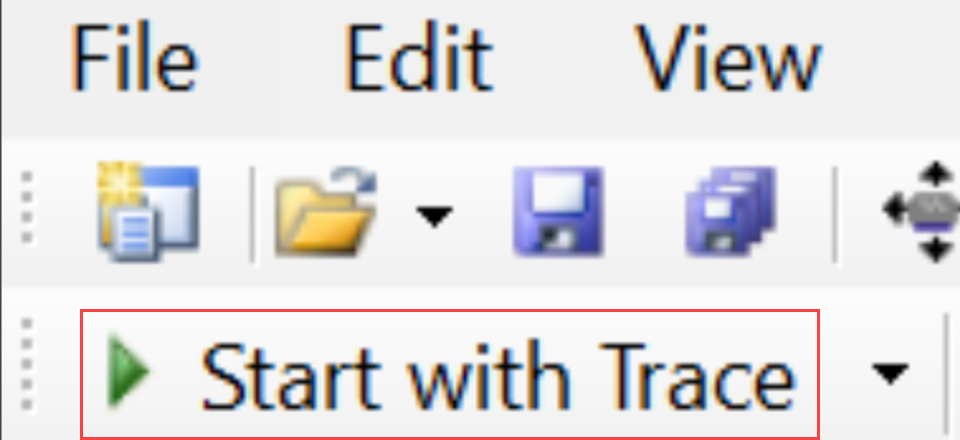
In Studio, select Start with Trace to initiate a test call.
-
Confirm that the call transcript appears in the ServiceNow Agent Workspace during the call.
If the transcript does not appear, verify that the transcription license is active, the role permission is enabled, and the transcription profile name in the script matches the profile you created.ssssss