

Configure CCaaS Admin Console
This section provides step-by-step instructions to configure the CCaaS Admin Console in ServiceNow for integrating NiCE as an external provider and importing queues successfully.
Prerequisites
-
You must have admin or appropriate configuration permissions in ServiceNow.
-
The Contact Center Integration Core application must be installed and accessible.
Set the Application Scope
-
From the ServiceNow header, click on the globe icon (Application Picker).
-
Set the Current Scope to Contact Center Integration Core.
Register NiCE as a Provider and Create the Integration Request Definition require this scope. If you change the scope inadvertently, repeat this step before continuing.
 View image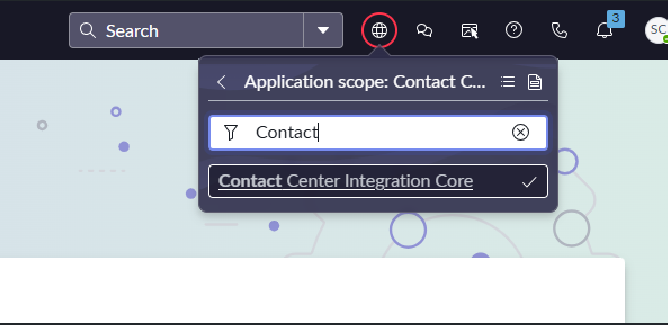
Register NiCE as a Provider
-
Navigate to All›Request Type (use the filter navigator search).
-
Click Sync configurations from external system.
-
Open the Integration request inputs tab.
-
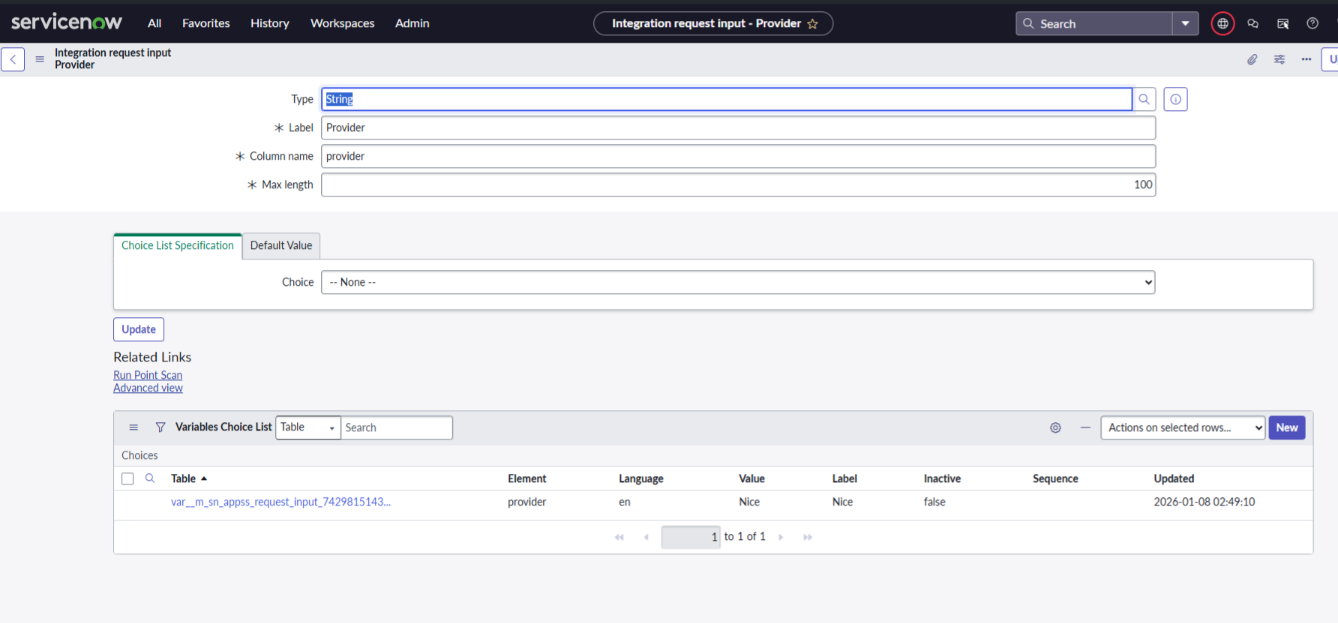
Click the link where Column name = Provider.
-
On the Integration request input – Provider page, under Variables Choice List, click New.
-
Enter the following values:
Field Value Label Nice Value
Nice
-
Click Update to save.
Create the Integration Request Definition
-
Navigate to All›Request Type.
-
Click Sync configurations from external system.
-
Open the Integration request definitions tab.
-
Click New.
-
Enter the following values:
Field Value Name Nice Queues Import Request Adapter
Import Queues from NiCE
-
Open the Condition tab and add the following condition:
-
Provider is Nice AND
-
Configuration is Queues
-
-
Click Update to save the record.

Import Queues from NiCE in Admin Console
-
Change the Application Scope to Global (use the globe icon).
-
Navigate to All›Contact Center Admin Console.
-
Open the Admin Console.
-
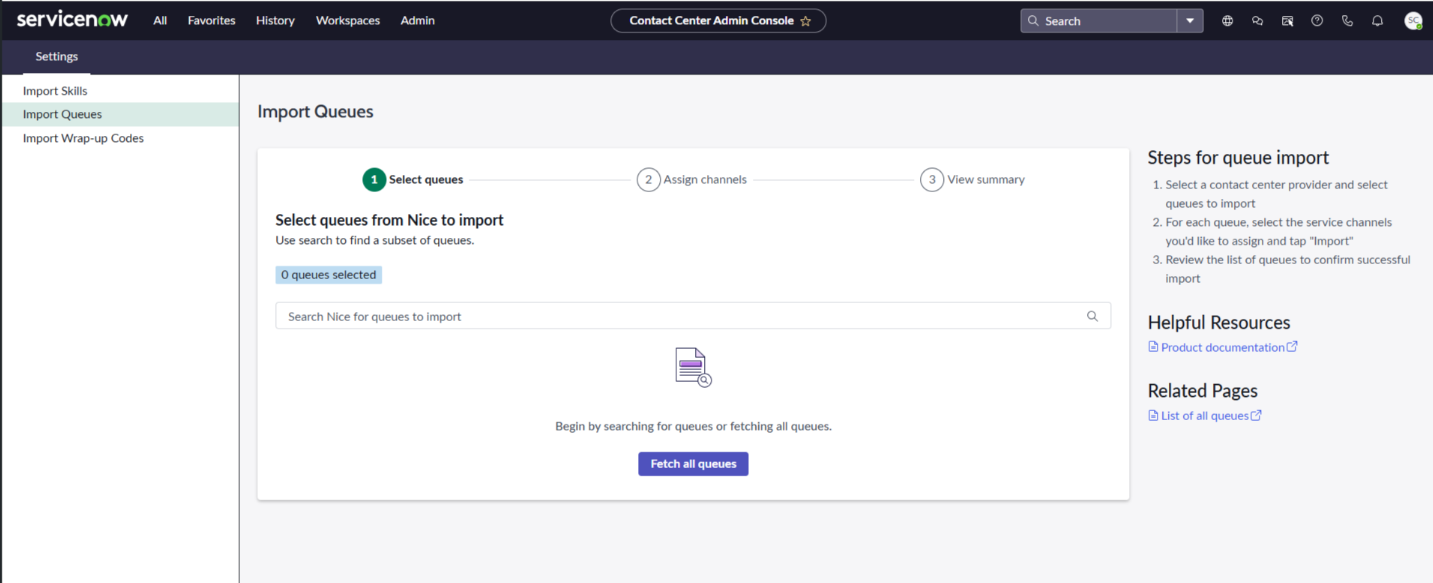
Select the Import Queues tab.
-
Perform one of the following:
-
Search for a specific queue by name, or
-
Select Fetch all queues to retrieve all available queues from NiCE CXone.
-
-
-
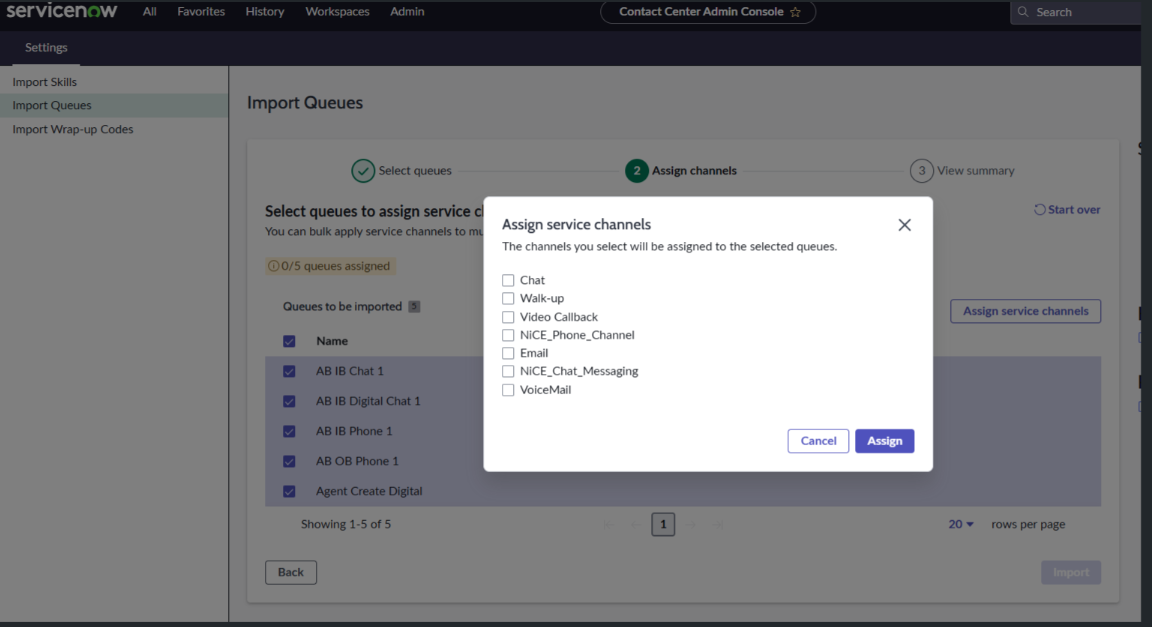
Follow the on-screen instructions to complete the import.
Channel Selection During Import: When assigning a channel to a queue, select the correct channel based on queue type:
Queue Type Channel to Select Voice Queue NiCE_Phone_channel NiCE Digital Queue
NiCE_Chat_Messaging
ServiceNow Digital Queue Chat
Post-Import Queue Activation & Channel Configuration
Once the NICE Skills are successfully imported as ServiceNow Queues, complete the following steps to make the queues functional:
Queue Activation
-
In ServiceNow, navigate to All > Advanced Work Assignment > Queues (or search for Queues in the filter navigator).
-
Open the imported queue record from the list.
-
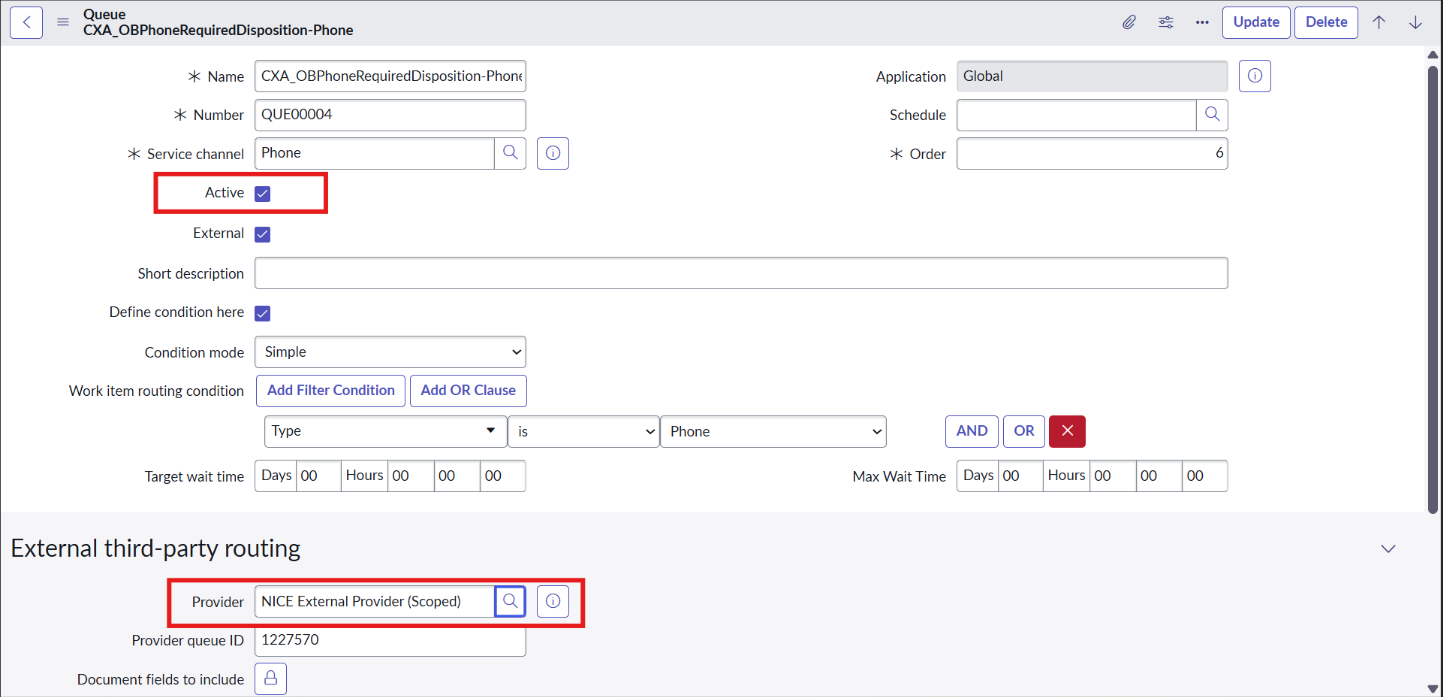
Select the Active check box to enable the queue.
Only active queues participate in routing.
-
Set Condition mode to Simple.
-
In the Work item routing condition section, define the condition based on the queue interaction type (for example, Type is Phone for voice):
Queue Type Work Item Routing Condition Assigned Service Channel Voice Queue Type is Phone NiCE_Phone_channel ServiceNow Digital Chat Queue
Type is Chat Chat
ServiceNow Digital Channels (Messaging) Type is Messaging NiCE_Chat_Messaging
Update Provider and Subflow (ServiceNow Digital Chat Queues Only)
Complete this procedure only for ServiceNow Digital Chat queues. Keep the Provider field empty for Voice and standard digital messaging queues.
-
In the External third-party routing section, select NiCE External Provider (Scoped) in the Provider field.
-
Select the information icon next to Provider and select Open Record.
-
In the Subflow field, select NiCE Subflow for External Routing, and select Update.
Channel Setup & Configuration (Post Queue Activation)
After activating queues, configure the corresponding Service Channels to prevent queue mismatch errors and ensure correct capacity management.
Navigation: All > Customer Service > Administration > Service Channels
Open the relevant channel record (such as Chat, NiCE_Phone_Channel, or NiCE_Chat_Messaging) and apply the following settings:
-
Enable Advanced Condition: Ensure that the Advanced Condition check box is selected (enabled).
-
Set Channel-Specific Condition: Configure the condition and type field to align exactly with the interaction type:
Service Channel Advanced Condition Condition Type Field ServiceNow Chat Channel Enabled Type is Chat Chat Phone Channel
Enabled Type is Phone Phone NiCE Digital Messaging Channel Enabled Type is Messaging Messaging -
Set Capacity Utilization Condition: For all service channel types, add the following Capacity Utilization condition: State is not one of Closed Complete, Closed Abandoned.
-
Select Update to save the service channel configuration.
If the service channel condition is missing, unselected, or mismatched with the queue condition, ServiceNow AWA fails with the following runtime error:
External queue with id <queue id> not found
Ensure that every active queue has a corresponding service channel whose Advanced Condition and Type field match verbatim.
Best Practices
-
Maintain 1:1 Alignment: Always ensure the Condition and Type fields match the intended interaction channel.
-
Do Not Disable Advanced Condition: Avoid leaving the Advanced Condition check box cleared.
-
Single Type per Channel: Do not mix multiple interaction types within a single Service Channel record.
-
Avoid Duplicate Active Conditions: Ensure two active channels of the same type do not share identical routing conditions simultaneously (e.g., do not configure two active Phone channels with Type is Phone).