

ServiceNow – NICE CXone Connector Creation & Configuration
Prerequisites
Before you create connectors in any Business Unit (BU), note that CXone supports creating multiple ServiceNow integration connectors within the same Business Unit to enable multi-org support:
| Feature | Required Setting |
|---|---|
| Connections Hub | Enabled |
|
CXone Studio > Connect Auth |
Enabled |
| CXone Studio > Connect Request | Enabled |
Contact your Tenant Manager or Product Team to confirm these features are active for the target Business Unit.
 View image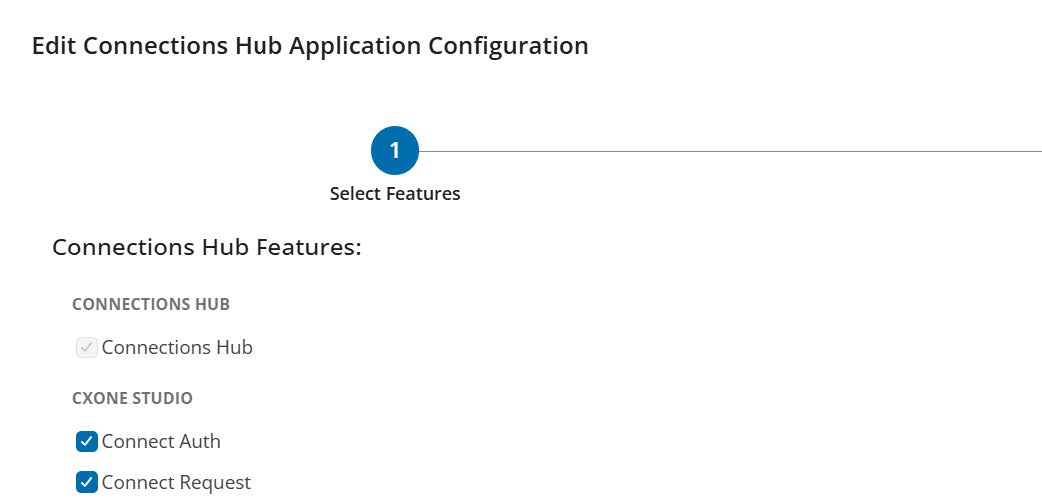
NiCE ServiceNow Integration Connector
Create a Connection Template
-
Log in to CXone UserHub with valid credentials.
-
Navigate to Connections Hub.
-
In the left navigation menu, go to Integrations > Integration Hub.
-
Under My Connections, select + Add Template.
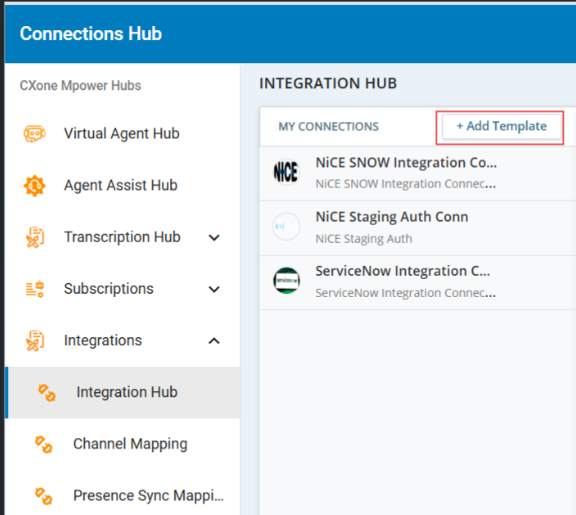
Configure Template Details
Complete the following fields:
| Field | Value |
|---|---|
| Name | NiCE ServiceNow Integration Connection |
|
Application |
NICE CXone App |
| Integration Method | REST |
| Authentication Type | OAuth 2.0 |
| Description | (Optional) Enter a meaningful description |
| Attach Icon | Upload an appropriate icon (mandatory) |
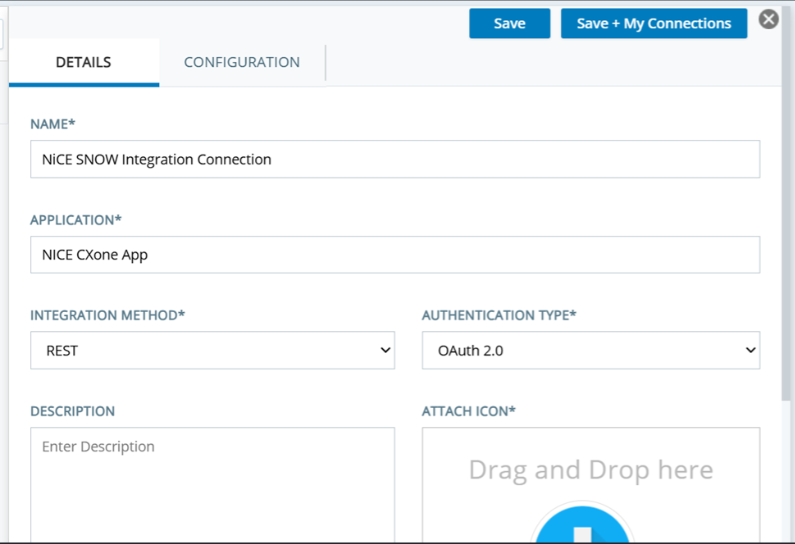
After completing all fields, select Save + My Connections.
Create the Connector
-
After saving the template, the Create Connection dialog appears.
-
In the Connector Name field, enter: NiCE ServiceNow Integration Connection.
-
Select Save.
Configure Authentication
Under the newly created connector, navigate to the Authentication tab and configure as follows:
-
In the URL field, enter the OAuth token endpoint for your environment:
https://cxone.{env}.niceincontact.com/auth/token
-
Set Method to: POST
Form Parameters
Set Media Type to FormURLEncoded, and add the following parameters:
Parameter Name Parameter Value grant_type password username
<CXone Username Access Key>
password [[password]] client_id <Client ID> client_secret [[client_secret]]
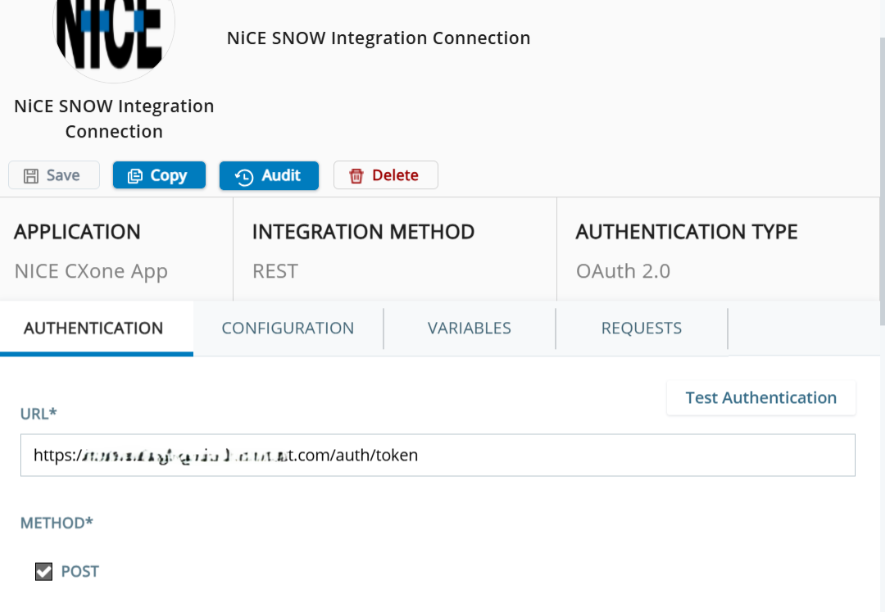
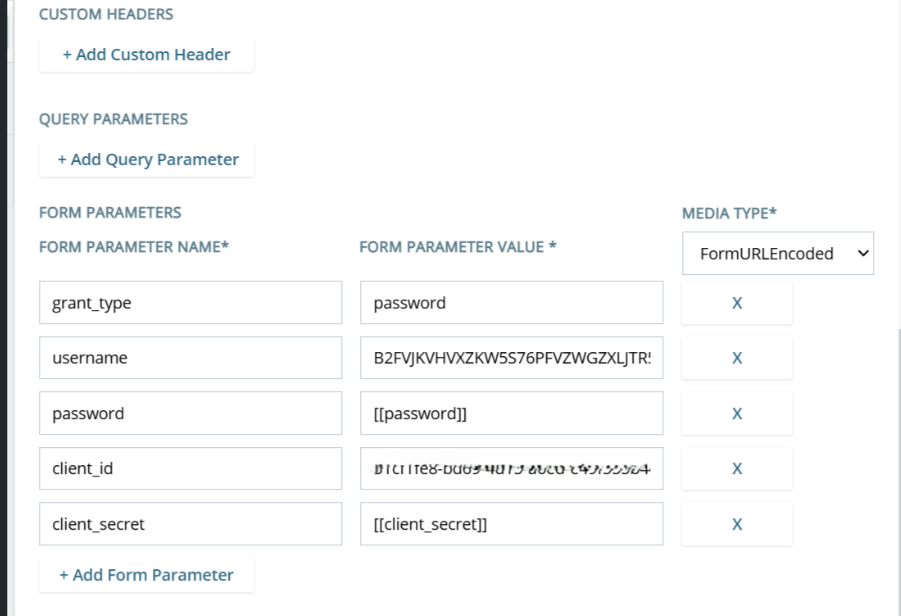
For Client ID and Client Secret values, contact the Release Management (RM) or Product Team.
Configure Variables
-
Select the Variables tab.
-
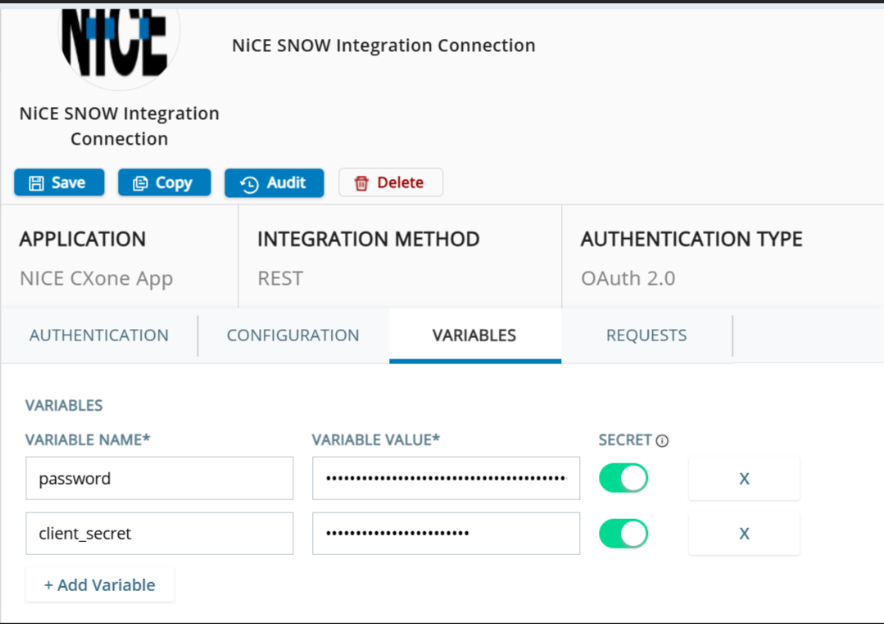
Select + Add Variable and add the following:
Variable Name Variable Value Secret password <CXone User Secret Key> Enabled client_secret
<Cluster Secret>
Enabled -
Ensure the Secret toggle is turned ON for both variables to mask sensitive values.
-
Select Save.
Validate Authentication
-
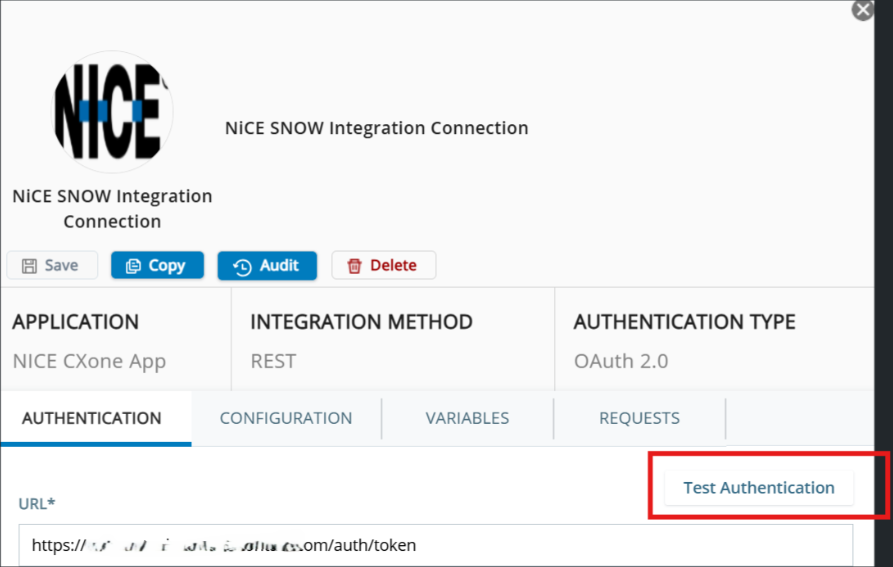
Navigate to the Authentication tab of the NiCE ServiceNow Integration Connection.
-
Select Test Authentication.
-
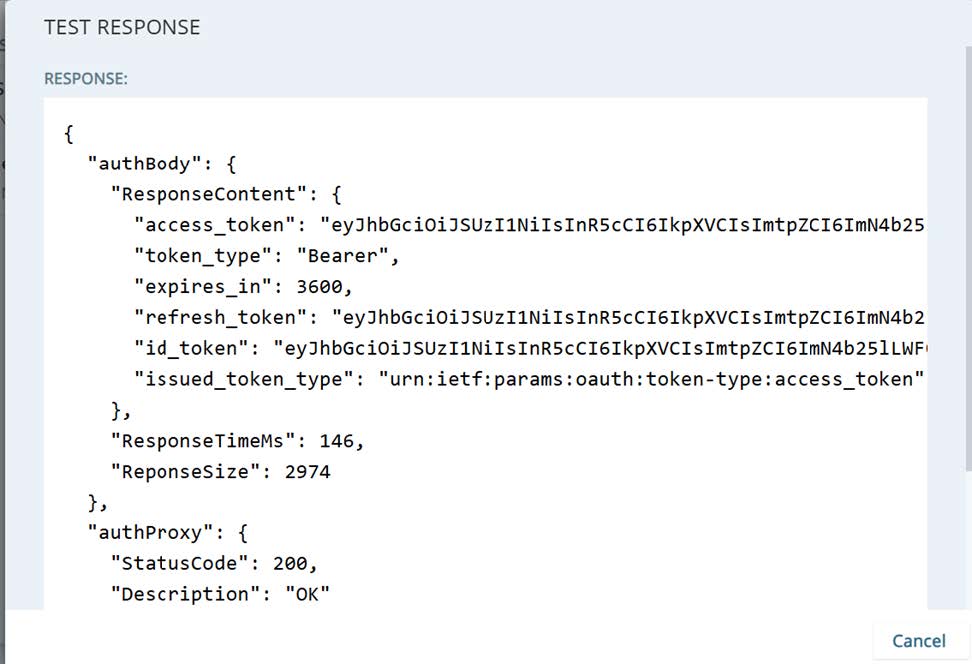
Wait for the response.
Expected result: The authentication test returns Status Code: 200 (OK). If it does not, verify the URL, form parameters, and variable values.
Retrieve Access Key and Secret Key (CXone Credentials)
The NiCE ServiceNow Integration connector uses an Access Key and Secret Key pair for authentication. Follow these steps to generate the credentials.
Enable Access Key Permissions
-
Log in to CXone UserHub with Admin credentials.
-
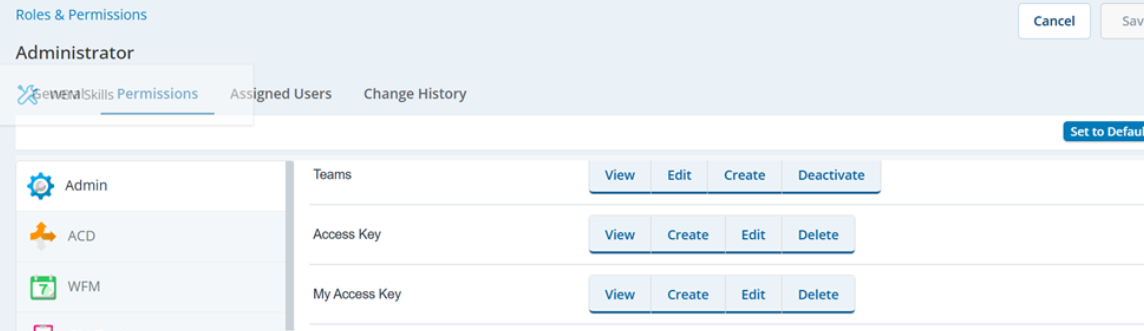
Navigate to Admin > Roles & Permissions.
-
Under the Permissions tab, locate the following sections:
-
Access Key
-
My Access Key
-
-
Enable the following permissions for both sections:
-
View
-
Create
-
Edit
-
Delete
-
-
Select Save.
Generate the Access Key
-
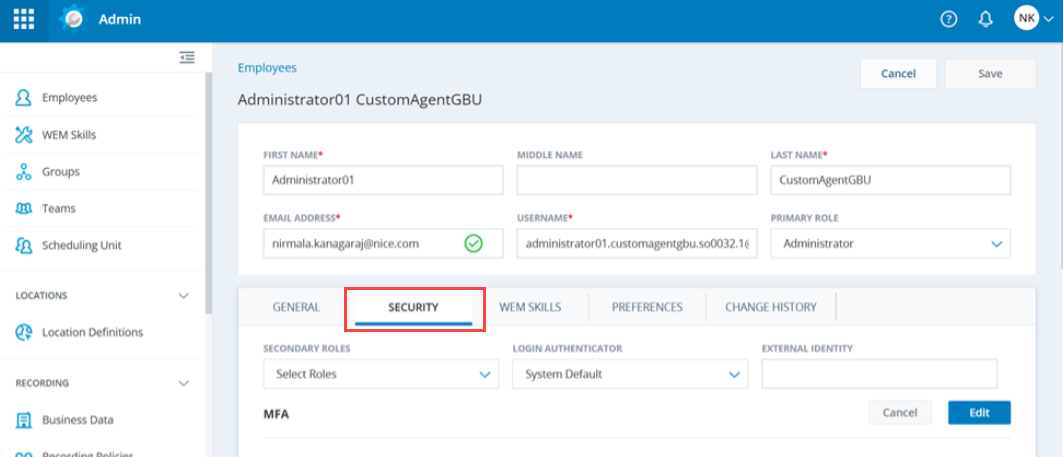
Navigate to Admin > Employees.
-
Open the required Admin User profile.
-
Go to the Security tab.
-
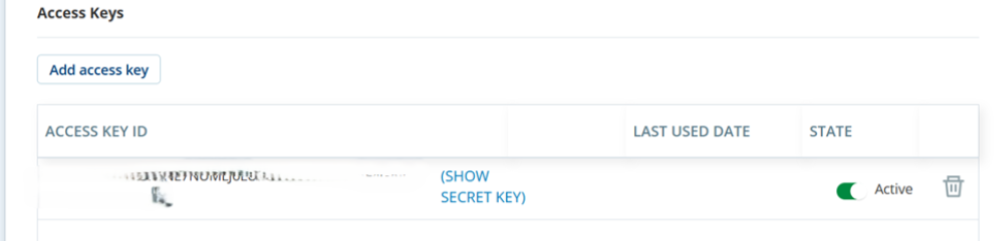
Select Add Access Key.
-
The system generates:
-
Access Key
-
Secret Key
-
Use Access Key and Secret Key in Integration
-
Copy the generated values and use them as follows:
-
Access Key → Username
-
Secret Key → Password
-
Security Notice:
-
The Secret Key is displayed only once at creation time. Copy and store it securely immediately.
-
Do not share the Access Key or Secret Key via email or store them in plain text.
-
Access Key–based credentials are required for secure authentication in integration connectors.
ServiceNow Integration Connector
This section describes how to create and configure the ServiceNow Integration Connection. For multi-org environments, create a separate connector for each ServiceNow instance, authenticating CXone against each respective ServiceNow instance using OAuth 2.0.
Create a Connection Template
-
Log in to CXone UserHub with valid credentials.
-
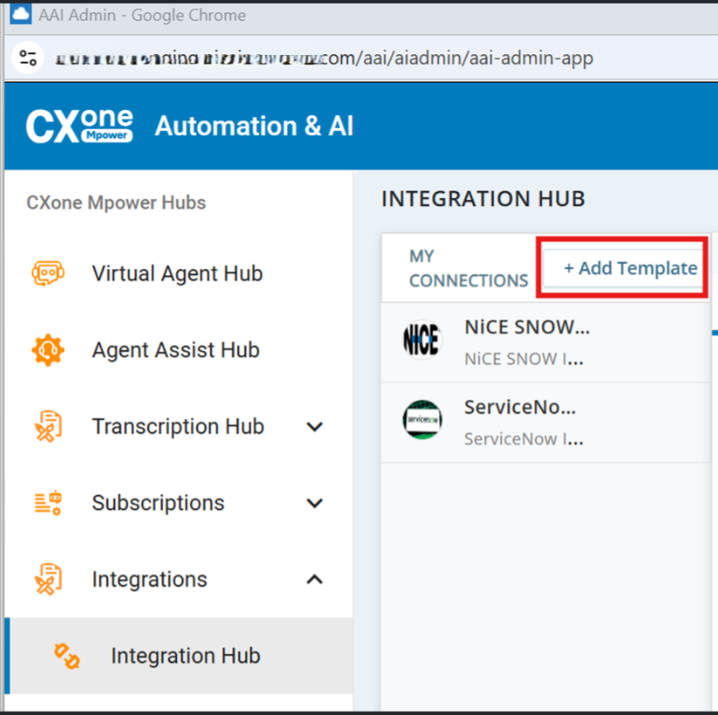
Navigate to Automation & AI.
-
In the left navigation menu, go to Integrations > Integration Hub.
-
Under My Connections, select + Add Template.
Configure Template Details
Complete the following fields:
| Field | Value |
|---|---|
| Name | ServiceNow Integration Connection |
|
Application |
ServiceNow Integration App |
| Integration Method | REST |
| Authentication Type | OAuth 2.0 |
| Description | (Optional) Add a description if required |
| Attach Icon | Upload Service Now Icon  |
After completing all fields, select Save + My Connections.
Create the Connector
-
After saving the template, the Create Connection dialog appears.
-
In the Connector Name field, enter a unique and descriptive connector name identifying the target ServiceNow instance (for example: ServiceNow Integration Connection - Dev, ServiceNow Integration Connection - Prod).
For Client ID and Client Secret values, contact the Release Management (RM) or Product Team.
-
Select Save.
Configure Authentication
Under the newly created connector, navigate to the Authentication tab and configure as follows:
-
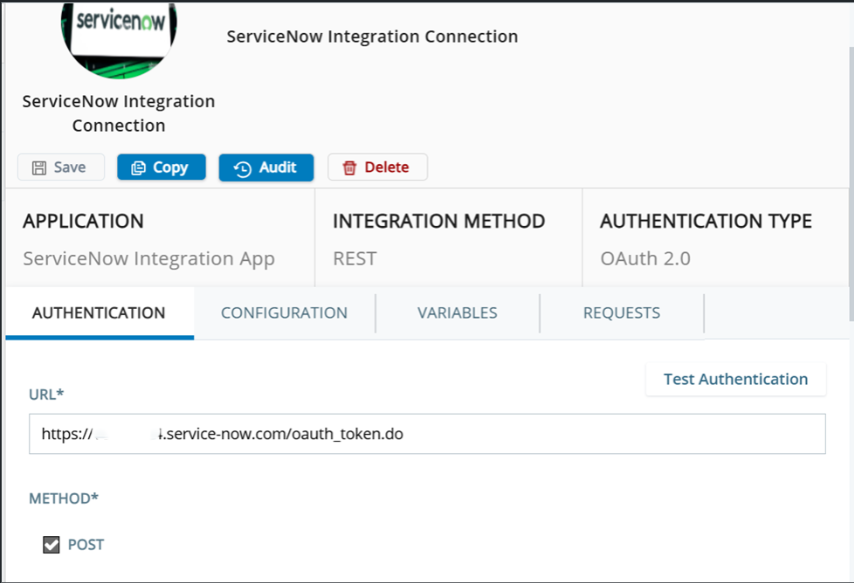
In the URL field, enter the ServiceNow OAuth token endpoint: https://<servicenow_instance>.service-now.com/oauth_token.do
Example (Staging): <ServiceNow Instance Url>/oauth_token.do
-
Set Method to: POST
Form Parameters
Set Media Type to FormURLEncoded, and add the following parameters:
Parameter Name Parameter Value grant_type password client_id
<ServiceNow Client ID>
client_secret [[client_secret]] username <ServiceNow Integration Username> password [[user_password]]
Configure Variables
-
Select the Variables tab.
-
Select + Add Variable and add the following:
Variable Name Variable Value Secret client_secret <ServiceNow OAuth Client Secret> Enabled user_password
<Integration User Password>
Enabled inboundId NiCE Disabled tenantUrl https://<servicenow_instance>.service-now.com Disabled -
Enable the Secret toggle for client_secret and user_password.
-
Keep the Secret toggle disabled for inboundId and tenantUrl.
-
Verify that variable names exactly match the placeholders referenced in the Authentication and Requests tabs.
-
Select Save.
Validate Authentication
-
Navigate to the Authentication tab of the ServiceNow Integration Connection.
-
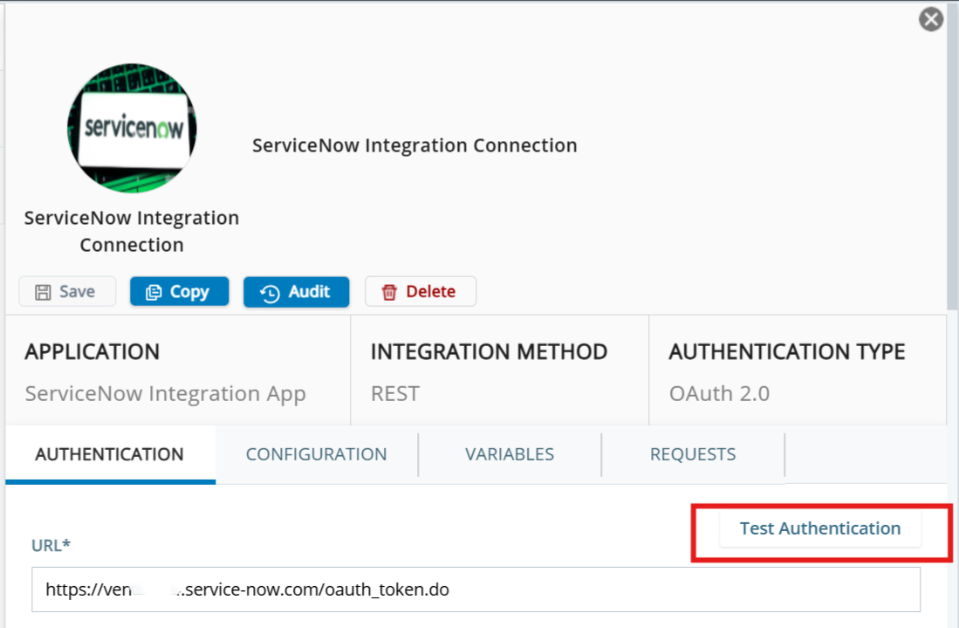
Select Test Authentication.
-
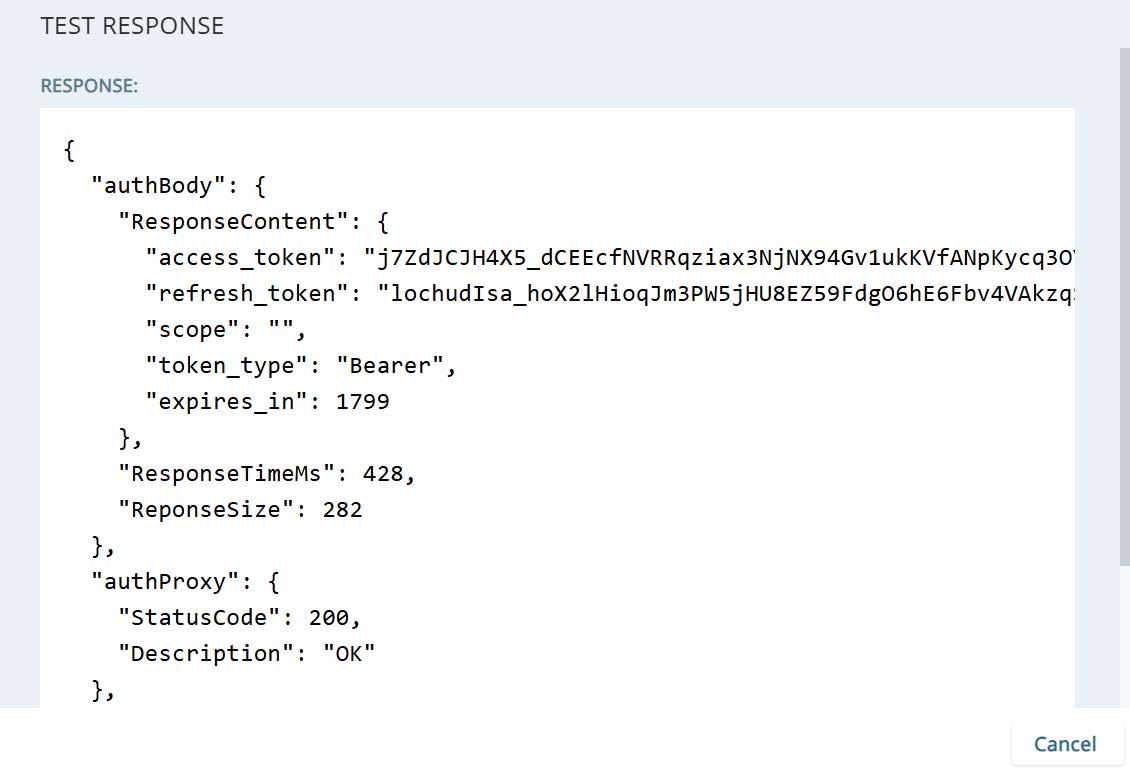
Wait for the response.
Expected result: The authentication test returns Status Code: 200 (OK). If it does not, verify the URL, form parameters, and variable values.
Retrieve Client ID and Client Secret (ServiceNow Credentials)
The ServiceNow Integration connector requires a Client ID and Client Secret from the ServiceNow Application Registry. Follow these steps to retrieve the credentials.
-
Log in to the ServiceNow instance with administrative credentials.
-
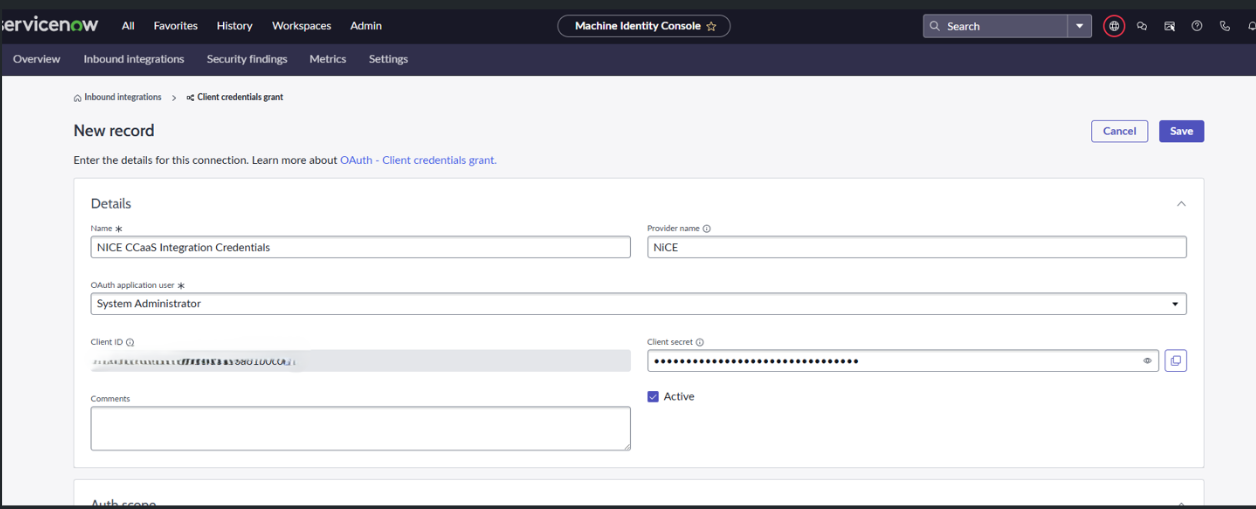
From the All menu, search for Inbound Integrations and open it.
-
Locate and select the application named: NICE CCaaS Integration Credentials.
-
In the record, note the following values::
-
Client ID
-
Client Secret
-
Security Notice:
-
Access to Application Registry requires appropriate admin roles in ServiceNow.
-
Do not share the Client ID or Client Secret via email or store them in plain text.