

Content on this page is for a product or feature in a public preview program. If you are not part of the preview and would like more information, contact your account representative.
Required permissions:
Prerequisites
Before you can set up Cognigy Agent Assist to work with NiCE CXone, you must have:
-
A Cognigy account.
-
A configured Cognigy Agent Assist application.
- One of the supported providers for NiCE CXone Continuous Stream Transcription. If you don't have a transcription profile set up yet, you can create one.
- Your agents using NiCE CXone Agent Workspace (Agent).
Create a Script
Use the following samples as a foundation to create the scripts to integrate your agent assist application into NiCE CXone. Inbound and outbound interactions require separate scripts. The following image shows the essential actions for an inbound script:
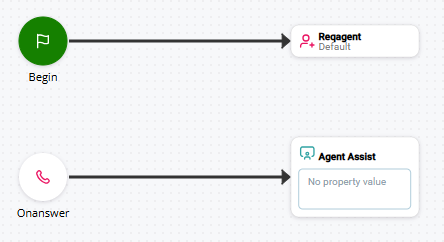
This image shows the essential actions for an outbound script:
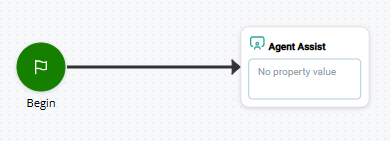
To complete the configuration of your script:
- Assign the Cognigy Agent Assist configuration app to the Agent Assist action.
- Add initialization snippets to the script using Snippet actions. You can do this to customize your agent assist application.
- Reconfigure the action connectors to ensure proper contact flow and correct any potential errors.
- Complete any additional scripting and test the script.
Add an App to Agent Assist Hub
You need to add a profile app for Cognigy Agent Assist to Agent Assist Hub. This allows you to connect Cognigy AI with NiCE CXone.
- Click the app selector
 and select Other > Connections Hub and then click Agent Assist Hub.
-
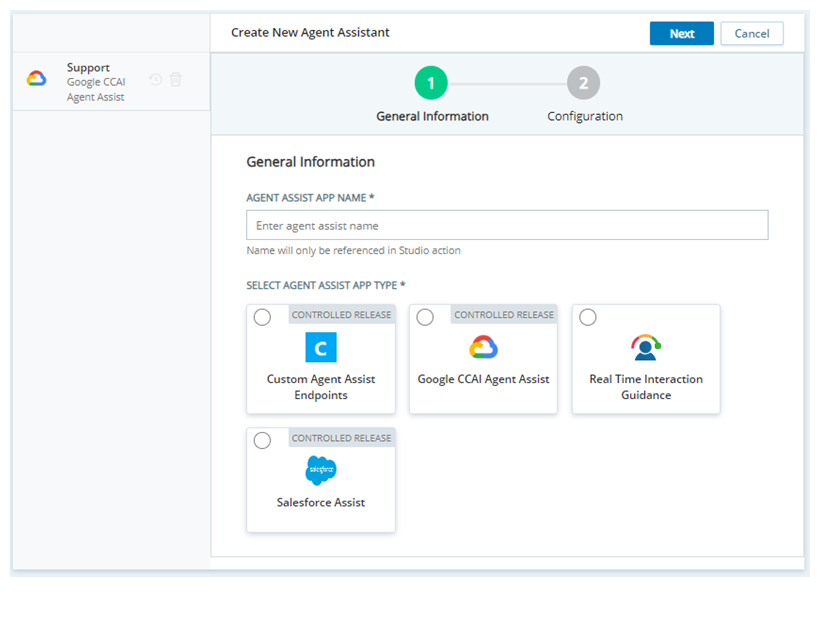
Click Add Agent Assist App.
-
Enter an Agent Assist App Name and click Cognigy Assist in the list of agent assist providers.
-
Click Next.
-
Complete the Configuration page using the information in the following table.
Cognigy AI provides the values you need to fill in the fields on the Configuration page. NiCE is not responsible for providing these values.
 Learn more about the fields in this step
Field
Details
Endpoint URL Your Cognigy instance URL. For example, https://classics.cognigy.ai/.
Agent Assist URL Your Cognigy instance URL with ai- at the beginning. For example, https://ai-classics.cognigy.ai/. URL Token The URL token of your Cognigy instance. API Key The API key retrieved from Cognigy. JWT Secret Key The secret key retrieved from Cognigy. -
Click Create and then click Close.
Assign the Cognigy Agent Assist App to an Action
If you haven't done so already, you need to assign the Cognigy Agent Assist app to the Agent Assist action Performs a process within a Studio script, such as collecting customer data or playing music. in your Studio script.
- In Studio, open the script you want to use.
-
If you haven't done so already, add the Agent Assist action to the correct location in your script.
-
Click open editor
 on the Agent Assist action.
-
In the left column, click the checkmark
 next to the agent assist application or profile you want to assign to this script.
An alternative to using the checkmark is to create a variable in your Studio script. Use the variable to pass the app or profile name into the Assign Launch Config Name property of the AGENT ASSIST action.
- Click Close.