Manage Data Share Users
Hosted Data Share customers can self-manage user accounts that query Snowflake data. Use the Data Share user management interface to create new users, generate password setup links, view user records, and delete user accounts.
Role and Capacity Constraints
-
Role: All self-service users are automatically assigned the DL_CUSTOMER role. Elevated administrative roles cannot be assigned.
-
User limit: Accounts have a default soft limit of 50 users. If your organization requires additional users, contact NICE CXone Support.
Prerequisites
Before you begin, verify that:
-
You have administrator permissions in NICE CXone.
-
Hosted Data Share is enabled and configured for your tenant.
Access the Data Share Users Page
-
Sign in to CXone.
-
Click the app selector
 and select Admin
-
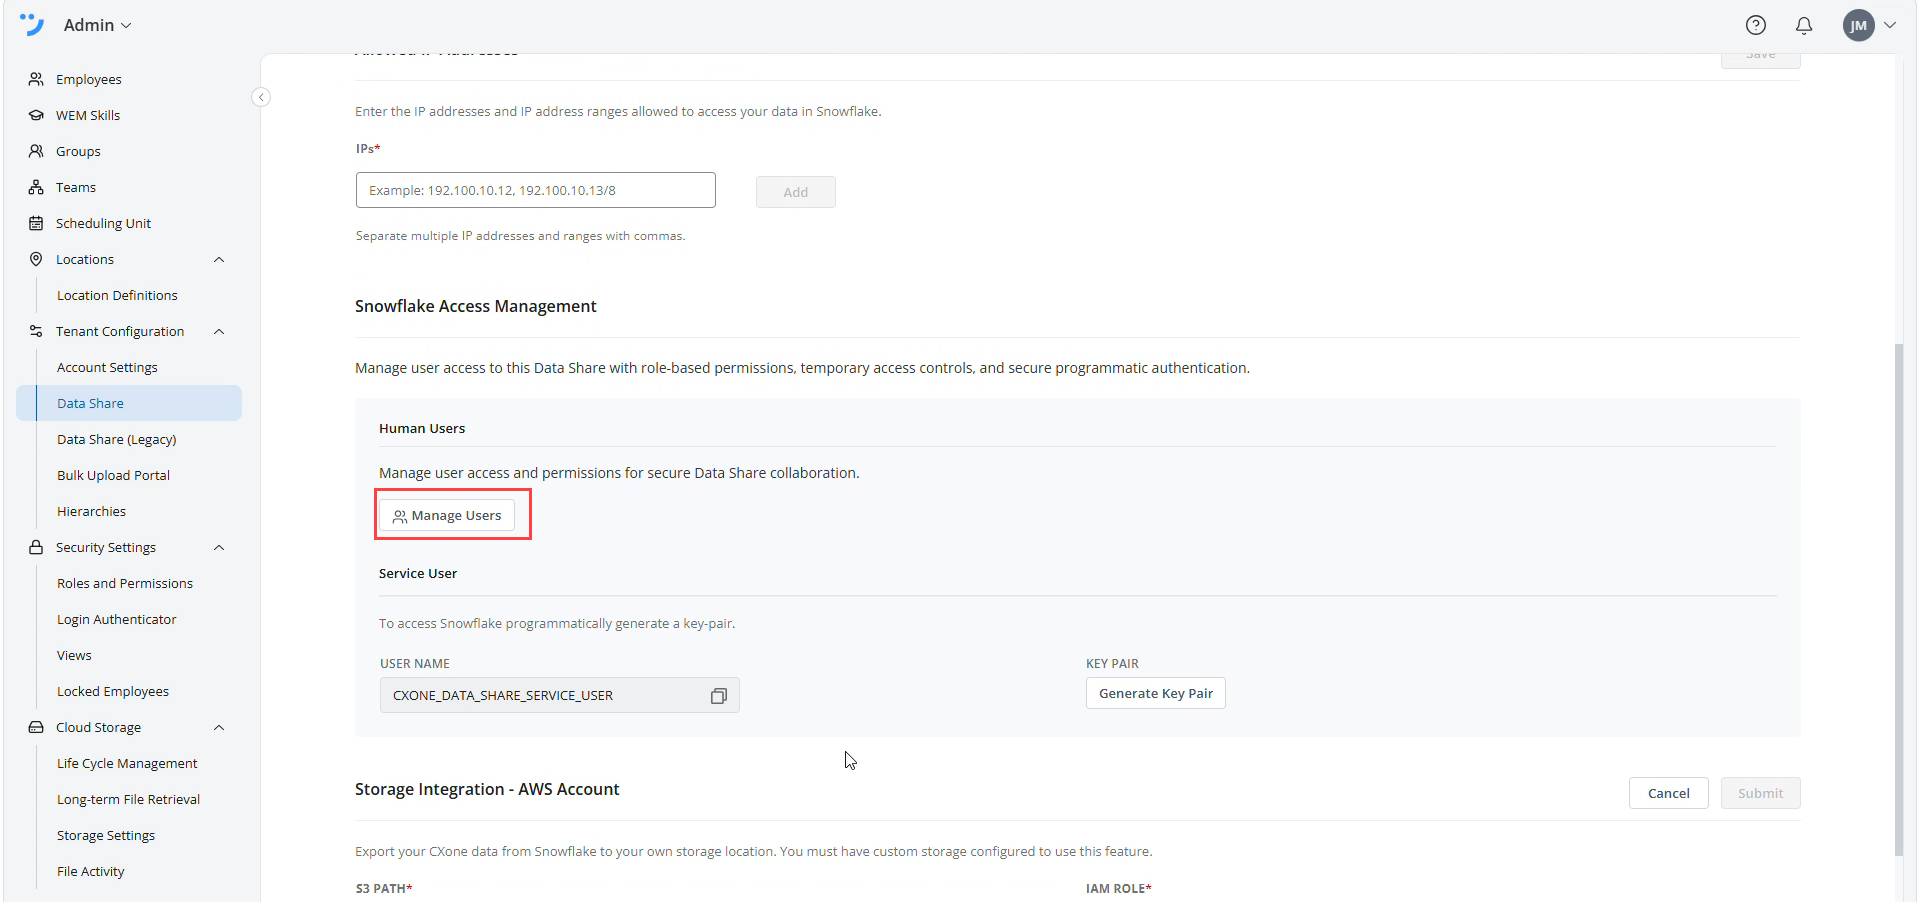
In the left navigation menu, select Tenant Configuration > Data Share.
-
In the Snowflake Access Management section, under Human Users, click Manage Users.
 View image
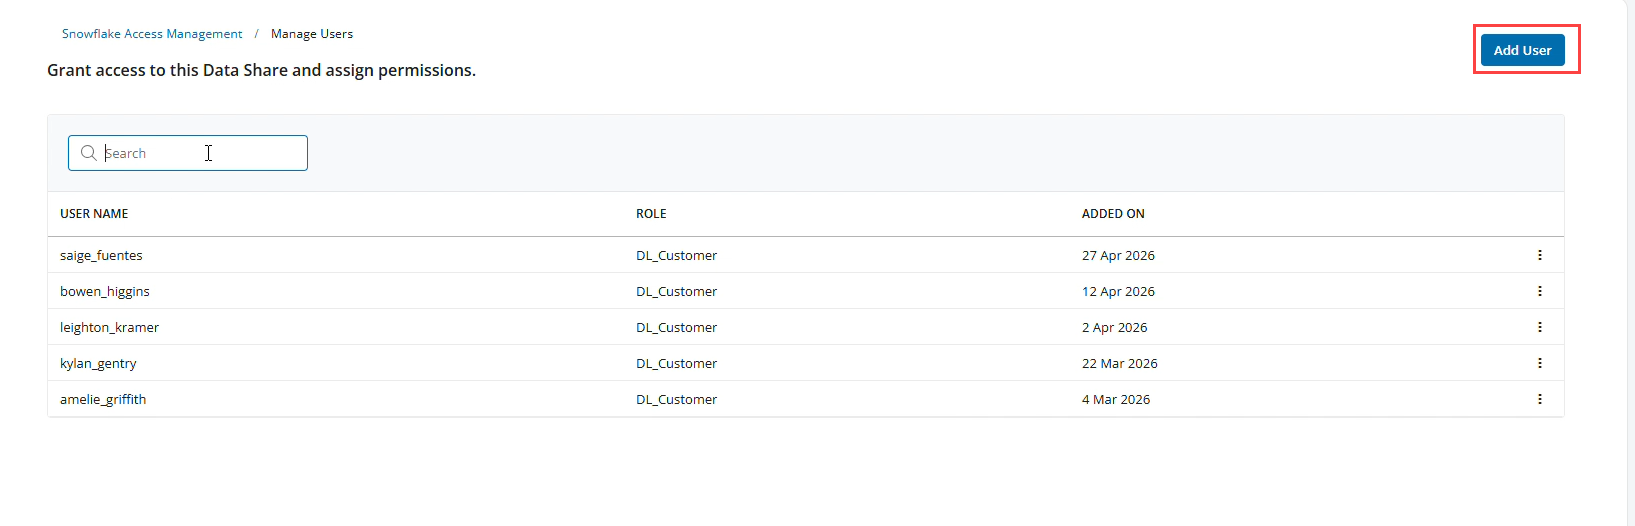
The Data Share Users page appears, displaying the user list grid and current account usage.
Data Share Users Grid Overview
The user management grid displays the following information for each Snowflake user:
| Column | Description |
|---|---|
| Username | The unique login name used to access the Snowflake data share. |
| Role | The assigned access role. Displays DL_CUSTOMER for all self-managed users. |
| Created On | The date and timestamp when the user account was created. |
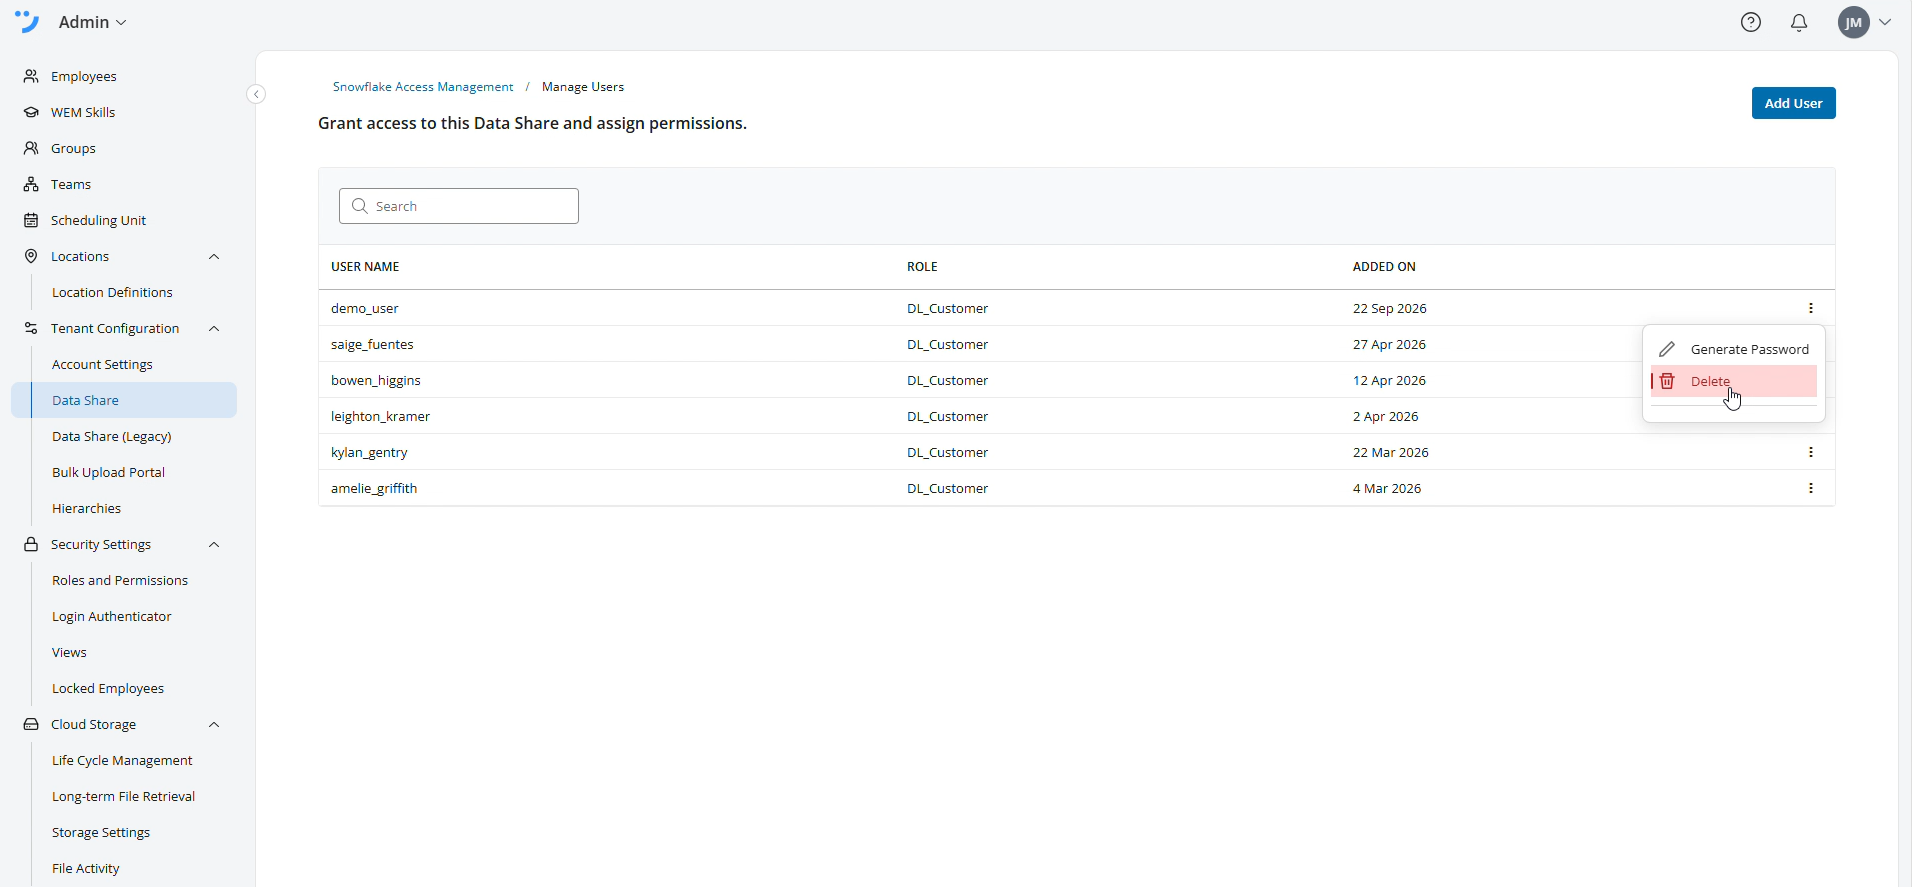
| Actions (...) | Click the ellipses icon at the end of the row to access user actions (Reset password or Delete). |
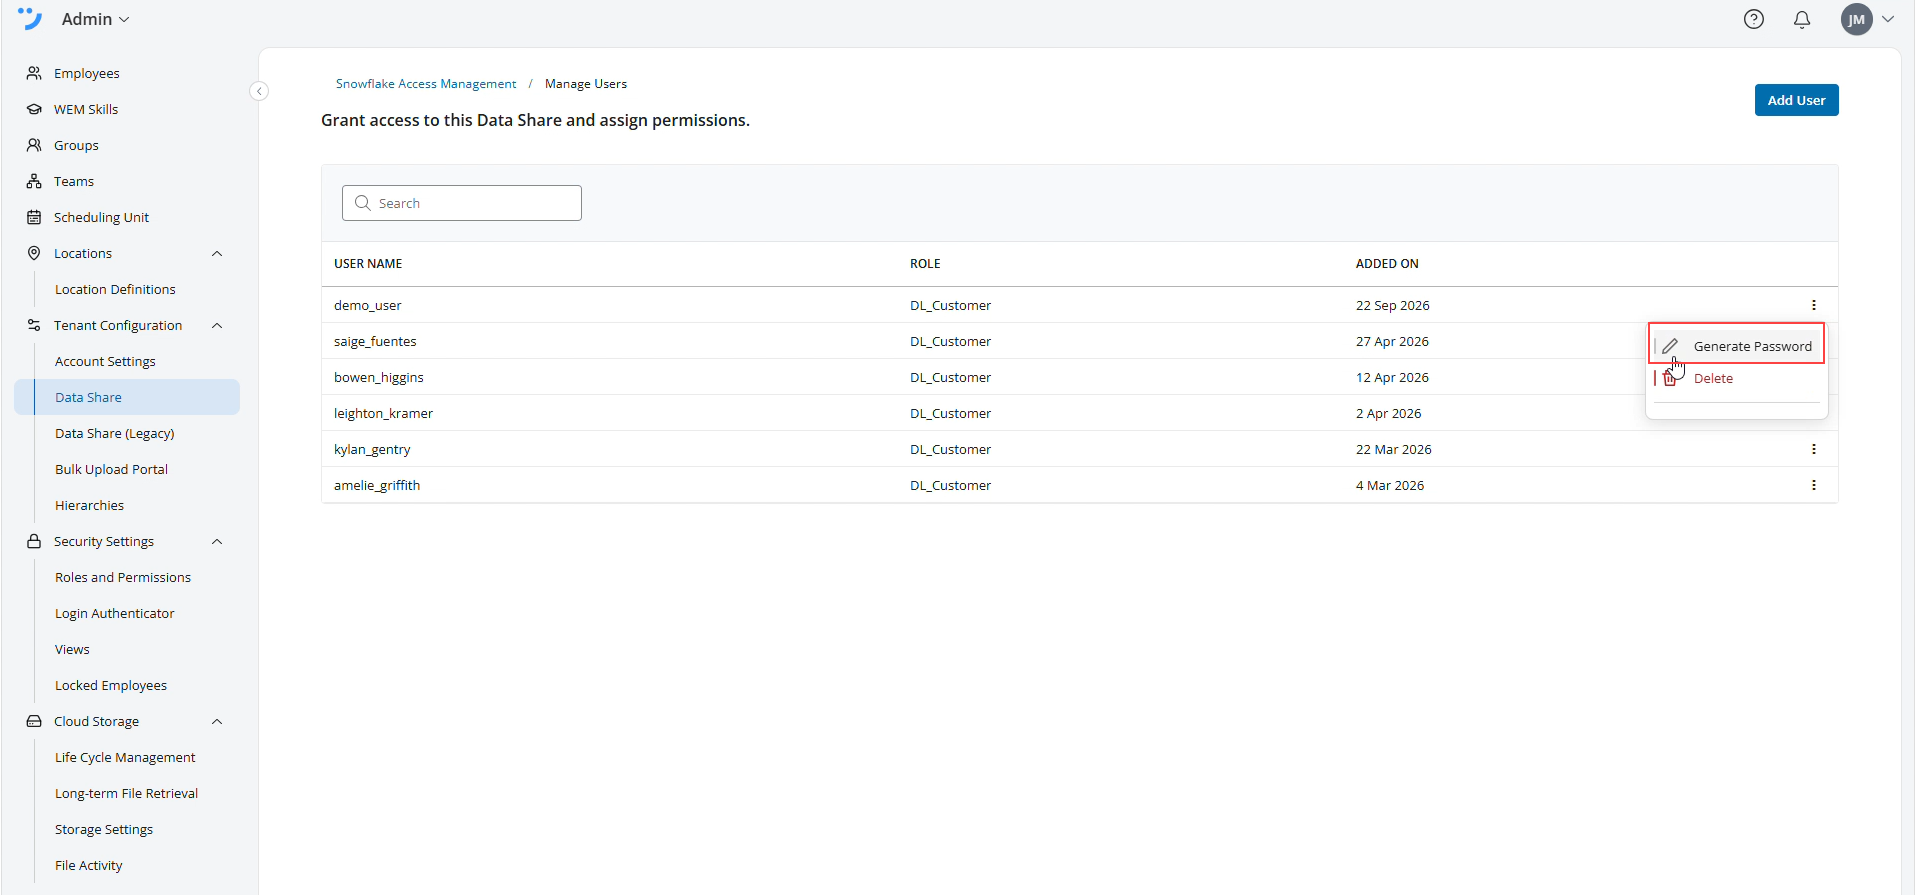
In the User Management table, row actions are accessed via the ellipses (...) button in the unlabeled right-hand column rather than a dedicated 'Actions' header column. Clicking the ellipses allows administrators to Reset password or Delete the selected user.
Add a New Data Share User
-
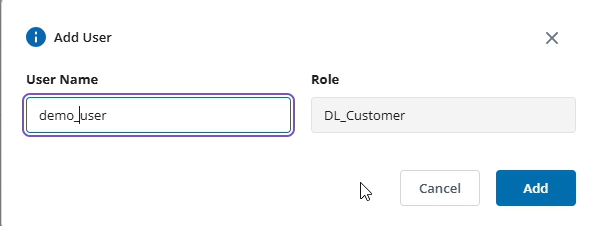
On the Data Share Users page, select Add User.
-
In the Add User dialog box, enter the unique username in the Username field.
-
Review the assigned role (DL_CUSTOMER).
-
Select Add.
-
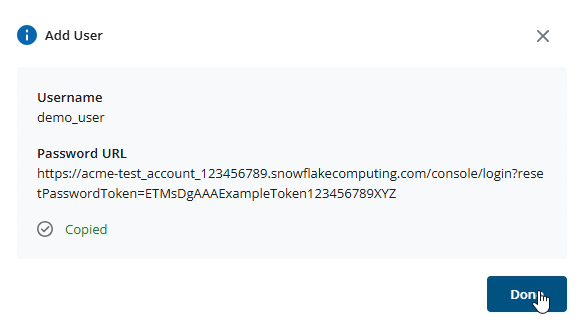
Copy the generated password setup link and share it securely with the user. Instruct the user to open the link in a new browser tab or a separate browser session to create or set their password.
-
Click Done.
Generate or Reset a Password Link
If a user forgets their password or has not completed initial account setup, you can generate a new password link.
-
In the Data Share Manage Users grid, locate the relevant user.
-
Select the Actions menu (three dots) next to the user name and select Generate Password.
-
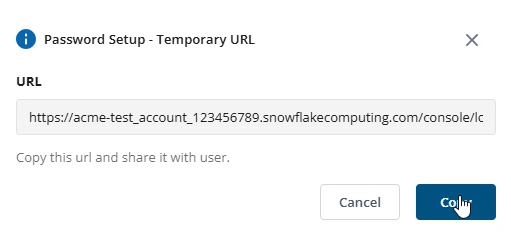
Click Copy in the confirmation dialog to copy the URL.
-
Send the link to the user to complete their password setup.
Delete a Data Share User
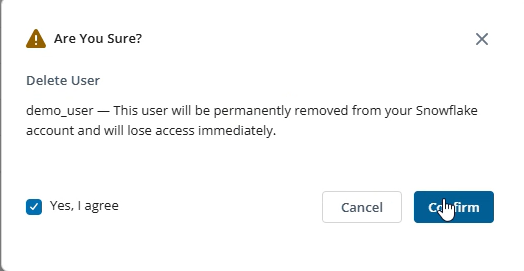
Deleting a user permanently revokes access to the Snowflake data share. This action cannot be undone.
-
In the Data Share Manage Users grid, locate the relevant user.
-
Select the Actions menu (three dots) next to the user name and select Delete.
-
Select the Yes, I agree checkbox, and then click Confirm to delete the user.