

Create Port Requests
Required permissions: Self-Service Port Management Create
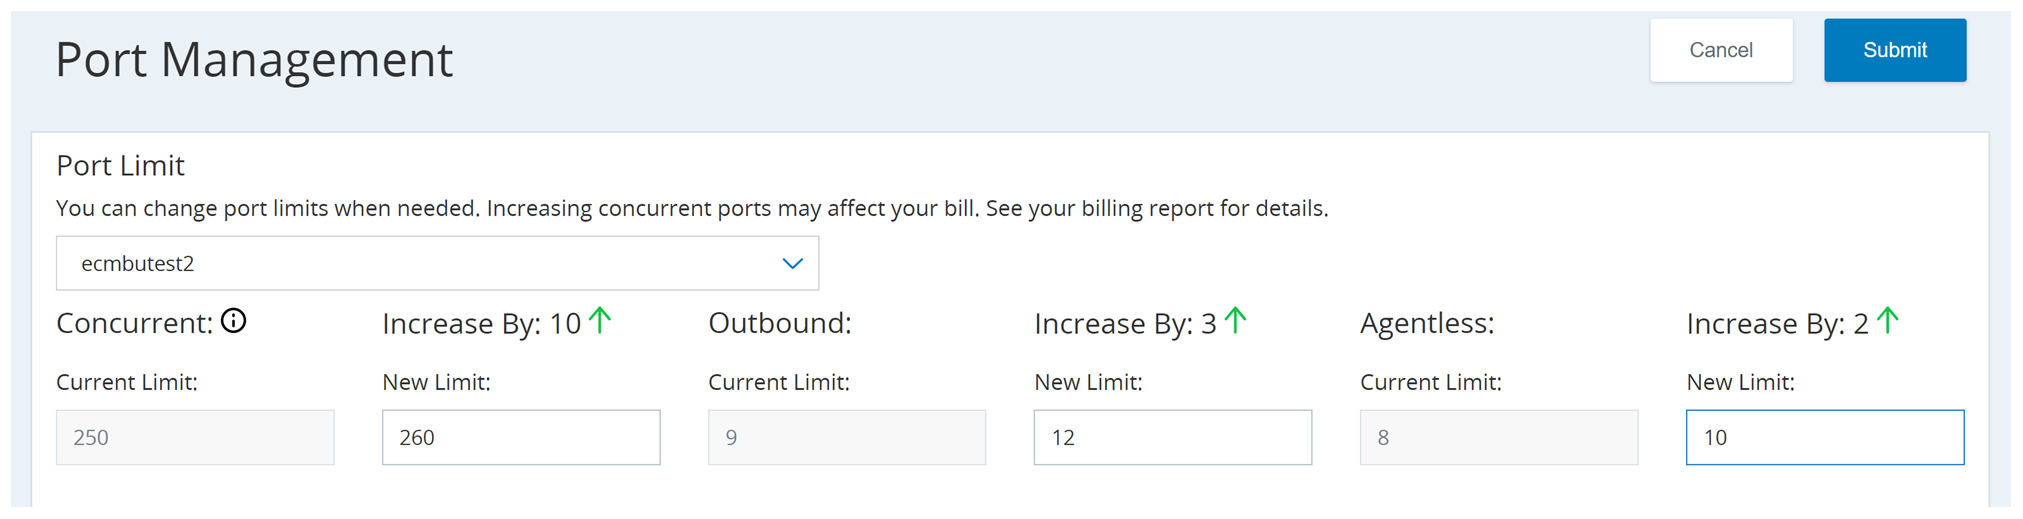
- Click the app selector
 and select Monitoring Gateway.
 - Click Self-Service Port Management.
- Complete the New Limit fields for each port limit you want to change. You will only see the Outbound and Agentless sections if the tenant is enabled for Personal Connection.
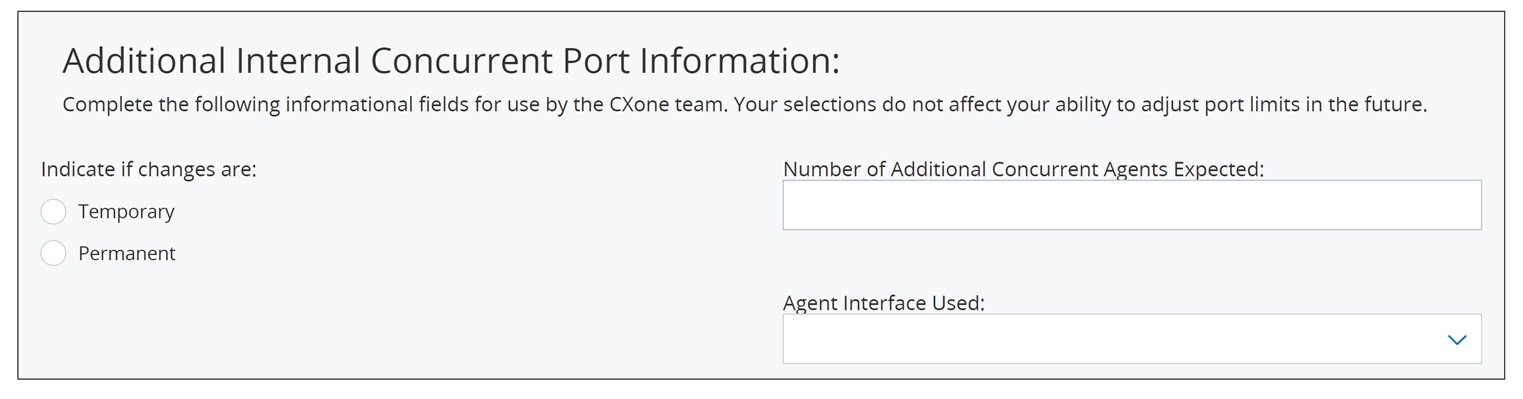
- If your request is for additional concurrent ports that exceed the daily limit:
- Select the radio button for Temporary or Permanent.
- If you selected Temporary, use the calendar and time pickers to set a Tentative End Date. This helps NiCE CXone Network Operations decide whether to approve your request. You must submit another request through Self-Service Port Management when your changes are no longer needed. Your port limits will not automatically change on the chosen date.
- Enter the Number of Additional Concurrent Agents Expected.
- Select the Agent Interface Used from the drop-down. You can select more than one.
- Click Submit.
View Pending Requests and Logs
Required permissions: Self-Service Port Management On
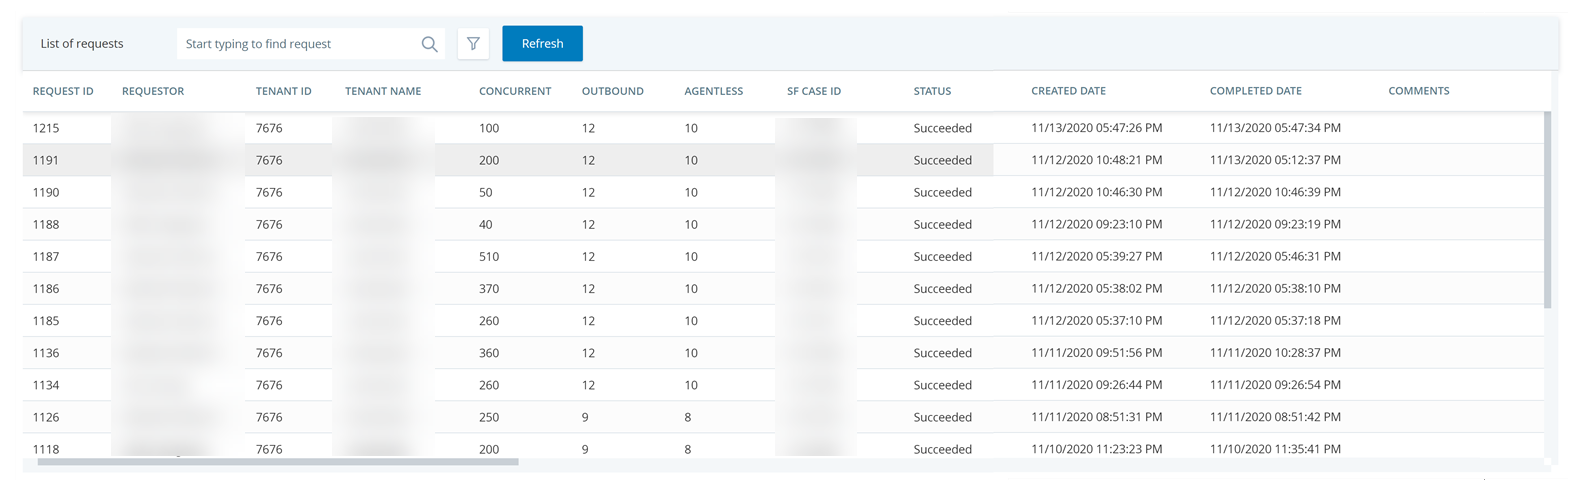
- Click the app selector and select Monitoring Gateway.
- Click Self-Service Port Management.
- If a request shows a Status other than Succeeded, check the Comments field for more information.
 View possible statuses
Status Details New The request has just been entered. Failed The request failed due to a technical issue.
Pending Self-Service Port Management is in the process of updating the ports. Succeeded The request has been granted. Rejected Either the requester is not an authorized user or NiCE CXone Network Operations has rejected the request. Under Review NiCE CXone Network Operations is considering the request.