

Before handling calls in Agent Workspace for Salesforce Voice (Agent for SCV), make sure to configure your Agent Workspace for Salesforce Voice (Agent for SCV) settings. If you are logged in with Integrated Softphone, make sure you are using the Agent WebRTC Extension. It prevents connection issues, including calls dropping.
Use Voice Controls
These voice controls appear when you're handling an active call in Agent Workspace for Salesforce Voice (Agent for SCV). Some of these controls may not appear, depending on the way your administrator has configured Agent Workspace for Salesforce Voice (Agent for SCV).
| Icon | Details |
|---|---|
Raise |
Raise a flag to ask your supervisor for help. You must indicate why you need help in the Message field. Your supervisor can send notes back. |
Add User |
Lets you add a new participant to your active call or call group. When you use Add Caller, the new participant's call automatically merges into the active call. While on an active call, click Add User icon and select or dial the participant you want to add. Once the participant answers, the call automatically merges with your active call and a call group is created |
Hold |
Place the contact on hold. |
Resume |
Resume a call you've put on hold. |
Record |
Record the call. |
Mute |
Mute your microphone so that the contact cannot hear you. |
|
Blind Transfer
|
Transfer the call. You are not placed in a conference; the call is directly transferred to the other party. |
New Call |
Start a consult. |
Keypad |
Open a keypad to enter a phone number. |
Merge |
If you have an active call and a call on hold, you can combine the two calls together to make a conference call. |
Swap |
If you have an active call and a call on hold, you can switch between the two. |
|
End the call. A "Contact ended" notification appears in the bottom right of Salesforce when you or the contact |

Some of these call controls may not be visible to you, depending on how your administrator has configured Agent Workspace for Salesforce Voice (Agent for SCV).
Make Outbound Calls
When placing an outbound call, you can search for people in the Phone Book  by name or use the keypad to enter a phone number to dial.
Before making outbound calls, set your default outbound phone skill.
-
Launch Agent Workspace for Salesforce Voice (Agent for SCV) and sign in.
-
Make sure you are in an online or busy state
 The availability status of an agent..
 -
Use the keypad to enter a phone number or click Phone Book
. In the search bar in the Phone Book, enter the name of the contact The person interacting with an agent, IVR, or bot in your contact center. you want to call. Only 1000 phone book entries are loaded at a time, so the contact you're searching for may not appear right away. You can use the drop-down to the left of the search bar to switch between phone books. Click the contact's name in the search results. -
Click Call.
Consult and Conference Calls
You can consult![]() Allows you to speak privately to a new party before adding them to a conference. and conference with other parties, such as other agents, to resolve a contact's
Allows you to speak privately to a new party before adding them to a conference. and conference with other parties, such as other agents, to resolve a contact's![]() The person interacting with an agent, IVR, or bot in your contact center. issue. You can have up to six people in a conference call including yourself. A supervisor can join the call in addition to the six parties. Agent Workspace for Salesforce Voice (Agent for SCV) lists all the parties in the conference call under a collapsible heading called Call Group.
The person interacting with an agent, IVR, or bot in your contact center. issue. You can have up to six people in a conference call including yourself. A supervisor can join the call in addition to the six parties. Agent Workspace for Salesforce Voice (Agent for SCV) lists all the parties in the conference call under a collapsible heading called Call Group.
-
While handling a call in Agent Workspace for Salesforce Voice (Agent for SCV), click New Call.
-
In the address book that appears, search for and select an agent or skill
Used to automate delivery of interactions based on agent skills, abilities, and knowledge.. You can also click Keypad and enter a phone number to dial. Click Call. -
You are placed in a consult with the new party. The original party is put on hold. From here, you can:
-
Click Merge
to combine the calls into a conference. -
Click Swap
to place the new party on hold and resume your call with the original party. -
Click Endnext to a party to hang up on them individually.
-
Click Leave Call to leave the conference.
-
-
If you merge the calls into a conference, you can then:
-
Click Leave to leave the conference. The conference continues for the other parties.
-
Click Remove
 next to a party to remove them from the conference.
 -
Click New Call to consult
Allows you to speak privately to a new party before adding them to a conference. with another party. The conference continues for the other parties. -
Click Add Caller
to add another party to the conference.
-
-
To end a conference call, click Remove
next to each party until only you and one other party are left. Then, click End Call.
Transfer Calls
You can blind transfer a call to another party, such as another agent. You are not placed in a conference; the call is directly transferred to the other party. It is removed from your agent console.
-
While handling a call in Agent Workspace for Salesforce Voice (Agent for SCV), click Blind Transfer
. -
In the address book that appears, search for an agent, queue, or skill
Used to automate delivery of interactions based on agent skills, abilities, and knowledge.. Wait times appear in parentheses next to queues. Available queues do not display a wait time indicator. -
Select an agent, queue, or skill, then click Transfer. You can also click Keypad
and enter a phone number to dial, then click Call. -
If required, assign a disposition to your part of the call.
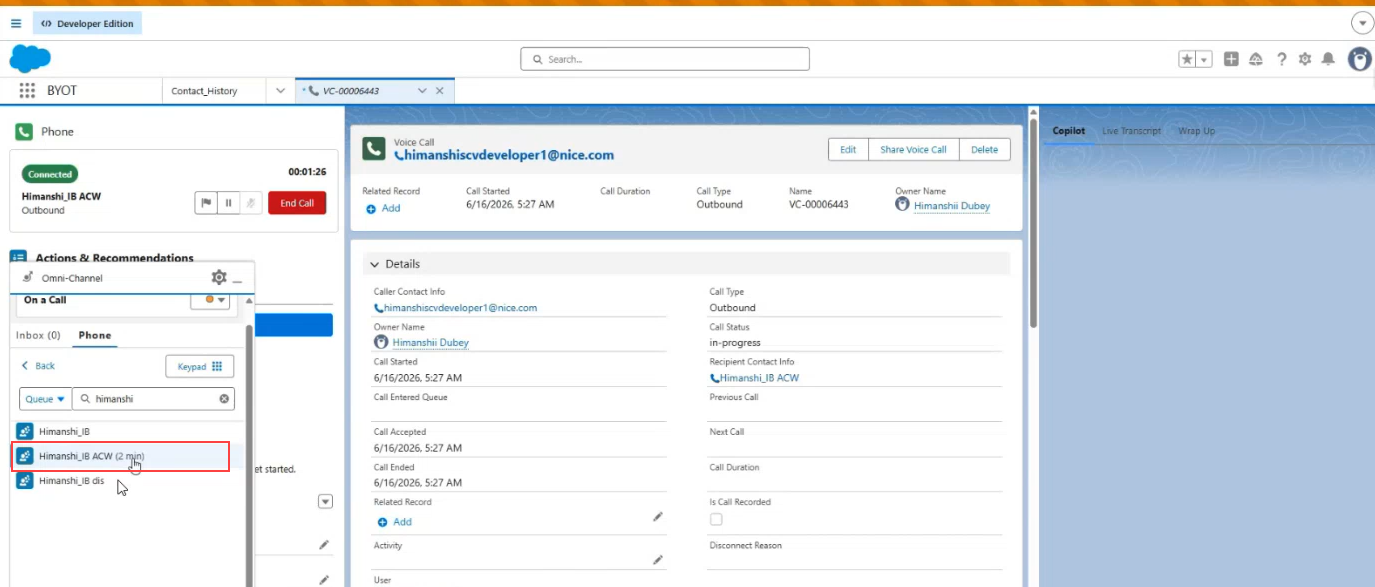
Estimated Wait Time
When browsing skills in the Address Book, each skill displays its current estimated wait time. This helps you choose the best skill for a consult, transfer, or conference by showing how long a contact would wait in that queue.
For example, if one skill shows 5 min and another shows 1 min, you can route the call to the shorter queue for a faster resolution.
The estimated wait time displays as <1 min when the wait time is less than one minute, and in the format X min (for example, 2 min) when it is one minute or more. When the queue wait time is zero, Salesforce does not display any value. The wait time does not update in real time within the Address Book; to view the latest wait time, navigate back to the Address Book and reselect or search for the skill again. If the system cannot retrieve wait time data, the Address Book loads normally without wait time information. These are known Salesforce platform limitations and may behave differently in other agent applications.
View Estimated Wait Time
-
During an active call, initiate a consult, transfer, or conference.
-
In the Address Book, select Queue from the All dropdown list.
-
Select a skill from the queue list.
-
The estimated wait time displays next to the skill name.
-
Select the skill to complete the consult, transfer, or conference.
Create Tasks
When you're on an active call in Agent Workspace for Salesforce Voice (Agent for SCV), a voice call (VC) record with information about the contact![]() The person interacting with an agent, IVR, or bot in your contact center. appears in Salesforce. In this VC record, you can edit the contact's information, see information about any past interactions, and create tasks.
The person interacting with an agent, IVR, or bot in your contact center. appears in Salesforce. In this VC record, you can edit the contact's information, see information about any past interactions, and create tasks.
-
In Salesforce, open the voice call record. It is a tab beginning with VC, followed by a string of numbers.
-
Scroll down to the Activity field and click Edit Activity
 .
. -
Click + New Task.
-
In the New Task pop-up, complete the Task Information form. The required fields are Assigned To, Status, Subject, and Priority.
-
Click Save.
View Indicators
When you're on an active call in Agent Workspace for Salesforce Voice (Agent for SCV), you can view indicators: custom menu items configured by your administrator.
-
While handling a call in Agent Workspace for Salesforce Voice (Agent for SCV), click More at the bottom.
- Click the Indicator tab.
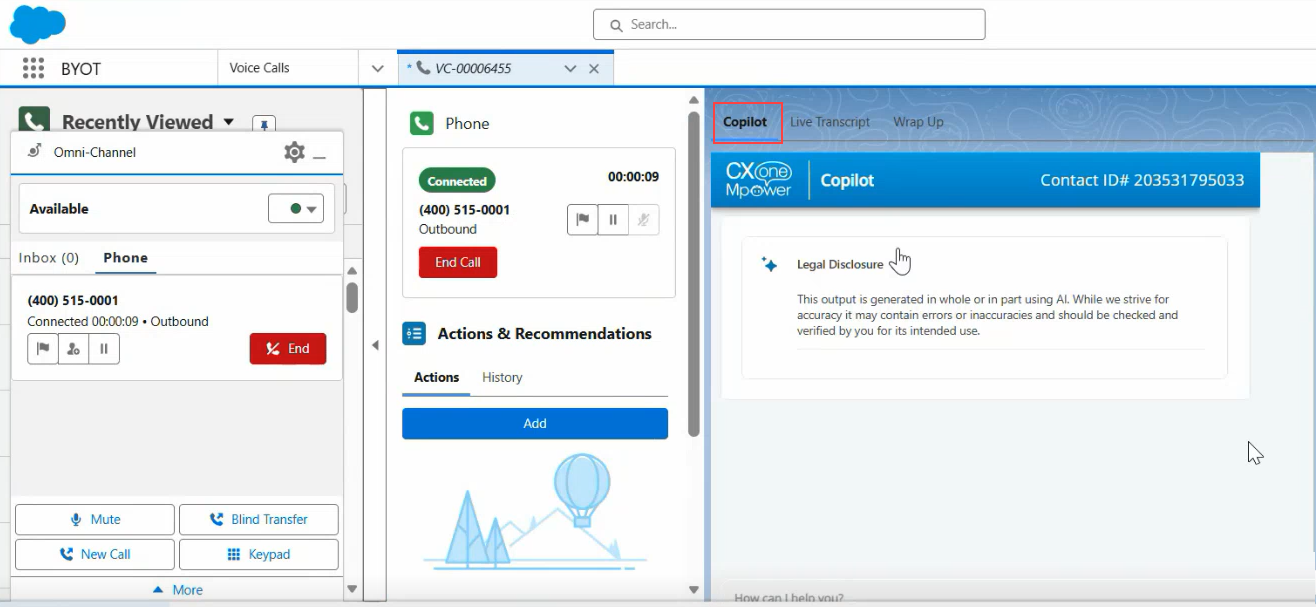
Use Copilot
Copilot, Live Transcript, and AutoSummary are add-on products that must be purchased and configured separately. The configuration steps are the same as for the standalone CXone Agent Workspace. If these features are not configured, the Copilot and Live Transcript tabs will not be functional, and the Wrap-Up tab will function as a standard notes field for agents to type in manually.
Copilot is an AI-powered assistant that appears as a tab in the Companion Application panel during voice calls. It listens to the live conversation and provides real-time guidance, including a live summary of the interaction, customer sentiment detection, knowledge base suggestions, and relevant customer data from connected systems.
To use Copilot, click the Copilot tab in the Companion Application panel during an active call. Copilot activates automatically and updates throughout the call as the conversation progresses. You can act on any suggestion directly from the panel, such as clicking a knowledge base article link or reviewing customer data.
Your administrator must enable Copilot for Agents for this feature to be available. If the Copilot tab is not functional, contact your administrator.
Live Transcript
A real-time transcript of the call appears in the Conversation window in Salesforce. As the call progresses, the transcript updates continuously, showing speaker-identified text so you can follow the conversation as it happens. Live Transcript is available as a companion app within the Salesforce Omni-Channel widget. It supports inbound, outbound, and multiparty voice calls.
View live transcripts during a call
-
Sign in to Salesforce and make sure you're available in the Omni-Channel widget.
-
Accept an inbound call or place an outbound call.
Studio Scripts are required for the Live Transcript functionality to work. Contact your administrator to have this feature configured.
-
In the companion app area of the Omni-Channel widget, select the Live Transcript tab.
Live Transcript in multiparty calls
Live Transcript works in multiparty call scenarios, including:
-
Conference calls — When additional participants join the call, the transcript continues to capture and display the conversation.
-
Consult transfers — The transcript captures the conversation during the consult phase.
Blind transfer and consult call scenarios are not currently supported for Live Transcript.
View Sentiment Next Best Action (NBA)
The Sentiment NBA window shows suggested actions during contact![]() The person interacting with an agent, IVR, or bot in your contact center. calls. For example, if a contact becomes upset, it may suggest offering a discount, as shown in the image below.
The person interacting with an agent, IVR, or bot in your contact center. calls. For example, if a contact becomes upset, it may suggest offering a discount, as shown in the image below.
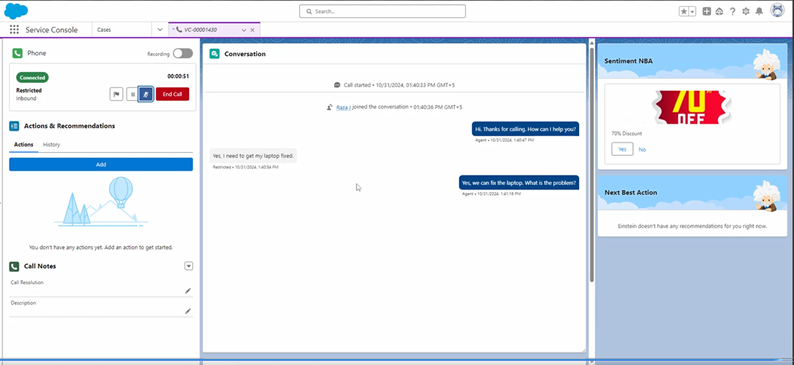
This feature listens to the conversation, analyzes the contact's mood, and offers you suggestions on the next best action to take. This helps you to provide an enhanced contact experience.
You may see the Sentiment Next Best Action in a separate window, as shown in the preceding image. The window may be in a different place, depending on your configuration. It may include links to assist you in taking its suggested actions.
This feature works for both inbound and outbound calls.
This is an optional feature that your NiCE CXone administrator must enable. If there isn't a Sentiment NBA window in Salesforce, your organization may not use the feature.
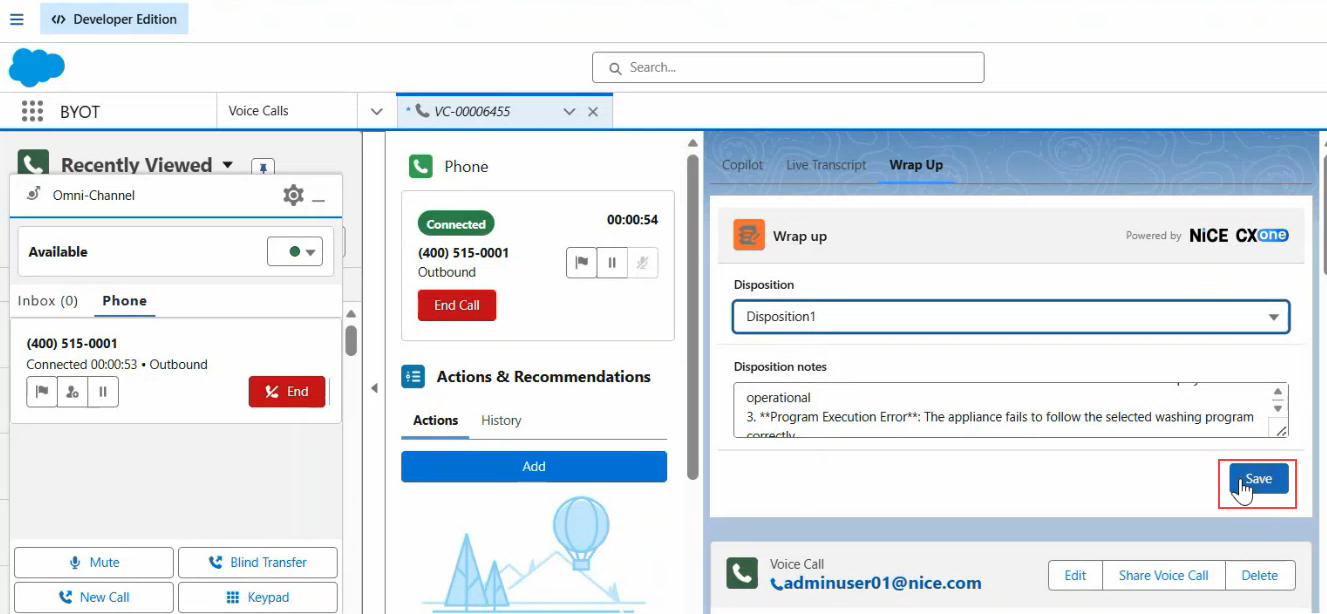
View AutoSummary
AutoSummary automatically generates a written summary of the voice interaction after the call ends. The summary includes the key points discussed, the resolution if one was reached, and the customer's sentiment. It saves you from manually typing disposition notes.
When the call ends, the summary is generated and appears in the Disposition notes field in the Wrap Up tab. You can review and save the summary. The saved notes are stored in the CX notes section of the Voice Call record.
To save the AutoSummary:
-
Click the Wrap-Up tab.
-
Review the generated summary in the Disposition notes field. Edit it if needed.
-
From the Disposition dropdown, select one of the options.
-
Click Save to save the disposition.
The saved notes are stored in the Disposition section of the Voice Call record. AutoSummary works for inbound and outbound calls, multi-party and conference calls, blind transfers, and warm transfers. If AutoSummary is not configured for your account, the Wrap-Up tab functions as a standard notes field where you can type notes manually.
For a blind transfer, the recipient of the call must have Auto Summary enabled.
Your administrator must enable AutoSummary for this feature to be available. If a summary is not generated after the call ends, contact your administrator.
Assign Dispositions to Calls
Starting with Package 26.3, customers can use the Wrap-Up section in the Companion App to submit call dispositions. If you currently use dispositions through the Voice Extension, update your Voice Extension configuration. This ensures that both new and existing disposition indicators continue to work correctly.
When you're on an active call in Agent Workspace for Salesforce Voice (Agent for SCV), you can assign a disposition![]() Result assigned by the agent or system at the end of a voice (disposition) or digital (status) interaction. to indicate the result of the call. For example, if you answered a contact's question, you could mark the call as Resolved. You can also add tags and notes. Adding tags associates the call with Salesforce records.
Result assigned by the agent or system at the end of a voice (disposition) or digital (status) interaction. to indicate the result of the call. For example, if you answered a contact's question, you could mark the call as Resolved. You can also add tags and notes. Adding tags associates the call with Salesforce records.
-
While handling a call in Agent Workspace for Salesforce Voice (Agent for SCV), Click the Wrap Up tab on the companion app.
-
Select the tags you want to assign to the call from the Tags drop-down.
-
If you want, enter Disposition Notes.
-
Click Save.
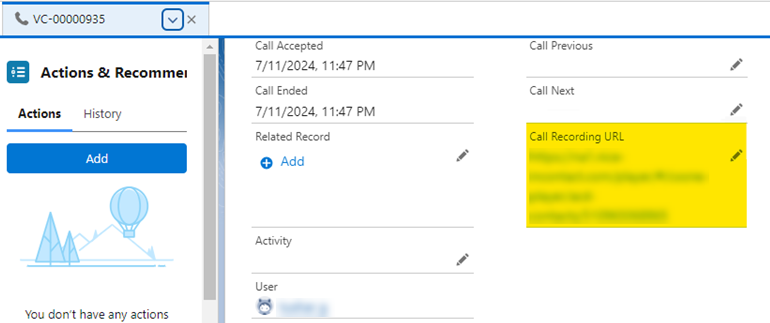
Access Call Recordings
All calls in Agent Workspace for Salesforce Voice (Agent for SCV) are automatically recorded. You can access the recording once the call ends.
-
Open the call's Voice Call record in Salesforce.
-
Refresh the record.
-
Click the URL in the Call Recording URL field. The recording opens in a new tab.
Contact Ended Notification
When a call ends while the omni-channel widget is minimized, a Contact Ended popup notifies you that the call has been disconnected. This helps you stay aware of call status changes even when you're working on other tasks in Salesforce. The popup appears whether the widget is maximized or minimized. The timing of the Contact Ended popup depends on your skill configuration.
What happens after a call ends depends on whether your skill has a disposition or ACW (After Call Work) timer configured.
If your skill has a disposition or ACW timer configured:
-
The call ends.
-
Complete the disposition or wait for the ACW timer to expire.
-
After you submit the disposition or the timer expires, the Contact Ended popup appears.
If your skill has no post-call actions configured:
-
The call ends.
-
The Contact Ended popup appears.