Configure Agent Workspace for Salesforce Voice Presence Mapping Authentication
This feature is not currently available. The documentation is provided in advance and the feature will be available at a later date.
Salesforce is retiring the legacy connected-app authentication approach (username and password credentials) across Salesforce Voice and Salesforce Cloud Voice integrations. To enhance security and align with Salesforce OAuth security standards, CXone now uses an Integration Hub (IHF) Connector paired with a Salesforce External Client App for presence mapping authentication.
Customer Experience by Account Type
New Customers: Automatically onboard using the new Integration Hub connector authentication flow. Legacy connected-app credential fields are not displayed.
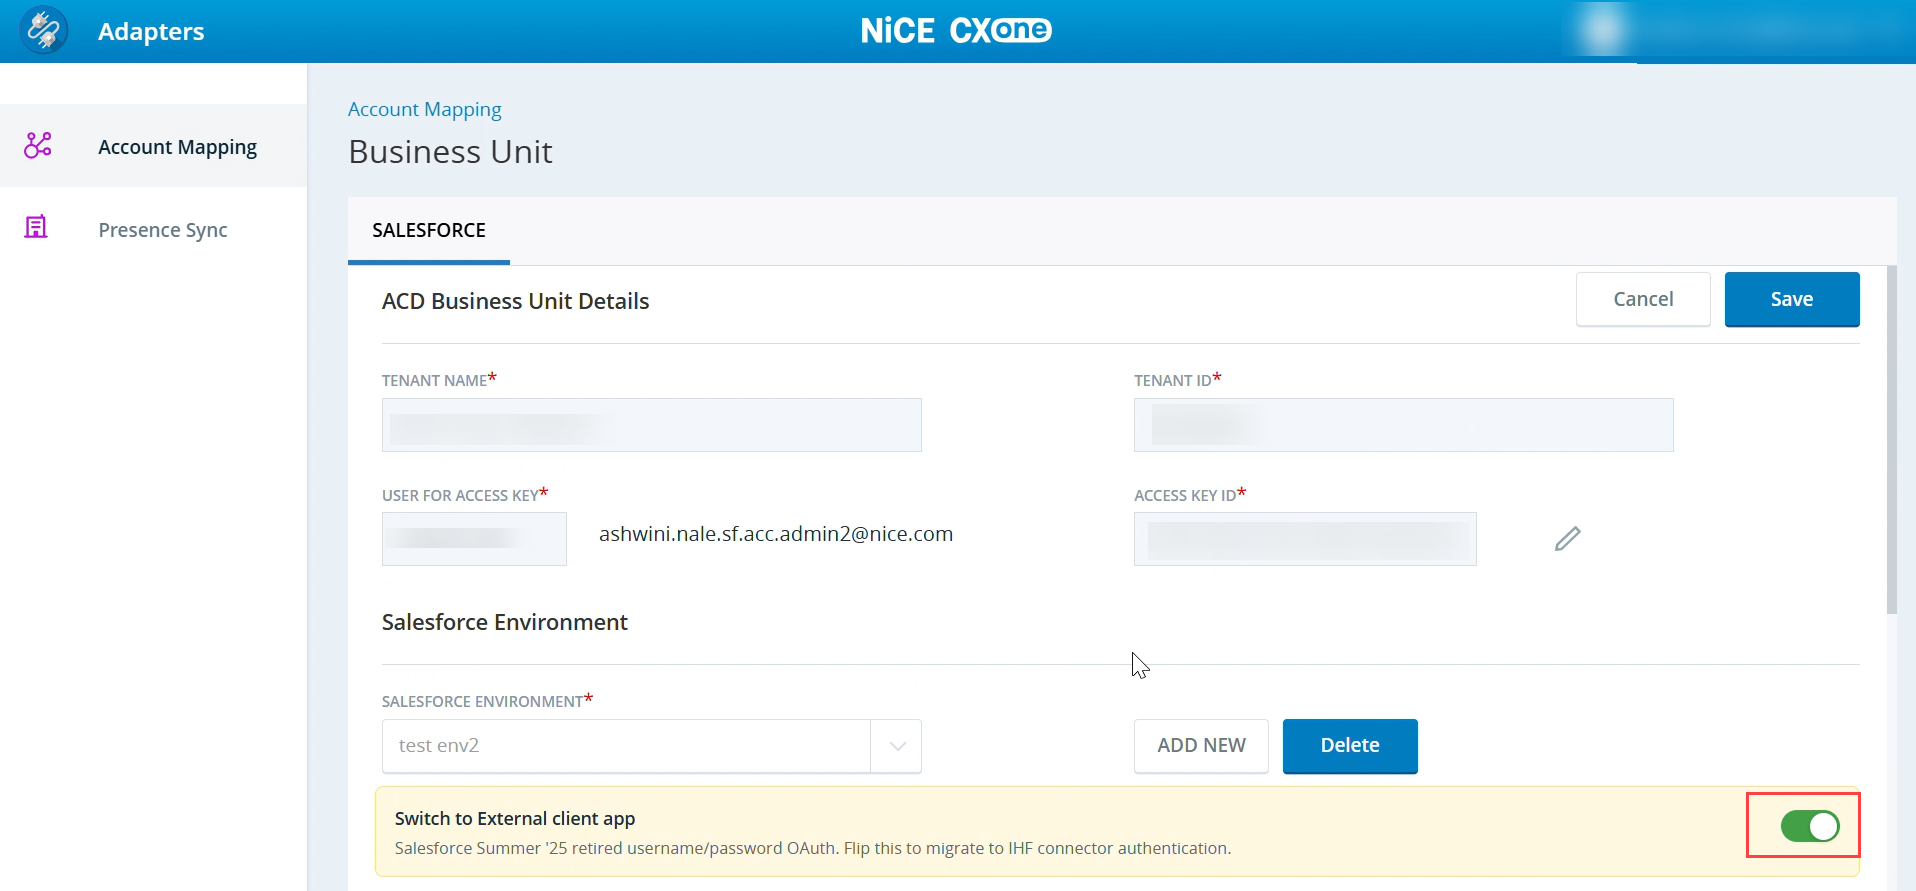
Existing Customers: Continue using legacy authentication until ready to migrate. A migration toggle is available in CXone Presence Mapping administration to transition to the new connector-based flow.
Shared Prerequisites
The connector-based authentication architecture for Presence Mapping shares identical prerequisite components with Salesforce Digital External Routing. If you have already configured these components in your environment, you can reuse them:
-
Salesforce External Client App: Refer to Salesforce Digital Chat Administrator Setup in the Online Help or complete Enable Integration Hub (IHF) Licenses in CXone below.
-
Integration Hub Connector: Complete Create a Salesforce External Client App andCreate an Integration Hub Connector and Request in CXone below to enable Integration Hub licenses and create the required connector.
Prerequisites
Before configuring presence mapping or enabling the migration toggle, complete the following prerequisites in CXone Tenant Management, Salesforce Setup, and CXone Integration Hub.
Enable Integration Hub (IHF) Licenses in CXone
Ensure that your business unit has the required Integration Hub licenses enabled.
-
Log in to CXone Tenant Management as a Tenant Administrator.
-
Search for your business unit by name or BU ID, and then click to open it.
-
In the business unit details page, expand Applications & Features.
-
Select the Automation & AI/Connections Hub tab.
-
Select the Connect Auth and Connect Request checkboxes.
-
Click Save.
Create a Salesforce External Client App
Create an External Client App in Salesforce to issue OAuth credentials for CXone Integration Hub.
-
Sign in to Salesforce with administrator credentials.
-
In the Quick Find box, enter App Manager, and then select App Manager.
-
Click New External Client App.
-
Configure basic app settings:
-
External Client App Name: Enter a descriptive name (for example, CXone_Presence_Mapping_Auth).
-
API Name: Enter a unique API name. The API name must begin with a letter and contain only alphanumeric characters or underscores.
-
Contact Email: Enter an administrative contact email address.
-
Distribution State: Select Local.
-
-
Under OAuth Settings, select Enable OAuth Settings and configure the following:
-
Callback URL: Enter your secure OAuth redirect URL (must begin with https://).
-
Selected OAuth Scopes: Add the following 10 required scopes:
-
Access the identity URL service (id, profile, email, address, phone)
-
Manage user data via APIs (api)
-
Full access (full)
-
Manage user data via Web browsers (web)
-
Access Connect REST API resources (chatter_api)
-
Access Visualforce applications (visualforce)
-
Perform requests at any time (refresh_token, offline_access)
-
Access unique user identifiers (openid)
-
Access custom permissions (custom_permissions)
-
Access the Salesforce API Platform (sfap_api)
-
-
-
Under Security, select Enable Client Credentials Flow, Require secret for Web Server Flow, and Require secret for Refresh Token Flow.
-
Click Create and then click Save.
-
Navigate to the Policies tab, click Edit, and verify that Enable Client Credentials Flow is selected and assigned to the execution user.
-
Navigate to the Settings tab, click Consumer Key and Secret, and securely copy the generated Consumer Key (Client ID) and Consumer Secret (Client Secret).
Create an Integration Hub Connector and Request in CXone
Configure an Integration Hub connector template and request in CXone to manage token exchange and endpoint requests with Salesforce.
Create the Connector Template
-
Log in to CXone with an administrative account for your target business unit.
-
From the application menu, select Automation & AI/Connections Hub, and then select Integration Hub.
-
Click Add Template to create a new connector.
-
On the Details tab, enter the connector parameters:
-
Name: Enter a name that follows the required Salesforce Voice naming convention, such as Salesforce Voice Presence Connector.
The Presence Mapping interface displays only connectors whose names begin with the required Salesforce Voice prefix.
-
Application: Select Salesforce.
-
Integration Method: Select REST.
-
Authentication Type: Select OAuth 2.0.
-
Logo: Select an icon for the connector.
-
-
On the Configuration tab, select the supported HTTP methods (for example, GET, POST) and enter the Salesforce token endpoint URL.
-
Complete one of the following actions:
-
To create the connector immediately after saving the template, click Save + My Connection.
-
To create the connector later, click Save.
-
-
If you selected Save, return to the Integration Hub templates list.
-
Locate the newly created template and select it.
-
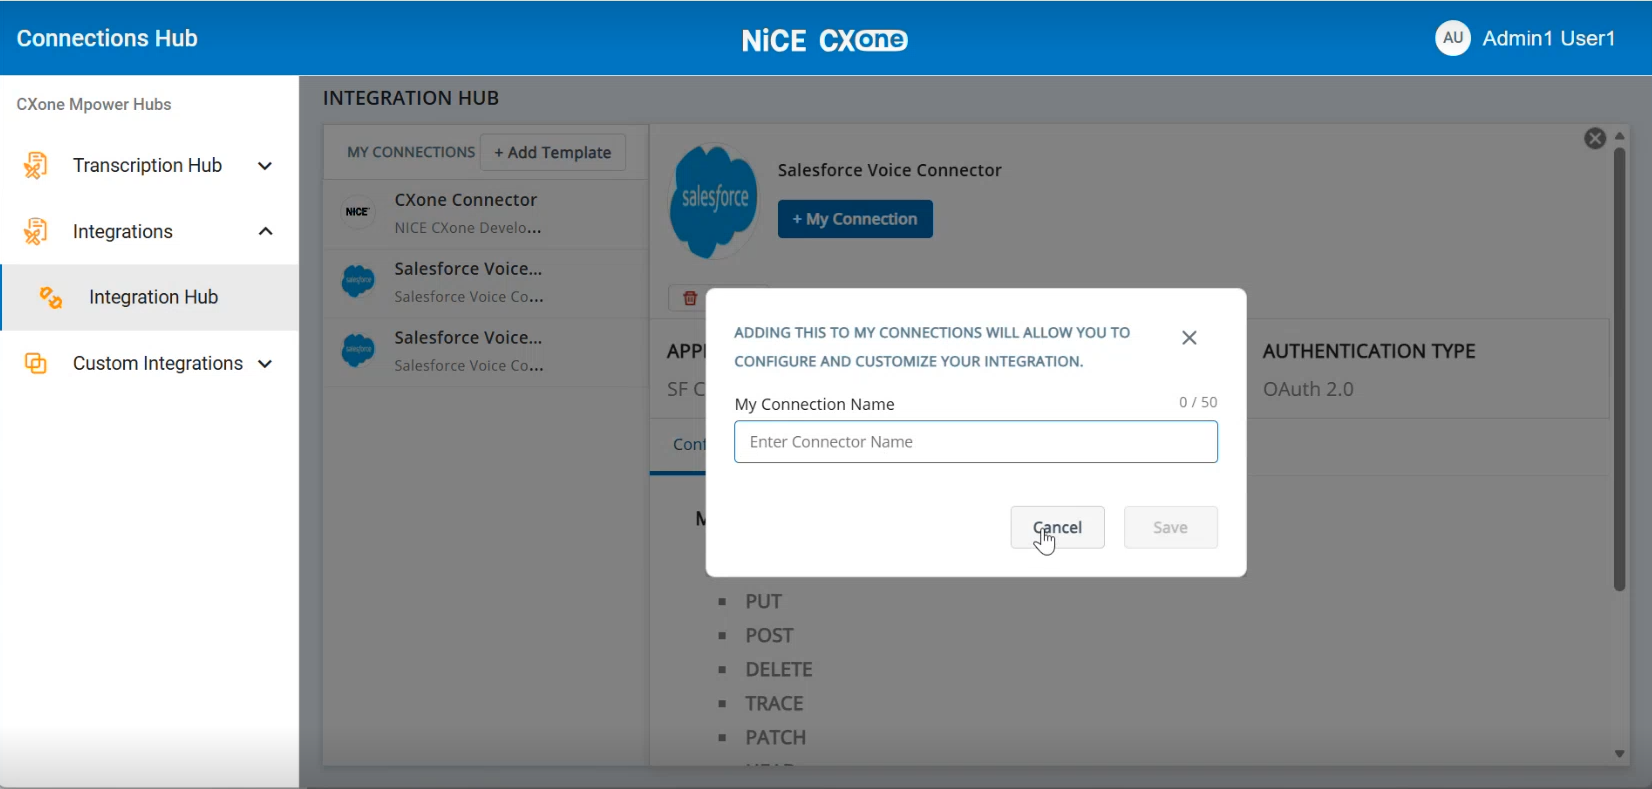
Click + My Connection.
-
In the My Connection Name field, enter a name that follows the required Salesforce Voice naming convention.
-
Click Save.
 View image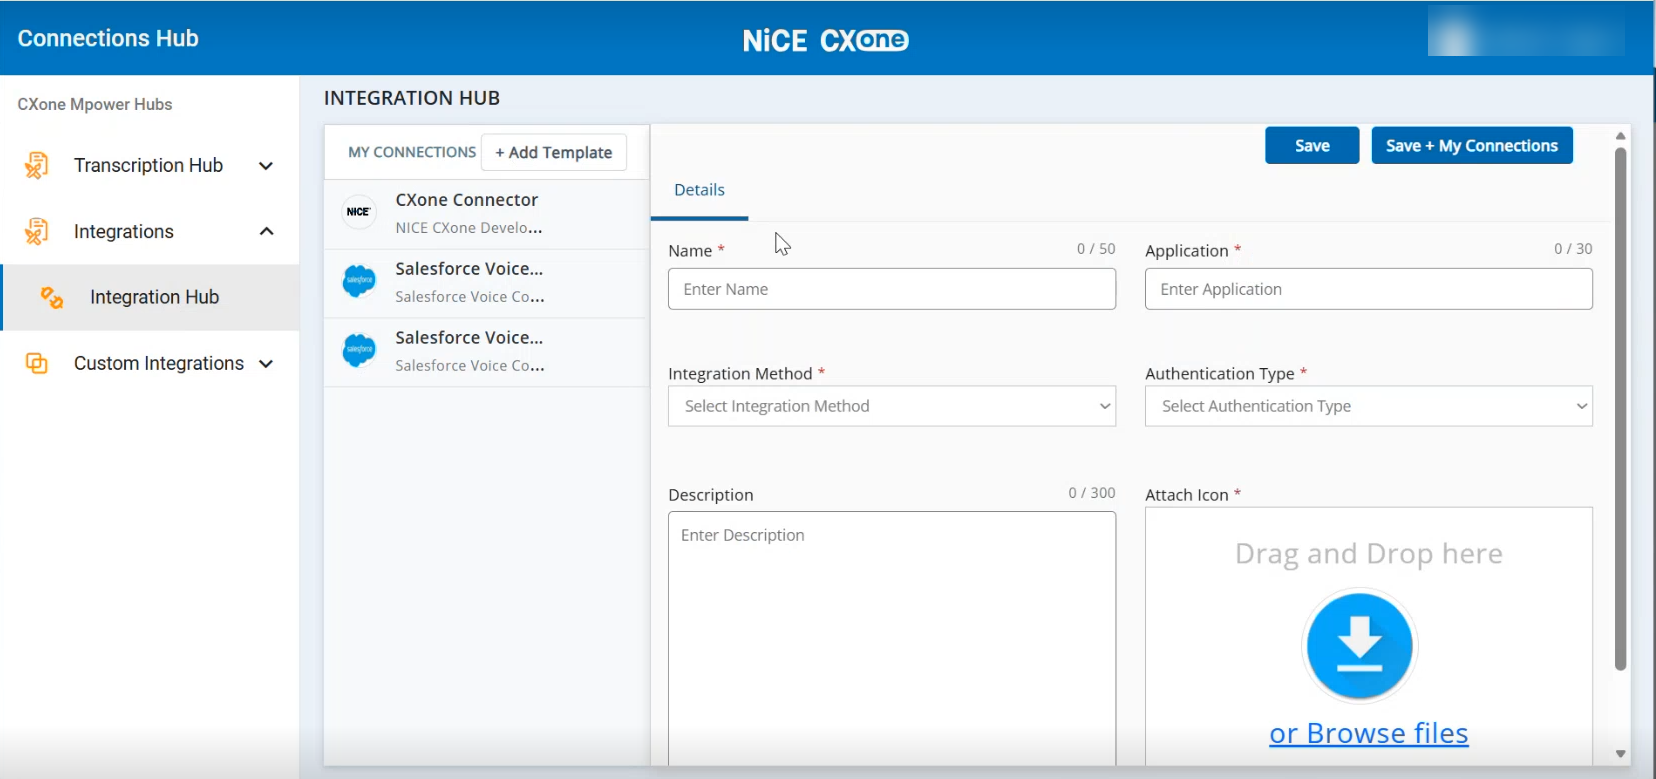
Configure the Salesforce Voice Connector
-
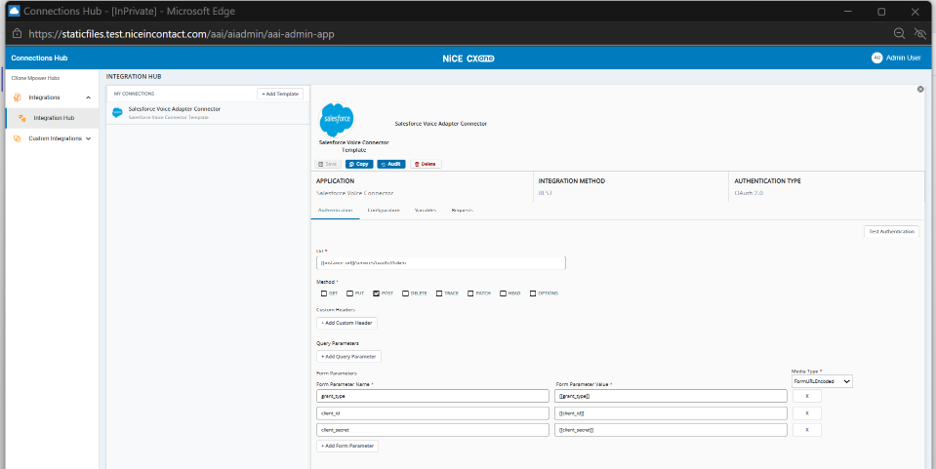
After you create the connector, you are navigated to the connector configuration page.
-
On the Authentication tab:
-
In URL, enter: {instance_url}/services/oauth2/token
-
Select POST as the HTTP method.
-
Set Media Type to FormURLEncoded.
-
Add the following form parameters:
-
grant_type = {{grant_type}}
-
client_id = {{client_id}}
-
client_secret = {{client_secret}}
-
-
-
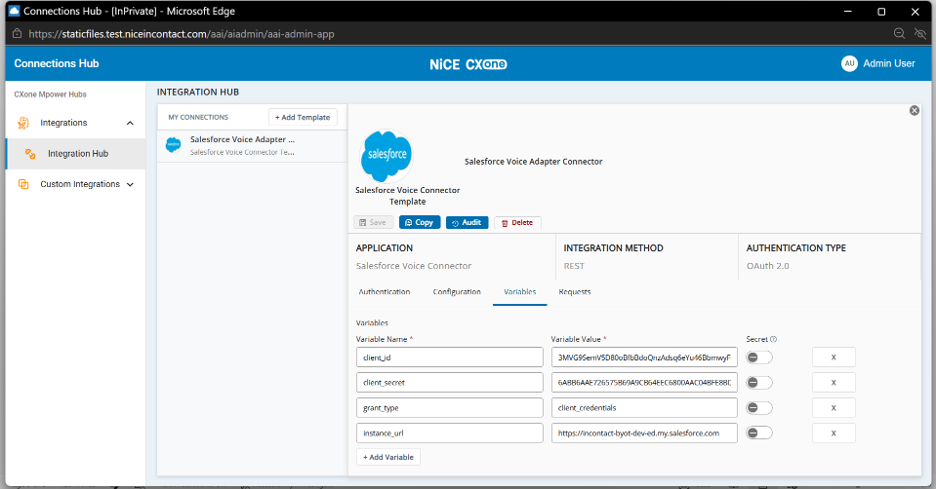
On the Variables tab, add the following variables:
- client_id = Salesforce Consumer Key
-
client_secret = Salesforce Consumer Secret
-
grant_type = client_credentials
-
instance_url = Salesforce instance URL
-
Click Save.
-
On the Authentication tab, click Test Authentication to verify the connector configuration. If the response returns Status Code: 200 and Description: OK, the connector is configured correctly and can successfully authenticate with Salesforce.
Configuring Presence Mapping for New Customers
New business units automatically use connector-based authentication when configuring Presence Mapping.
-
Click the App Selector icon and select Adapters.
-
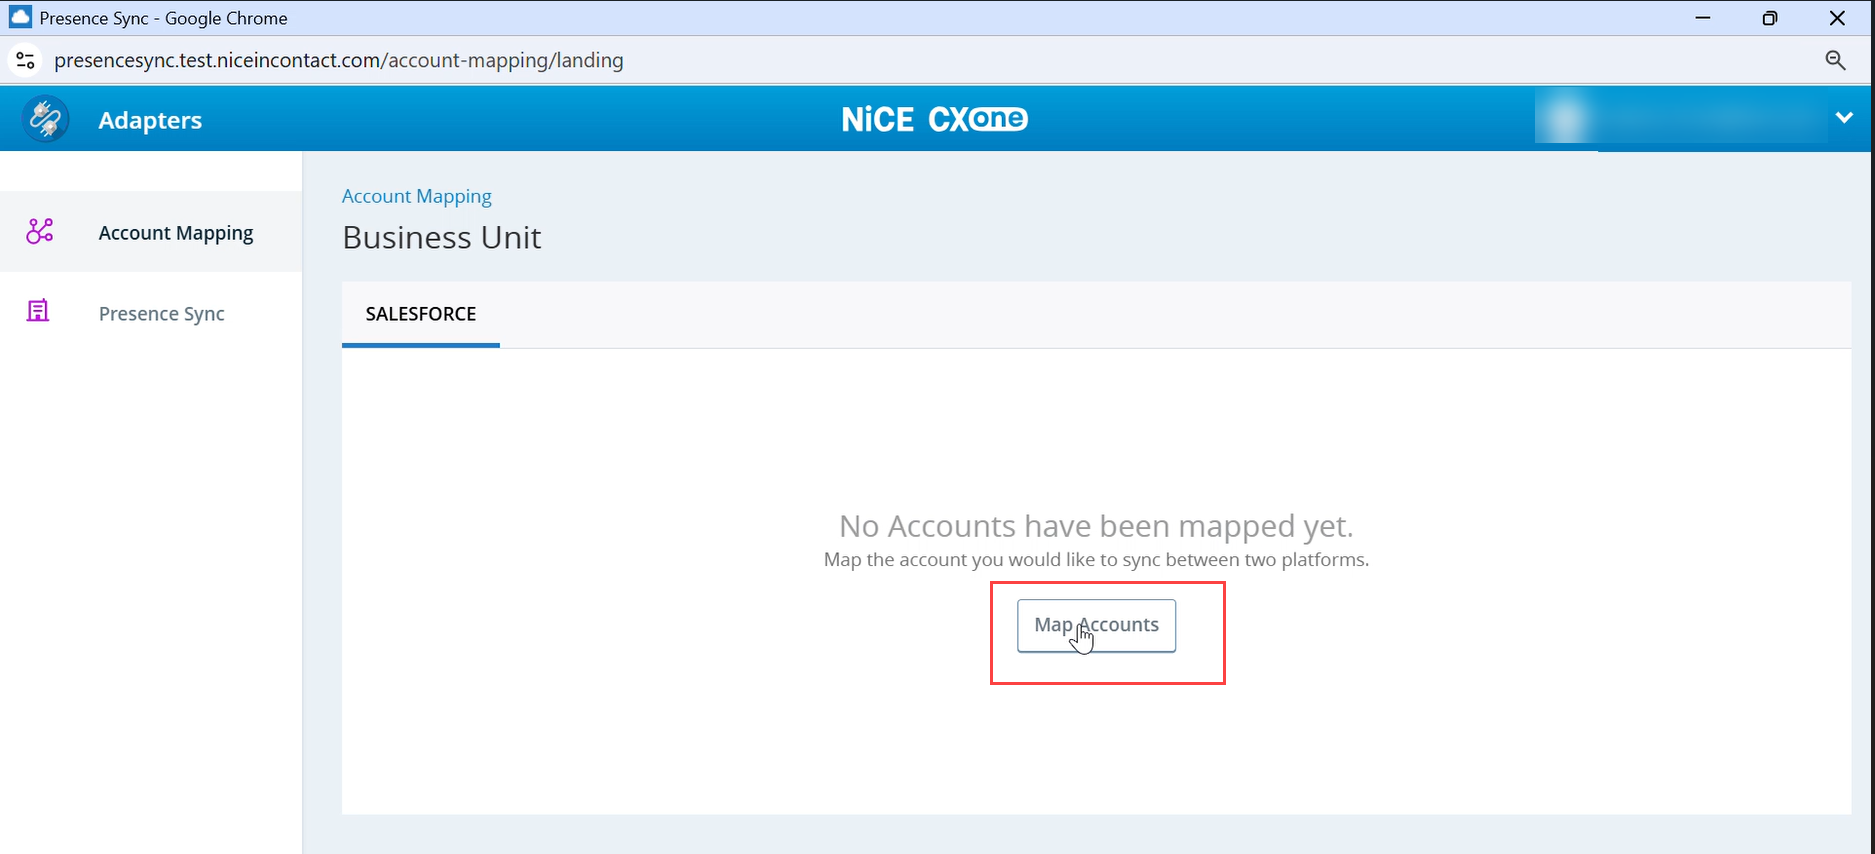
Click Account Mapping.
-
Under SALESFORCE, click Map Accounts.
-
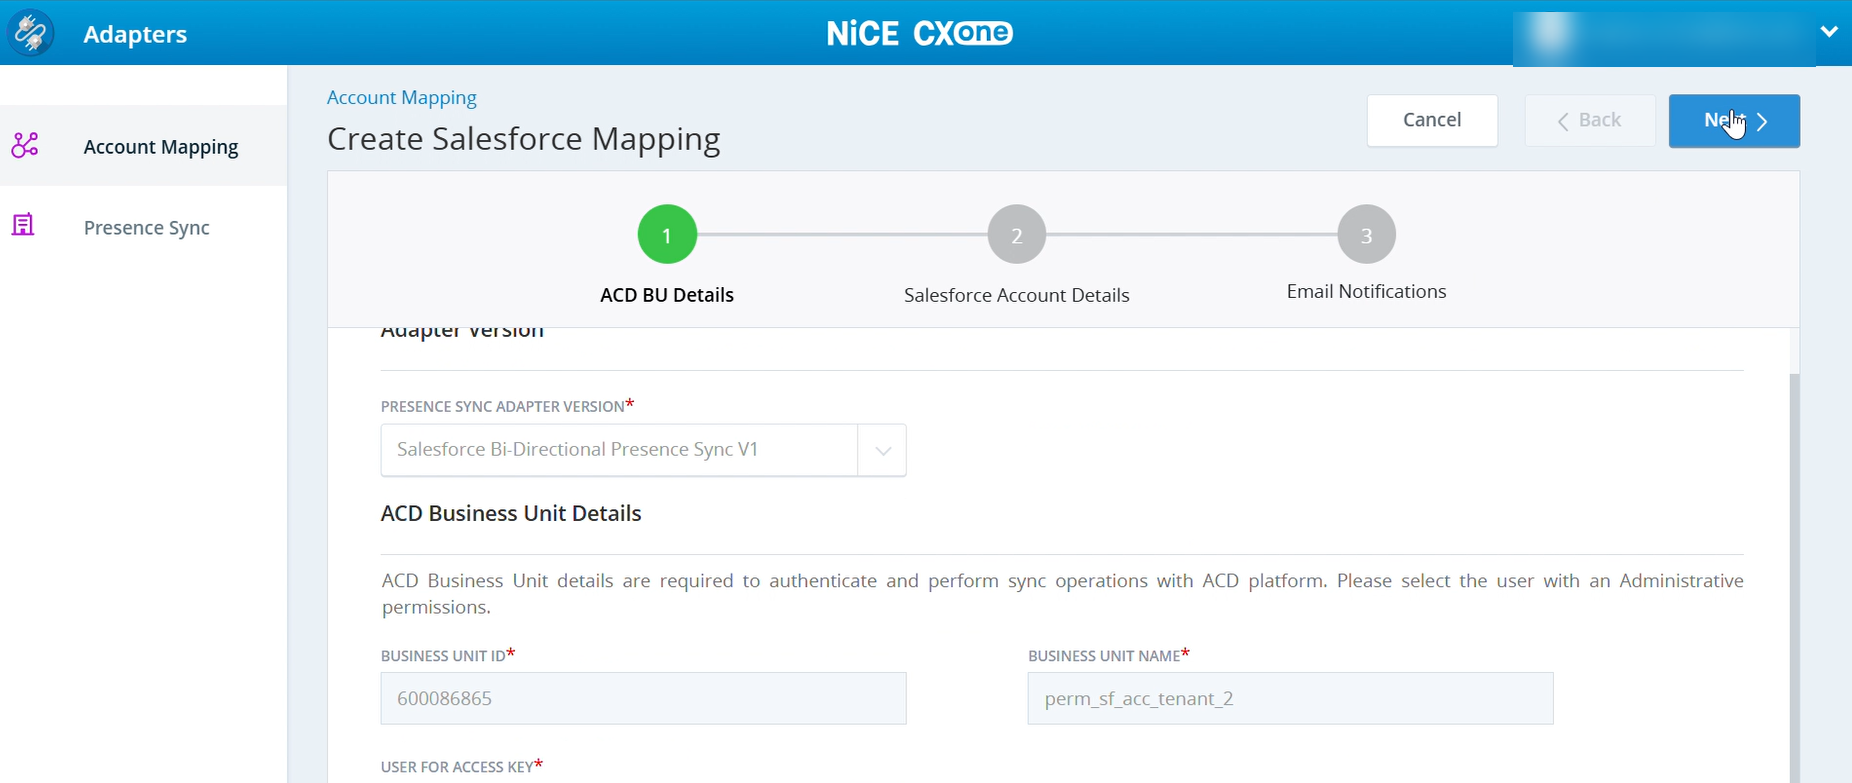
In the ACD BU Details section, under Adapter Versions, select the required adapter version from the Select Adapter Version dropdown list.
-
Scroll down and select a user from the Select User dropdown list.
-
Click Next.
-
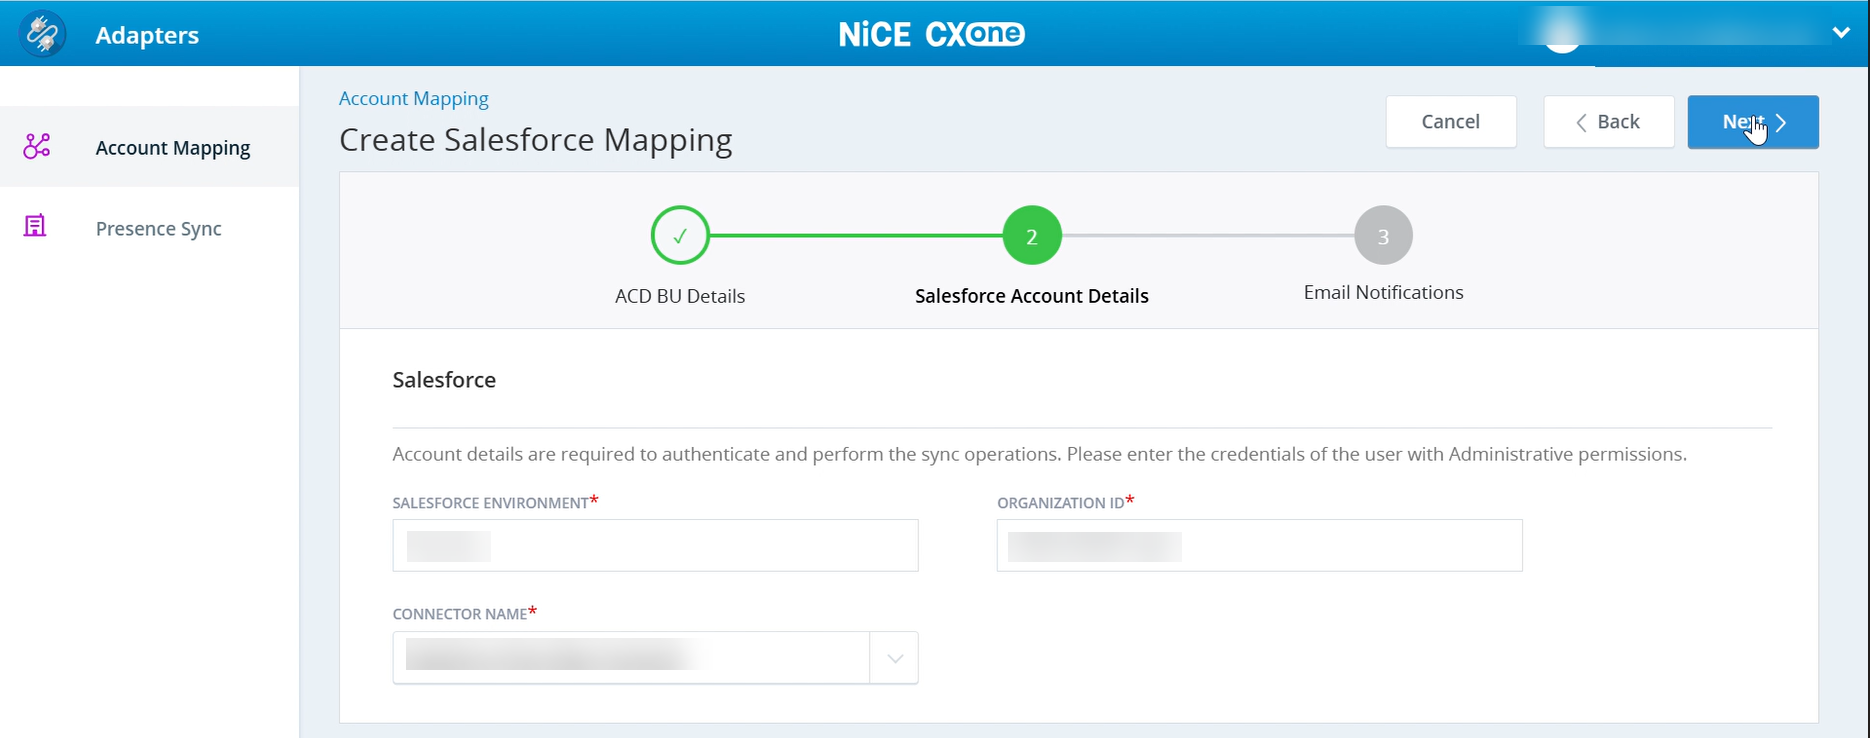
In the Salesforce Account Details section, enter the following information:
-
Salesforce Environment
-
Organization ID
-
Connector Name (select from the Connector Name dropdown list)
-
-
Click Next.
-
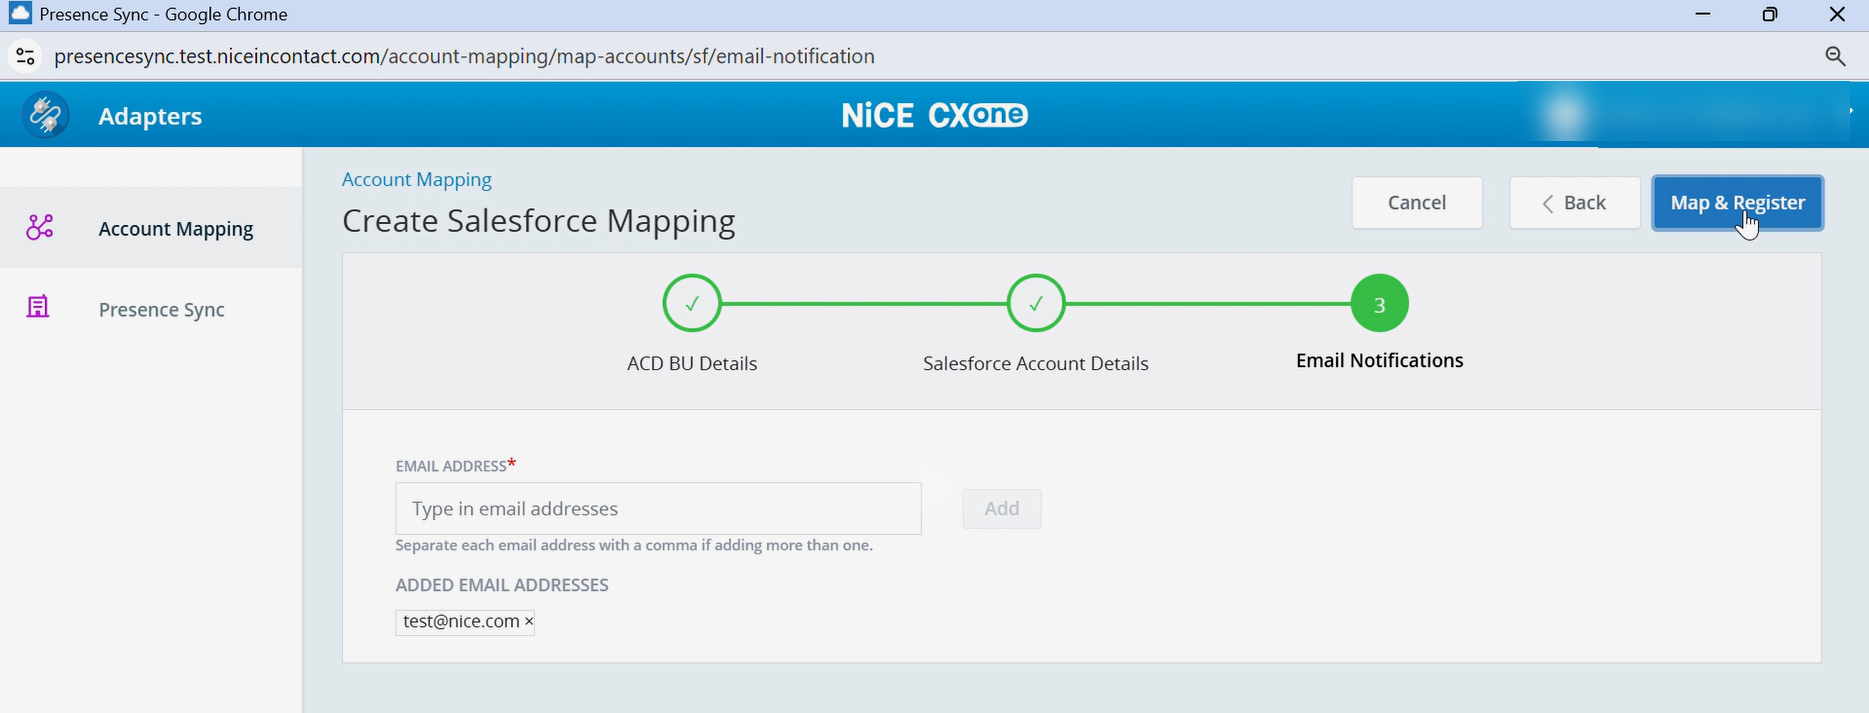
In the Email Notification section, enter the email address that should receive status and notification updates.
-
Click Add.
-
Click Map & Register.
-
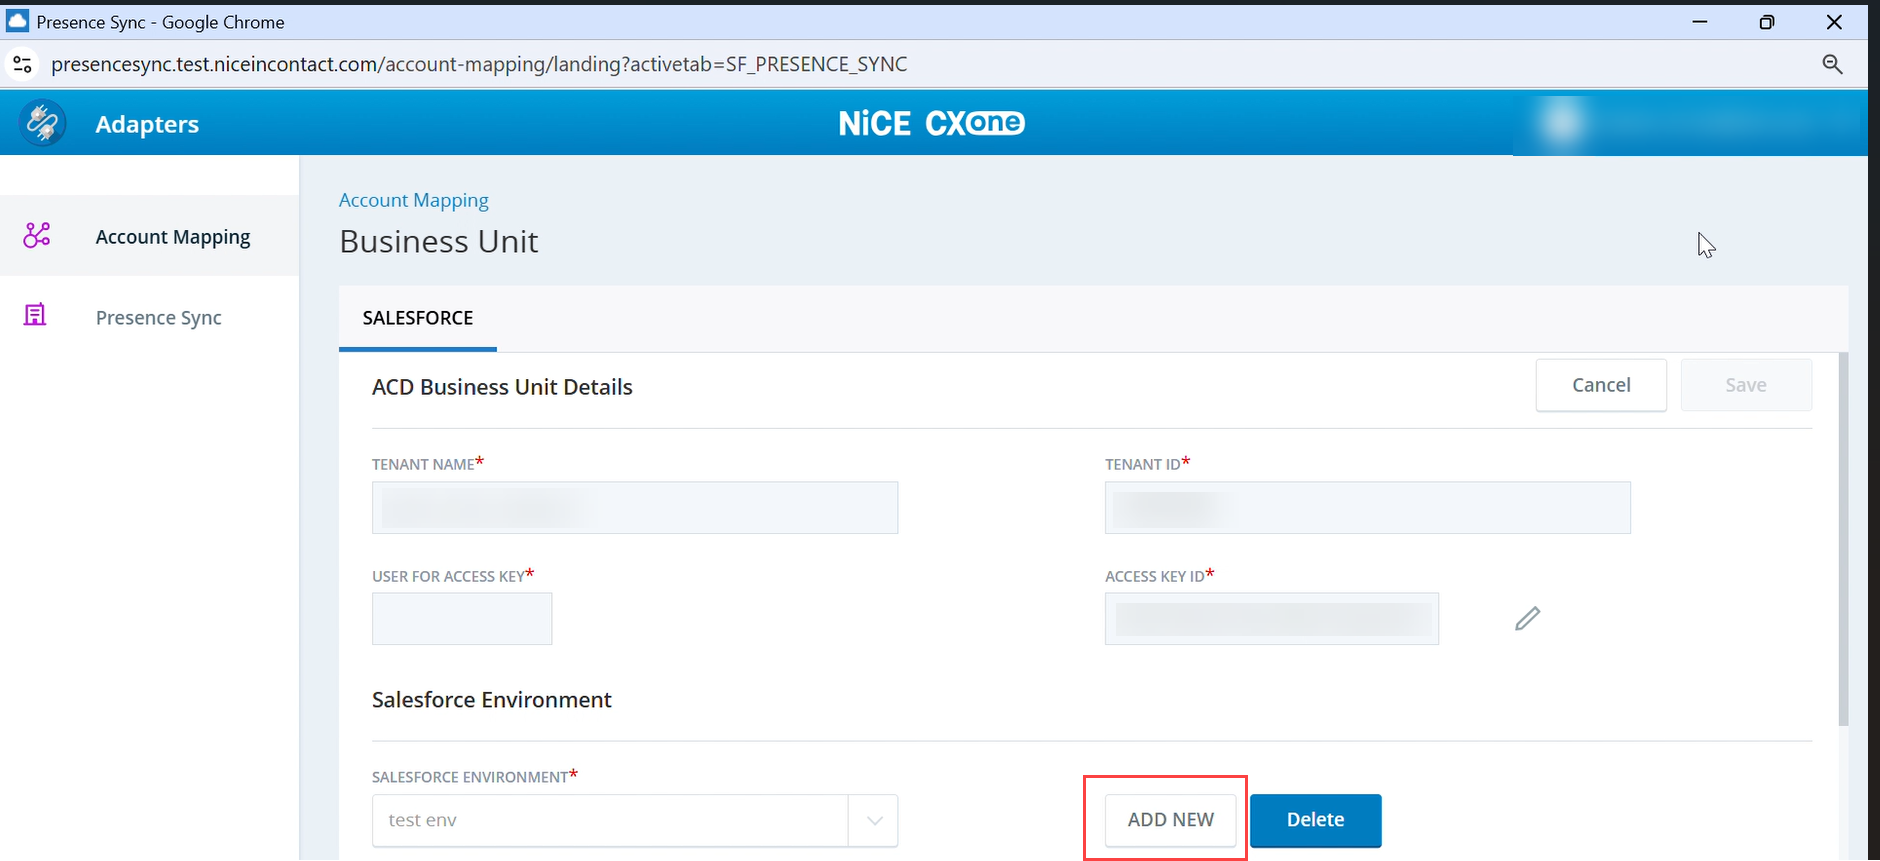
You are redirected to the Salesforce page.
-
Under Salesforce Environment, click ADD NEW next to the Salesforce Environment dropdown list.
-
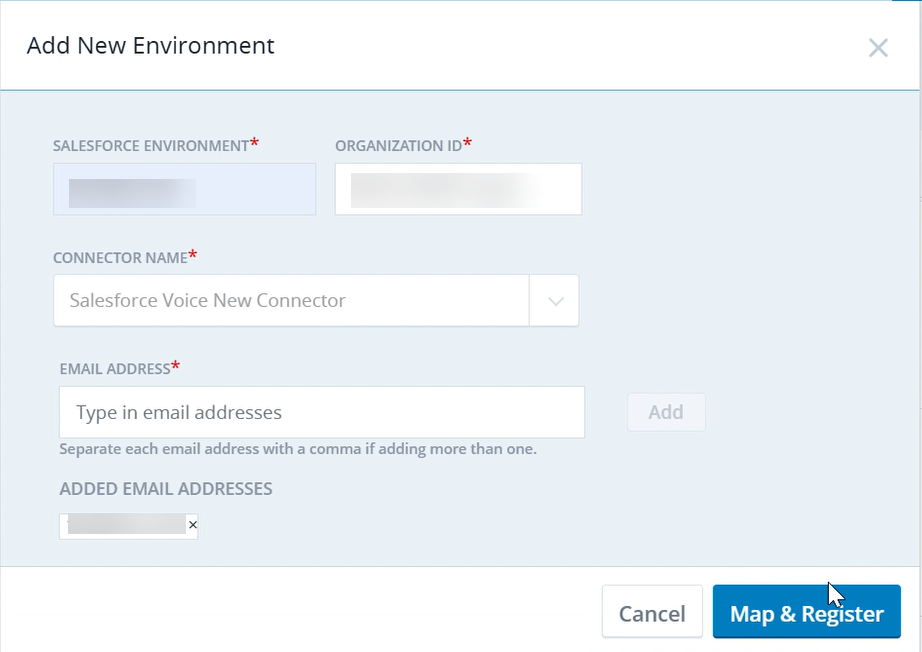
In the Add New Environment window, enter the following details:
-
Environment Name
-
Organization ID
-
Connector Name (select from the Salesforce Voice New Connector dropdown list)
-
Email Address
-
-
Click Add.
-
Click Map & Register.
Migrating Presence Mapping Authentication (Existing Customers)
Existing customers currently using legacy connected-app credentials must perform this one-time migration.
Presence mapping migration is a one-time, non-reversible action.
-
Once you save the migration configuration, legacy credential fields are permanently removed from the UI.
-
The system cannot roll back to username/password connected-app authentication.
-
Mandatory Verification: Always test and validate the Integration Hub connector and Salesforce External Client App in lower environments (sandbox/staging) before executing the migration in production.
Migration Procedure
-
Click the App Selector icon and select Adapters.
-
Click Account Mapping.
-
Locate the Switch to External client app migration toggle switch and set it to Enabled.
Enabling the toggle hides legacy credential fields and displays connector selection controls.
-
From the Connector Name dropdown list, select the required connector.
-
Click Save.
-
To add a new Salesforce environment, click ADD NEW under Salesforce Environment.
The Add New Environment window opens.
-
Enter the following details:
-
Environment Name
-
Organization ID
-
Connector Name
-
Email Address
-
-
-
Click Add.
-
Click Map & Register.