

Salesforce Case Administrator Setup
Use this topic to configure Salesforce Case end to end: the User Hub and ACD settings that support persistent work items, the connectors that link NICE CXone and Salesforce, and the Salesforce-side queue and caserouting setup.
All changes made to Salesforce Chat must remain in place. ase setupbuilds on your existing chat configuration.
Enable the BU-level license
This step must be completed by a NICE account representative, such as a Technical Account Manager (TAM) or Professional Services (PS) representative.
-
Log in to NICE CXone using your Tenant Management (TM) credentials.
-
Select your business unit (BU).
-
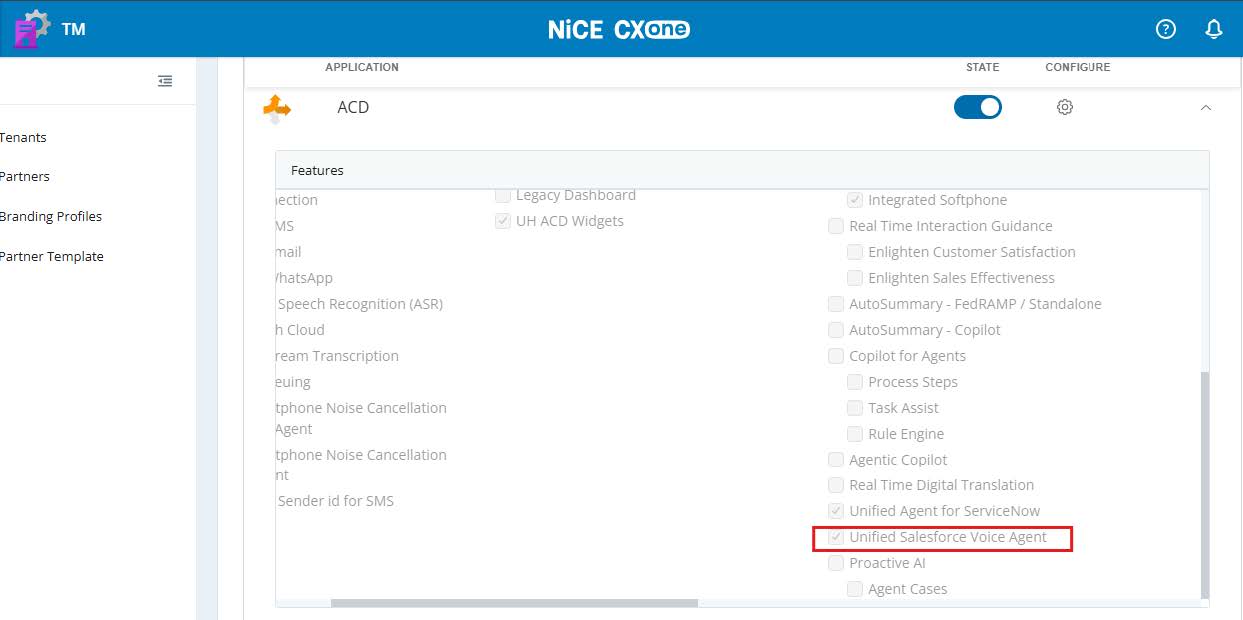
Under ACD > Features, select the Unified Salesforce Voice Agent checkbox.
Set up the connectors
In Connection Hub, navigate to Integrations > Integration Hub, and then click Add Template to create the NICE CXone and Salesforce connectors. When configuring the connectors, use the values that correspond to your environment. The examples in this guide use the NA1 production environment; replace these values with those for your own region and Salesforce organization.
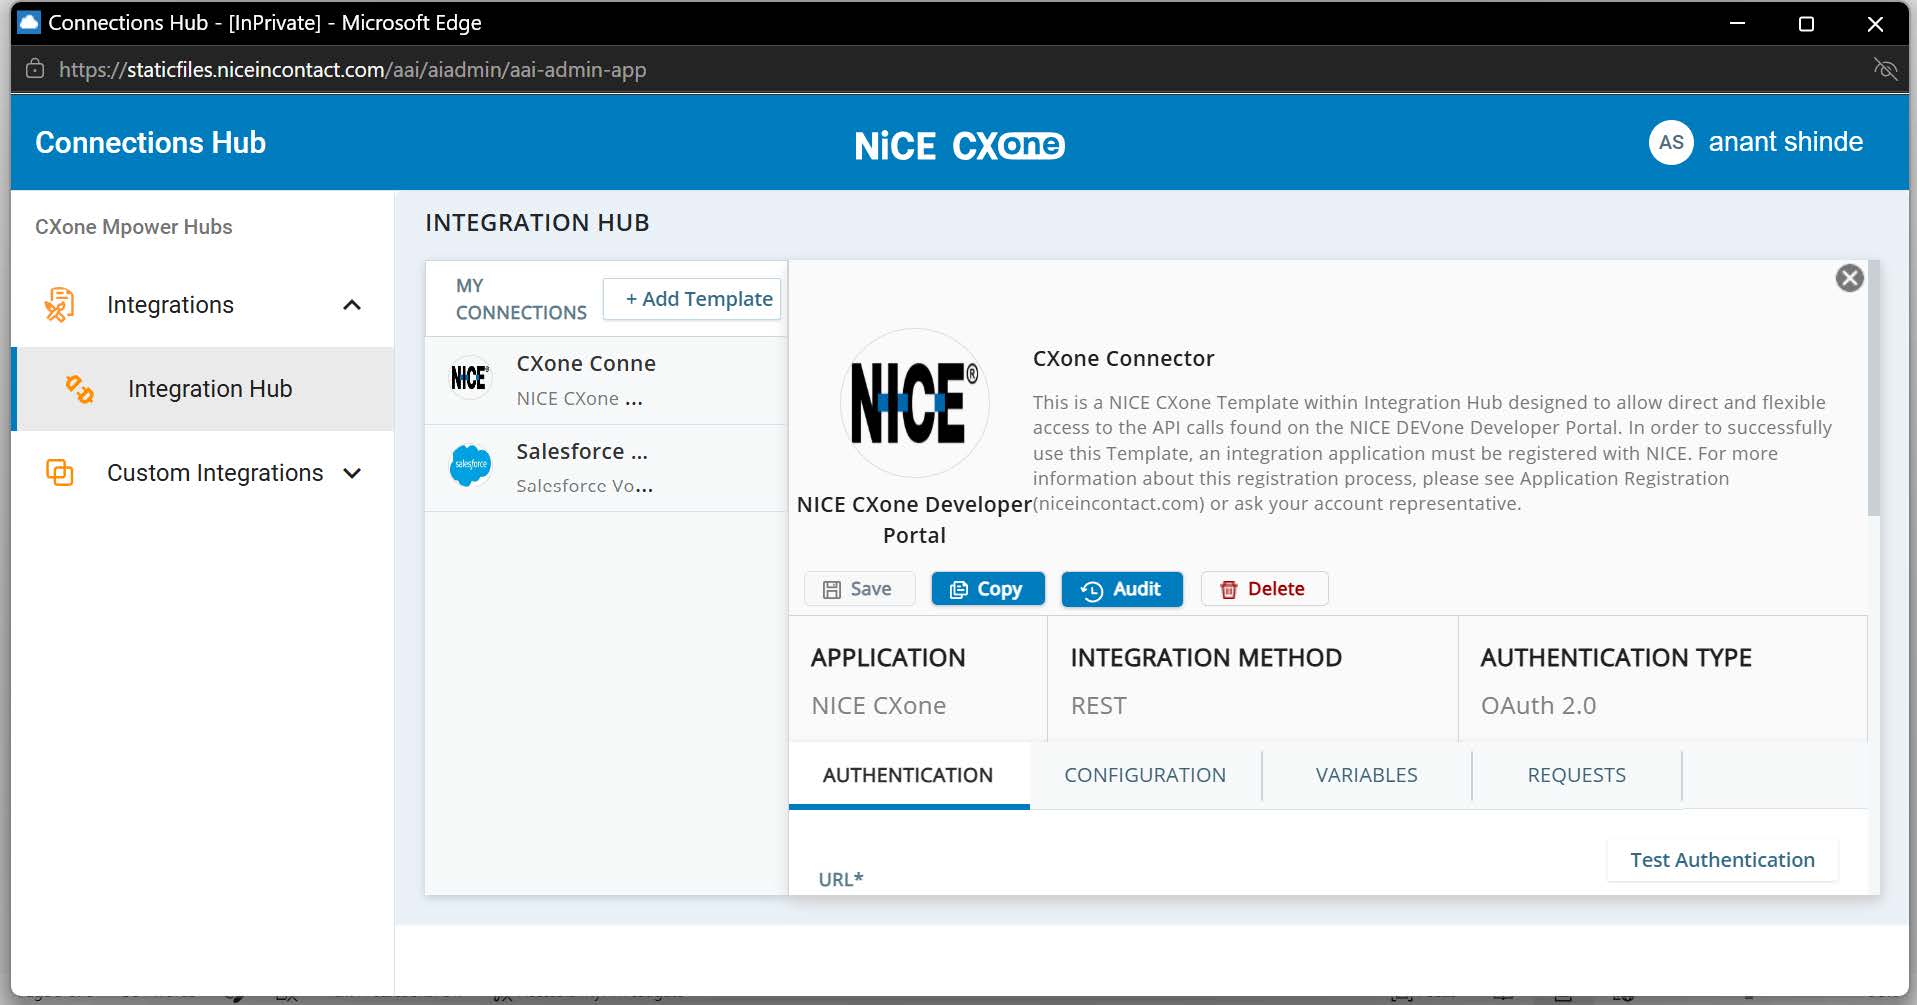
NiCE CXone connector
-
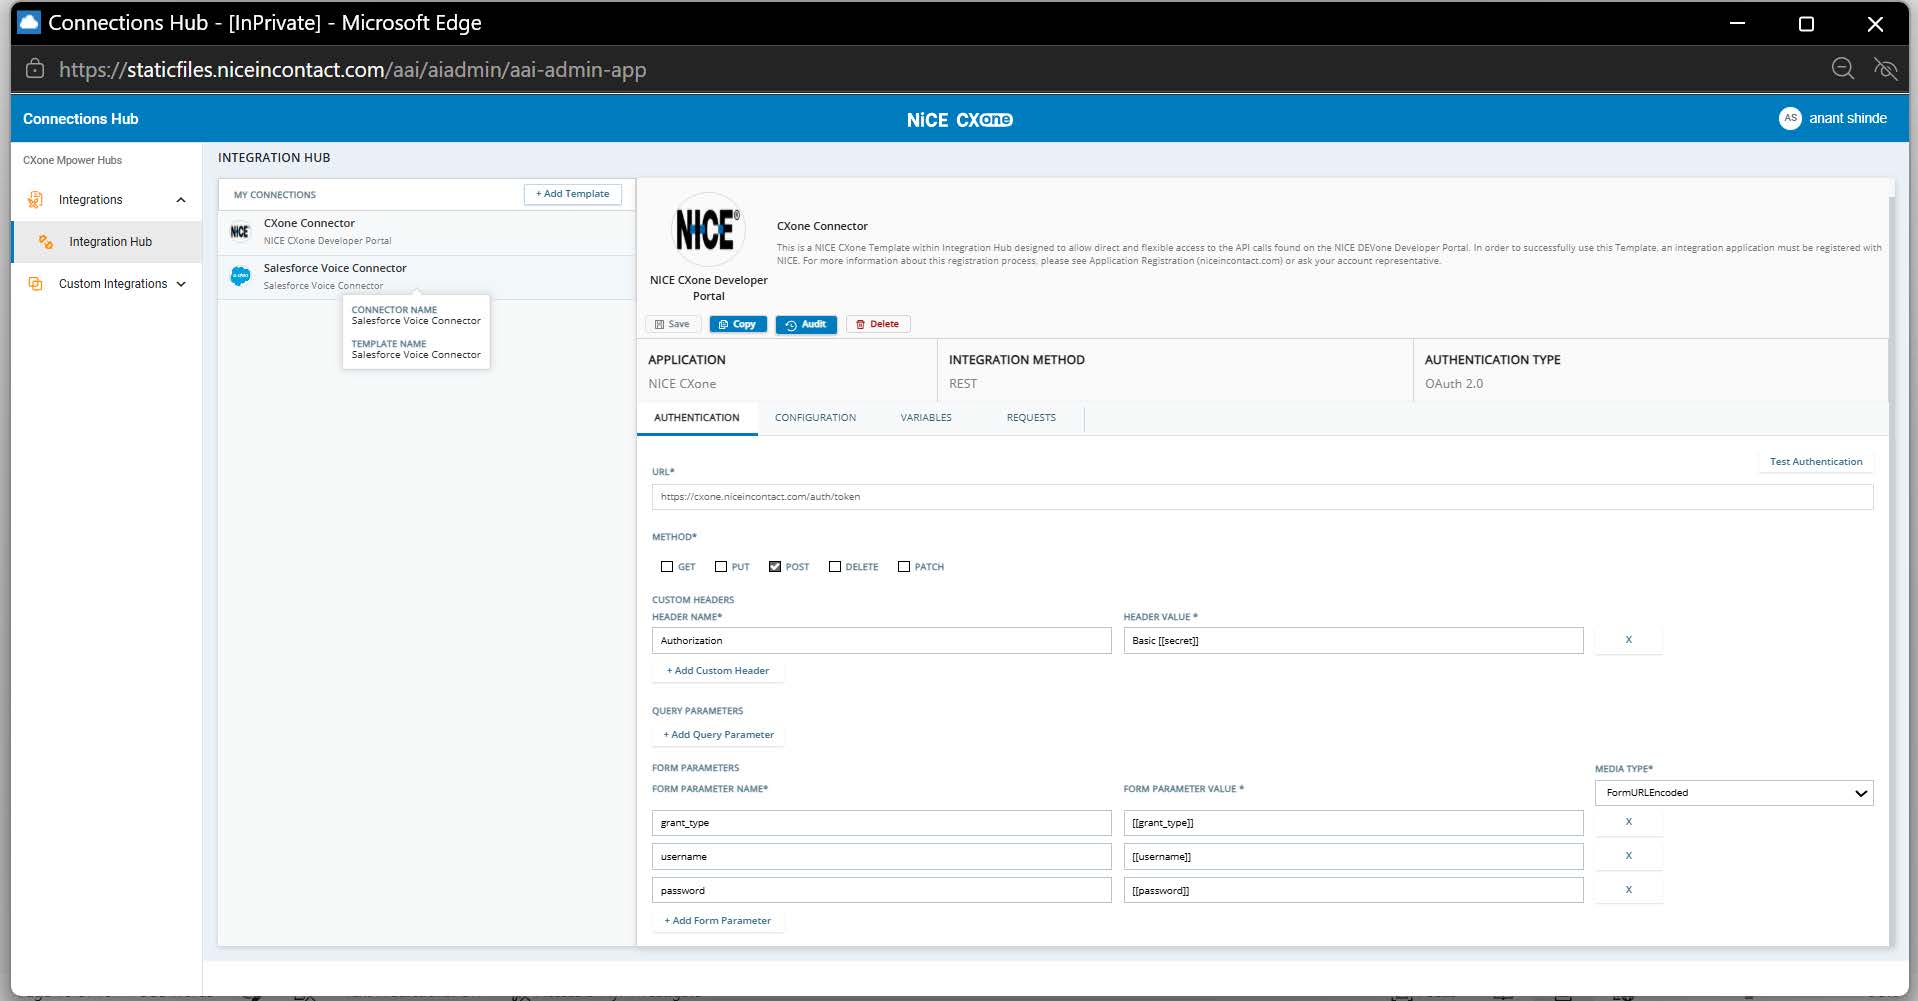
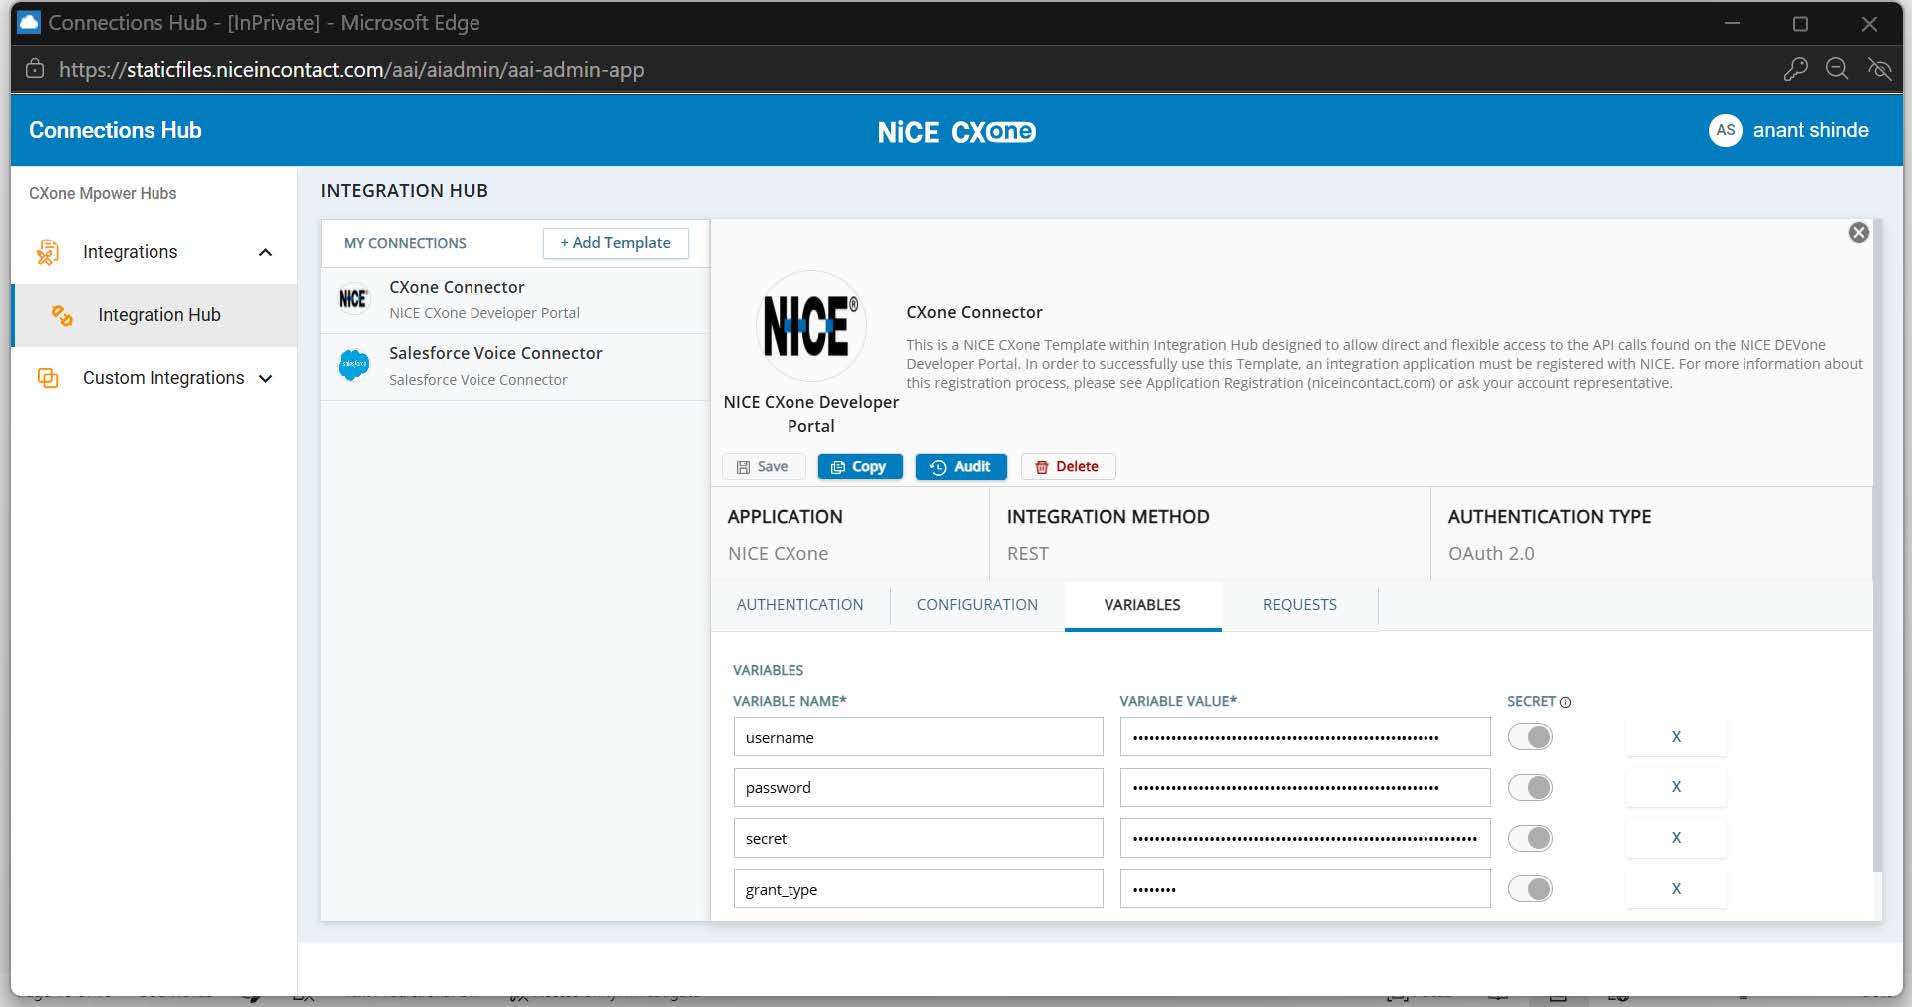
Open the CXone connector and, on the Authentication tab, enter:
Field Value URL https://cxone.niceincontact.com/auth/token Method POST Custom header Authorization = Basic [[secret]] Form parameter grant_type = [[grant_type]] Form parameter username = [[username]] Form parameter password = [[password]] -
On the Variables tab, add the following variables: username, password, secret, and grant_type.
-
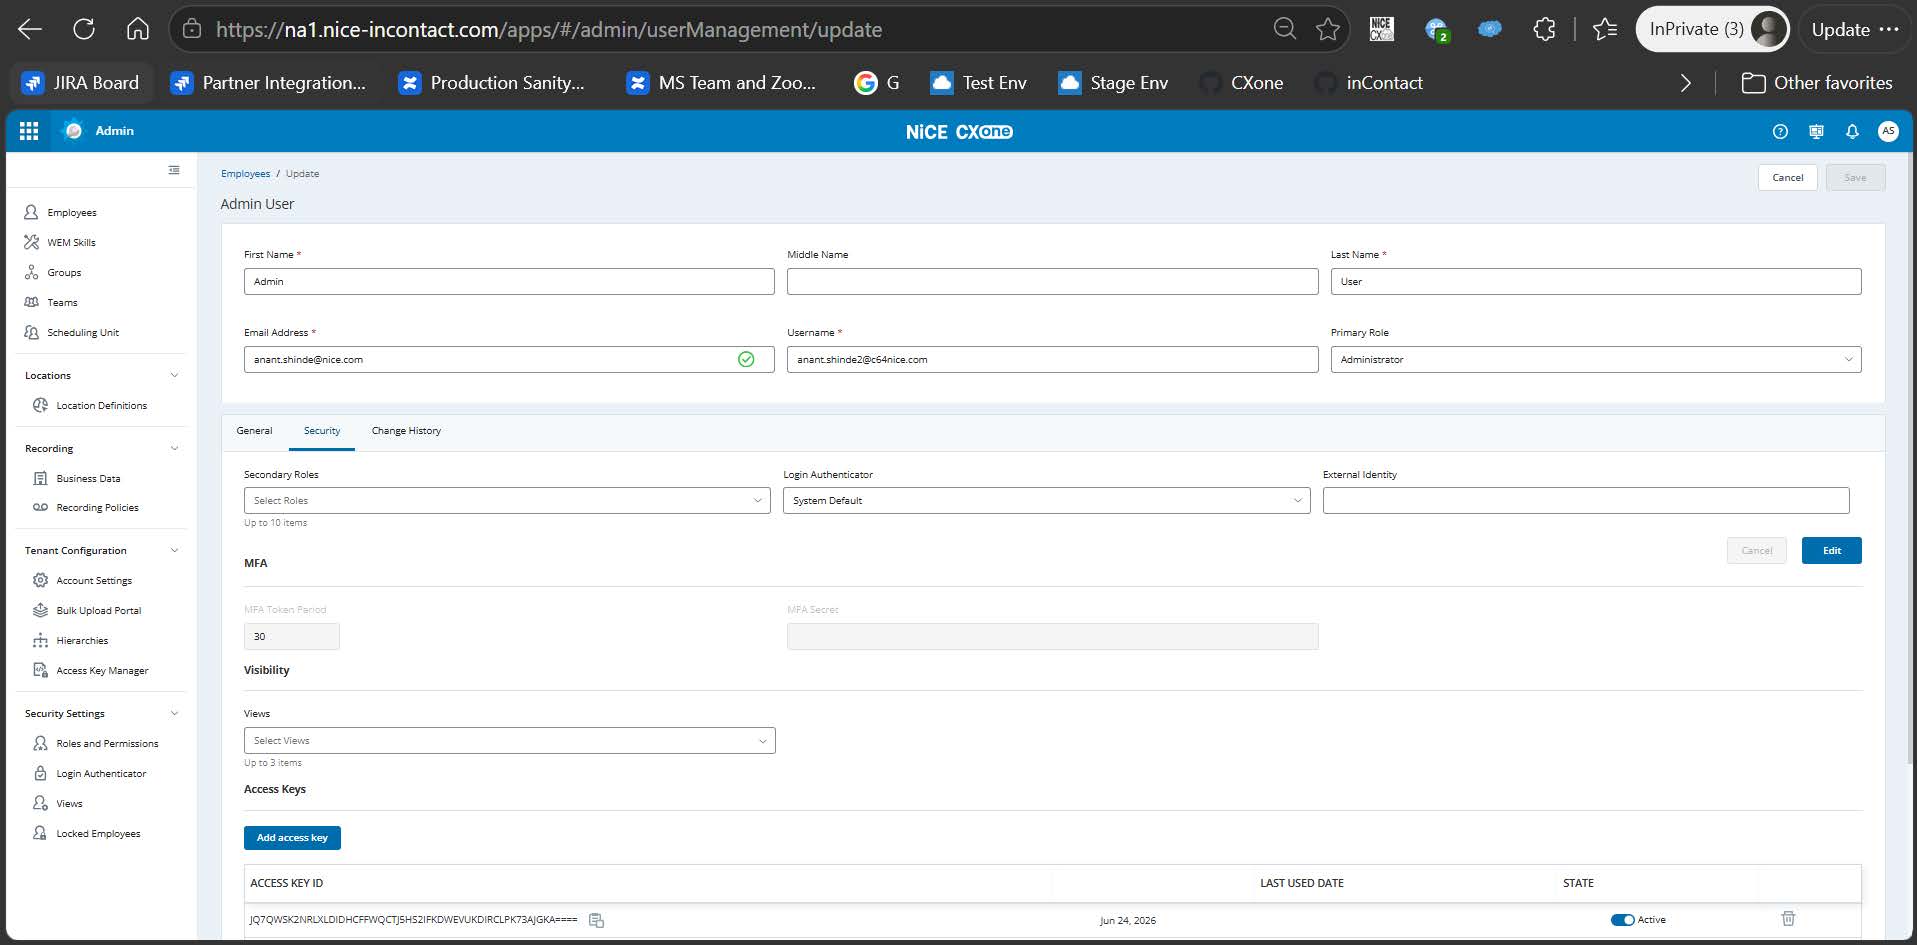
username and password: In Admin > Employees, open the admin user, go to the Security tab, and click Add access key. Use the generated CCESS KEY ID as the username and the SECRET ACCESS KEY as the password. The secret access key is displayed only once, so copy and store it securely immediately after it is generated.
-
secret: Encode the region-specific client_id:client_secret pair using Base64 format (base64(client_id:client_secret)). Use the values applicable to your region.
These values are constant per production region.
-
grant_type: Enter password. This value is constant and should be used for all configurations.
 View image
Save the connector once all values are entered. You can also save midway to preserve your entries if you need to switch tabs.
-
Salesforce connector
-
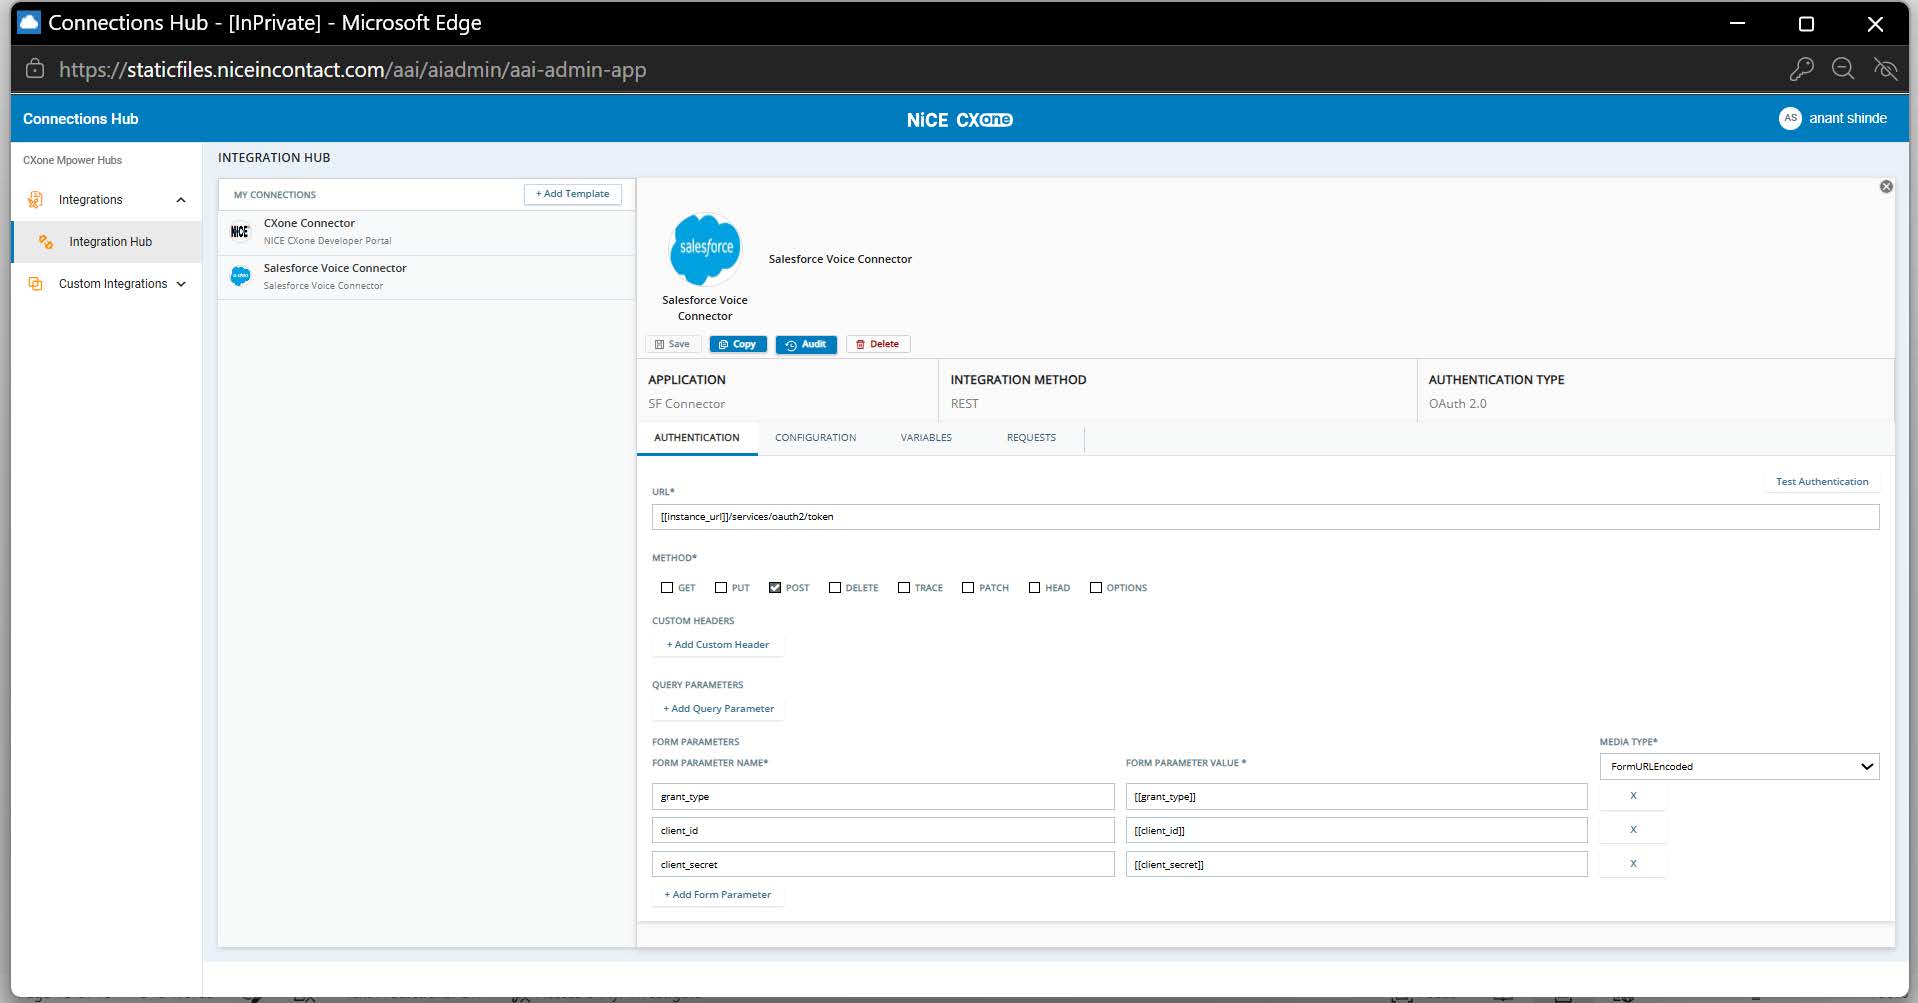
Open the Salesforce connector and, on the Authentication tab, enter:
Field Value URL [[instance_url]]/services/oauth2/token Method POST Custom header Authorization = Basic [[secret]] Form parameter grant_type = [[grant_type]] Form parameter client_id = [[client_id]] Form parameter client_secret = [[client_secret]] -
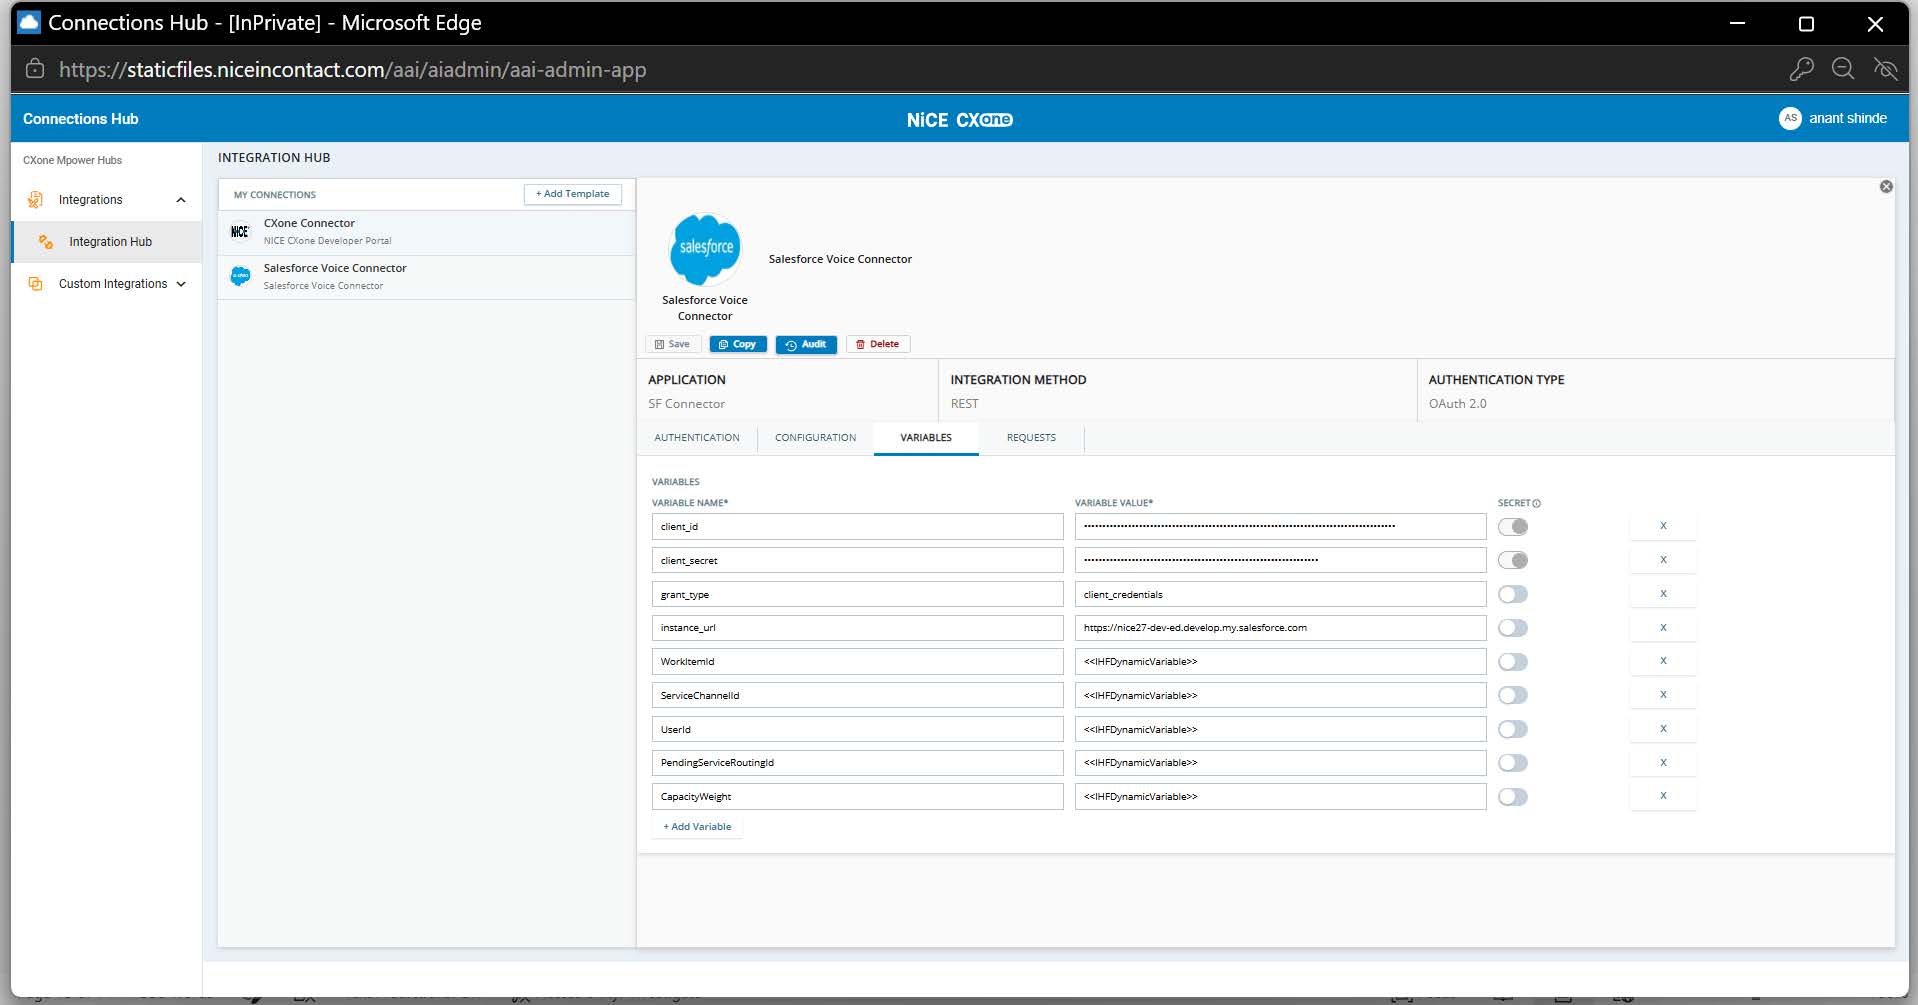
On the Variables tab, add the following variables:
Field Value client_id, client_secret From the SF Digital External Client App created in Salesforce. See the Salesforce-side setup documentation for the steps to obtain these values. grant_type client_credentials instance_url Your Salesforce base URL, for example https://nice27-deved.develop.my.salesforce.com WorkItemId, ServiceChannelId, UserId,PendingServiceRoutingId, CapacityWeight <<IHFDynamicVariable>> — leave as shown; these are populated dynamicallyat runtime. Form parameter client_id = [[client_id]] Form parameter client_secret = [[client_secret]] -
On the Requests tab, add the three requests below:
-
Get Queues
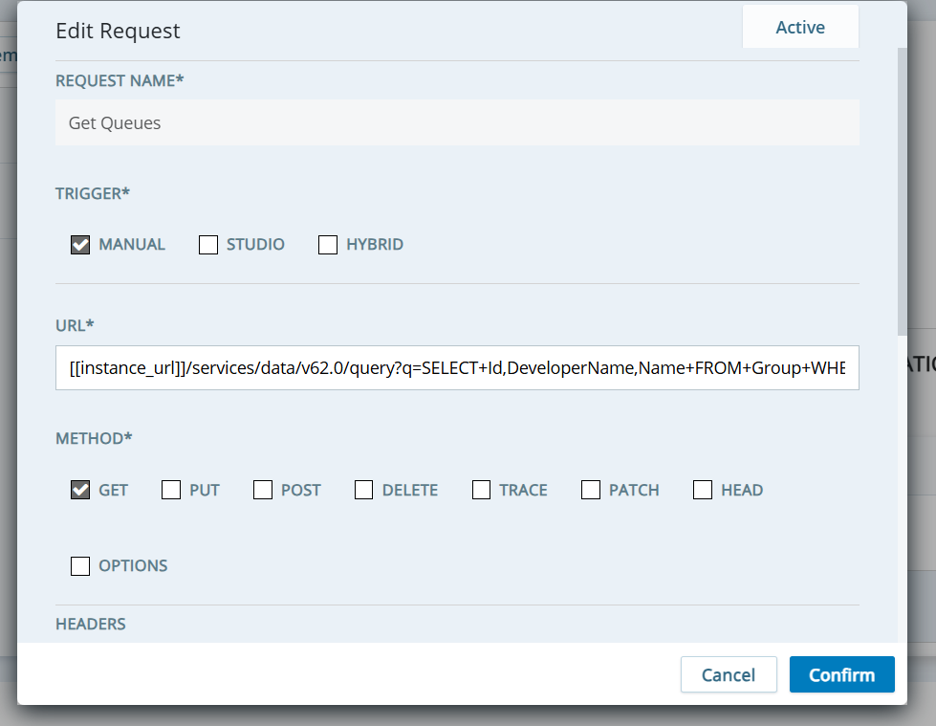
Field Value Trigger Manual Method GET URL [[instance_url]]/services/data/v62.0/query?q=SELECT+Id,
DeveloperName,Name+FROM+Group+WHERE+Type='Queue'.
-
Assign Agent Work
Field Value Trigger Hybrid Method POST URL [[instance_url]]/services/data/v61.0/sobjects/AgentWork
-
Body (Media Type: ApplicationJson):
{ "WorkItemId": "[[WorkItemId]]", "ServiceChannelId": "[[ServiceChannelId]]", "UserId": "[[UserId]]", "PendingServiceRoutingId": "[[PendingServiceRoutingId]]", "CapacityWeight": "[[CapacityWeight]]"}
-
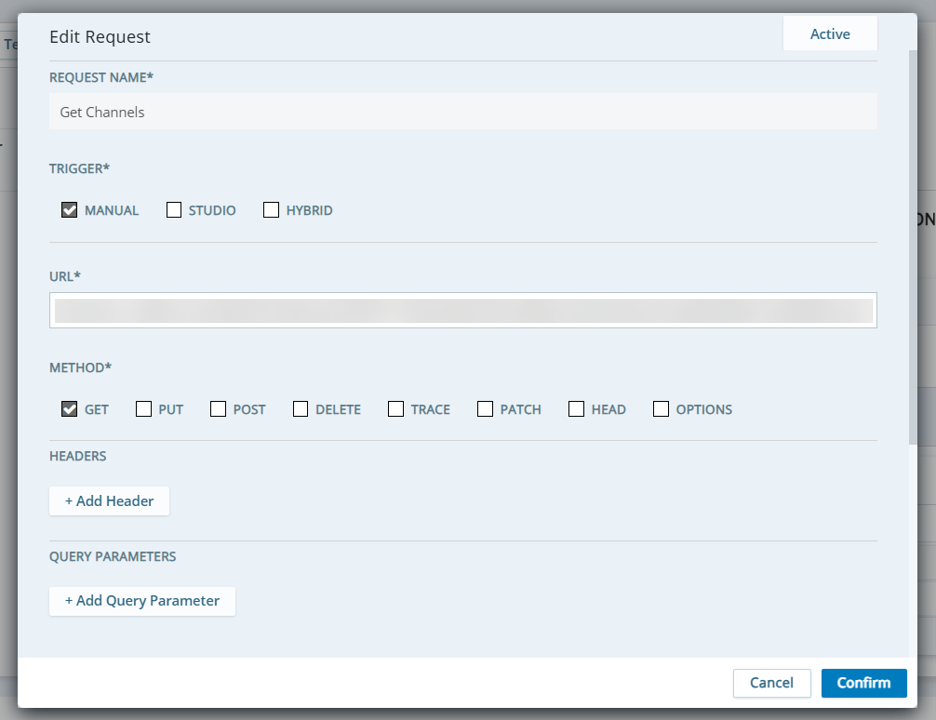
Get Channels
Field Value Trigger Manual Method GET URL [[instance_url]]/services/data/v62.0/query?q=SELECT+Id,DeveloperName,MasterLabel,HasAutoAcceptEnabled,
CreatedDate,LastModifiedDate,RelatedEntity+FROM+ServiceChannel
-
Once all three requests are added, click Test to verify each one, then save the connector.
-

Create the persistent work item skill
-
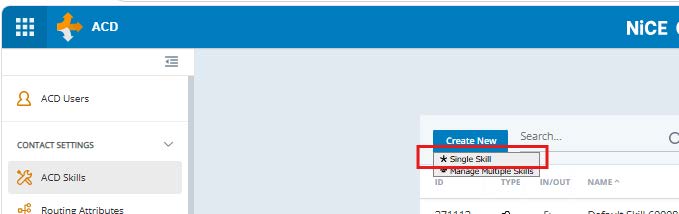
Go to ACD > ACD Skills.
-
Click Create New, then select Single Skill.
-
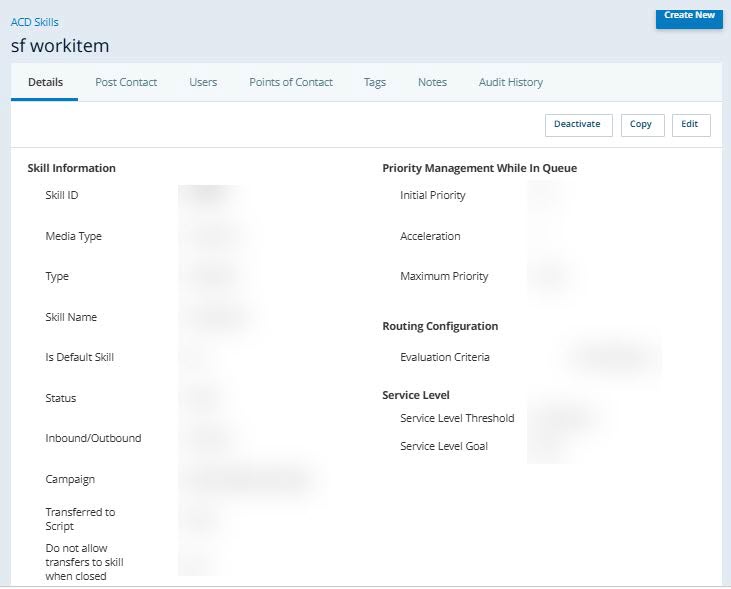
Enter the skill details, then set Media Type to Work Item and Type to Persistent.
-
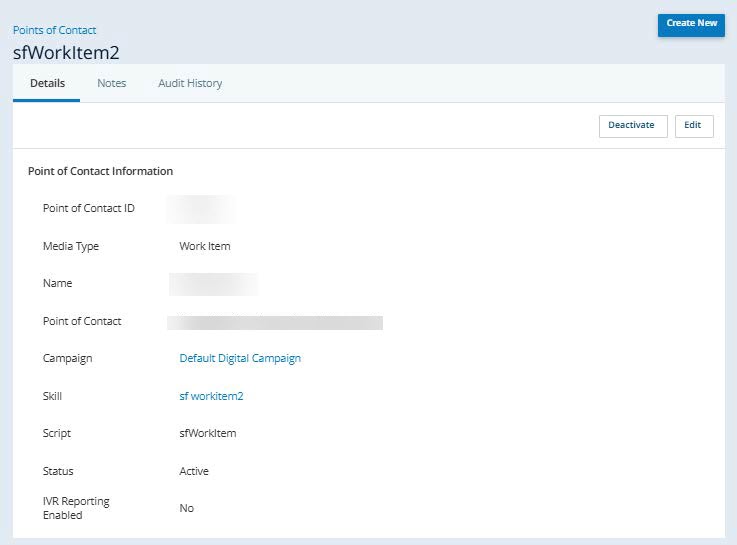
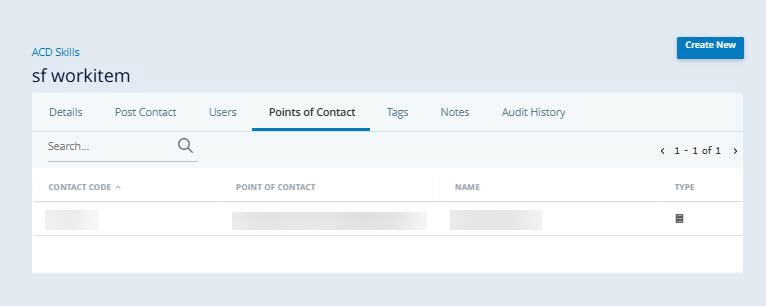
Attach a point of contact to the skill.
The skill selected in the Skill field is the standard skill created during the Create Inbound Skill procedure.
-
On the skill's Points of Contact tab, verify that the point of contact is attached.
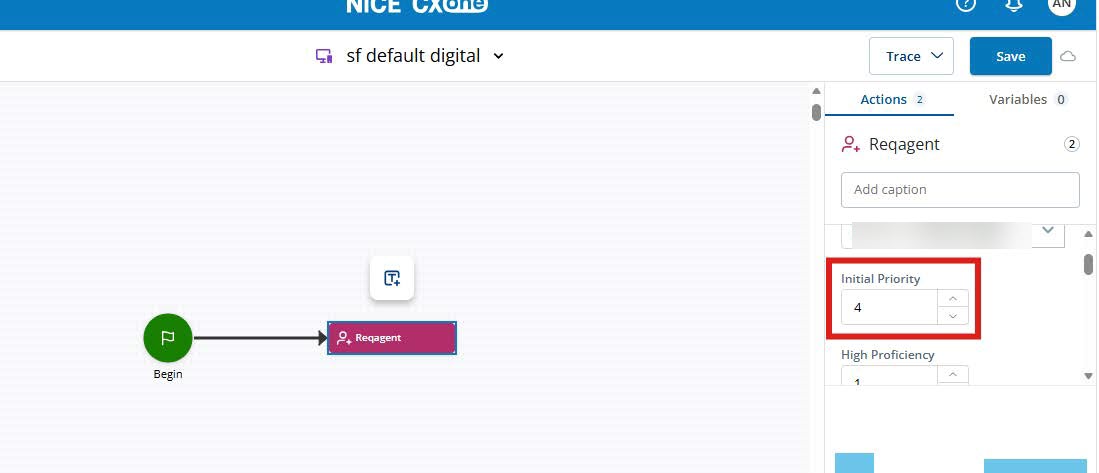
When creating the point of contact in the script, set the Initial Priority value to a number greater than 0 to ensure the point of contact is eligible for routing and processing.
Update ACD user contact settings
-
Go to ACD > ACD Users.
-
Select a user.
-
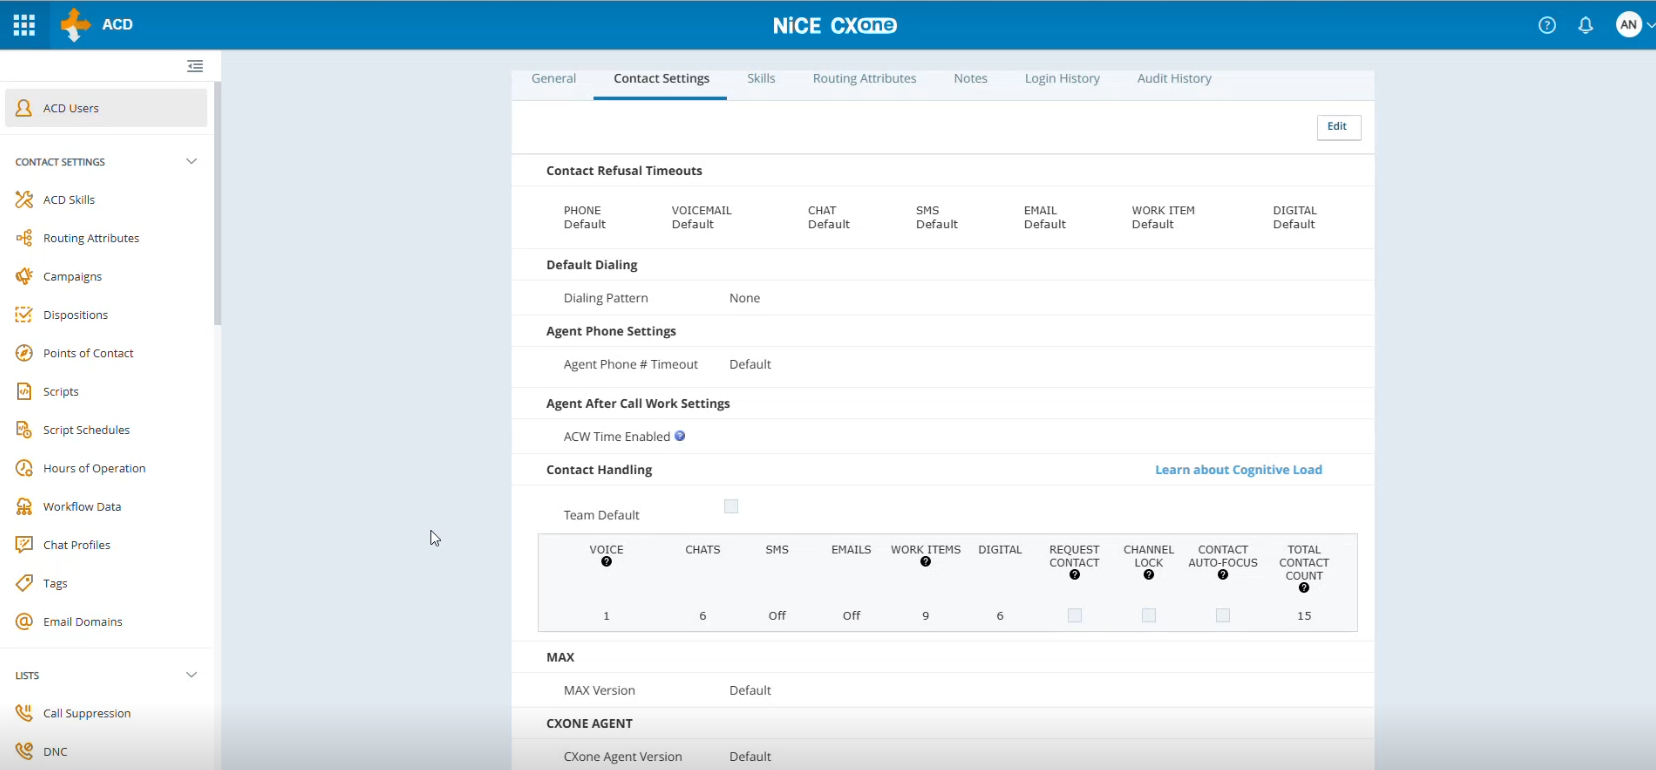
Open Contact Settings.
-
Set Work Items to a value greater than 5.
Enable entity toggles in WebAdmin
-
Log in to WebAdmin.
-
Navigate to Cluster Overview.
-
Select the required cluster.
-
Navigate to VC.
-
Business Unit > Options > BU Extended Settings, and then select the business unit.
-
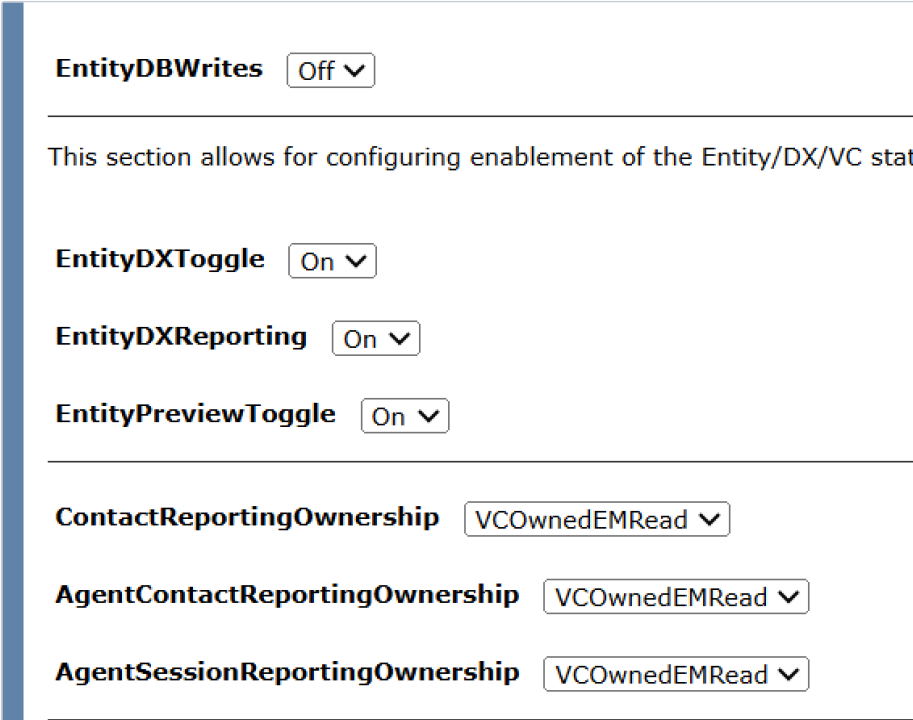
Enable the following settings:
-
EntityDXToggle = ON
-
EntityDXReporting = ON
-
Map the Salesforce account
Refer to the Salesforce Account Mapping section on the Salesforce Digital Chat – User Hub Configuration Guide page.
Create Presence Status
-
In Salesforce, go to Setup > Presence Statuses.
-
Click New. or select an existing presence status to edit.
-
Under Selected Channels, add Case.
Create a queue
-
Go to Setup > Queues and click New.
-
In the Label field, enter a queue name and ensure it ends with the ACD persistent work item skill ID (for example, Ext_Routing_395388).
-
Select the appropriate Routing Configuration, add the Case object, assign the required users to the queue, and then click Save.
A single Salesforce queue supports either Messaging or Case, not both. Create separate queues if you need to route both channel types.
Configure Change Data Capture
Configure Change Data Capture for case-related entities so that case updates can trigger work item routing.
-
In Salesforce, go to Setup >Change Data Capture.
-
Move the following entities from Available Entities to Selected Entities:
-
Case
-
Pending Service Routing
-
Agent Work
-
-
Click the Add arrow to move each entity to the Selected Entities list.
-
Click Save.
-
Digital Case supports the Email, Phone, and Web case origins only.
-
After a case is created, change the case owner to the target queue. This triggers NiCE CXone to create the work item.
-
You can change the case owner to a user or a queue only.
-
A Salesforce queue must be dedicated to either Messaging or Case — the same queue cannot serve both channel types.
Configure Email-to-Case in Salesforce
Enable Email-to-Case
-
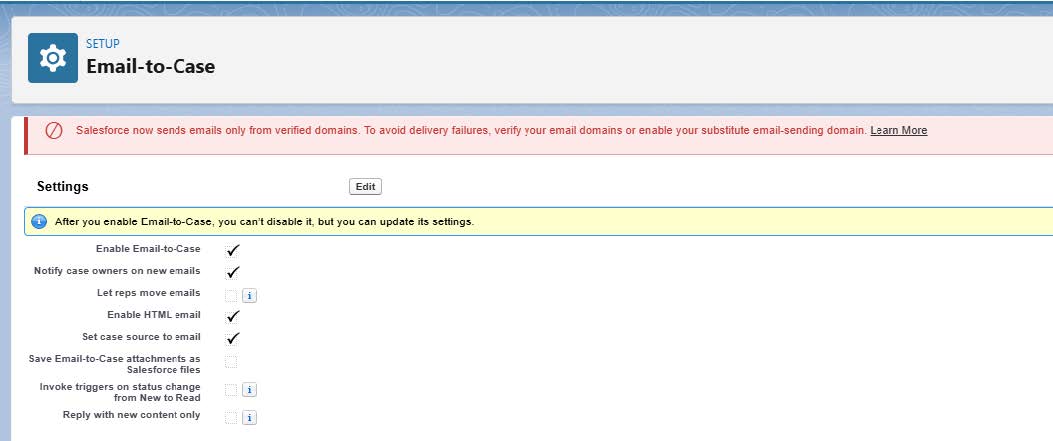
In Salesforce Setup, search for and select Email-to-Case.
-
Select Edit.
-
Under Settings, select the following checkboxes:
-
Enable Email-to-Case
-
Notify case owners on new emails
-
Enable HTML email
-
Set case source to email
-
-
Under Send Emails from Cases, select the following checkboxes:
-
Insert email threading token in email subject
-
Insert email threading token in email body
-
Use email headers for threading
-
-
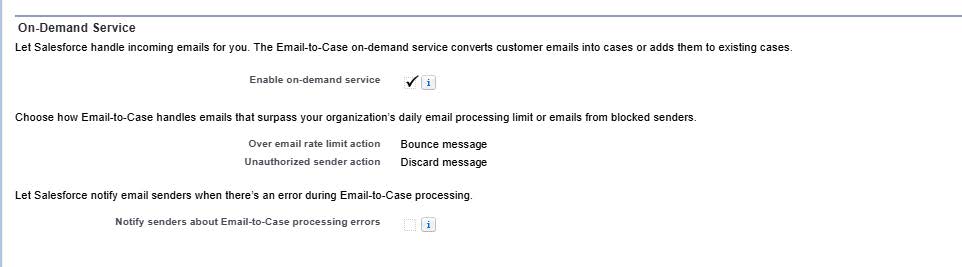
Under On-Demand Service, select Enable on-demand service.
-
Set Over email rate limit action to Bounce message.
-
Set Unauthorized sender action to Discard message.
-
Select Save.
After you enable Email-to-Case, you can't disable it. You can only update its settings.

Create an Email-to-Case routing address
-
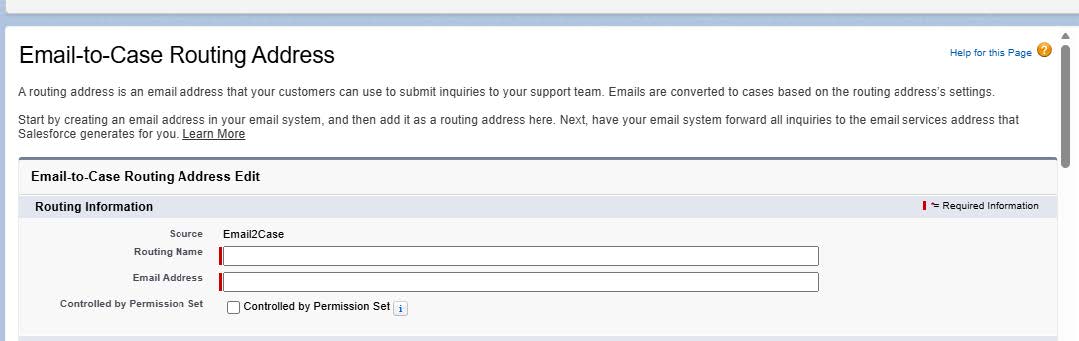
On the Email-to-Case setup page, in the Routing Addresses section, select New.
-
From the dropdown list, select Email2Case.
-
In Routing Name, enter a name that identifies this routing address, for example, Nice Support.
-
In Email Address, enter the destination address that customers send support requests to, for example, sharmavikas@rediffmail.com. This is the To address.
-
Under Email Settings, in Accept Email From, enter the email addresses or domains that Salesforce accepts email from.
-
Under Task Settings, select Create Task from Email.
-
Set Task Status to Not Started.
-
Under Case Settings, configure the following fields:
-
Case Owner: Select Queue, then select the queue that your administrator specifies, for example, Ext_Routing_Ash_371115.
-
Case Priority: Select the priority that your administrator specifies, for example, Medium.
-
Case Origin: Select Email.
-
-
Leave Omni-Channel Flow and Fallback Queue under Flow Settings blank. These fields aren't required for this configuration.
-
Select Save.





Verify the routing address
-
After you save the routing address, Salesforce generates an Email Services Address.
-
Copy the Email Services Address.
-
In your email system, set up a forwarding rule that sends all messages received at your routing email address (for example, sharmavikas@rediffmail.com) to the Email Services Address.
- Check the inbox for your routing email address for a verification email from Salesforce.
- Open the verification email and select the confirmation link to verify the address.
-
Return to the Routing Addresses list on the Email-to-Case setup page.
-
Confirm that the Verification column shows Verified for your routing address.
