Salesforce Digital Chat – User Hub Configuration Guide
Overview and Setup Scope
This document describes the end-to-end procedure for configuring Salesforce Digital Chat within NiCE CXone User Hub. Follow these steps to establish integration connectivity, provision custom digital chat channels (BYOC), assign agent routing, and map Salesforce environments to NiCE CXone.
Integration Box Setup
The Integration Box establishes the foundational gateway for the Salesforce Voice integration. This task is a one-time activity executed for each production region (such as NA1).
Ensure regional Integration Box provisioning is complete and verified before proceeding with BU-level configuration.
BYOC Digital Chat Channel Creation
Perform the following steps to create a Bring Your Own Channel (BYOC) Digital Chat channel within your Business Unit.
Create Inbound Skill and Studio Script
Create a Digital Inbound Skill:
-
Go to ACD > ACD Skills.
-
Click Create New, then select Single Skill.
-
Enter the Skill information.
-
Click Create.
-
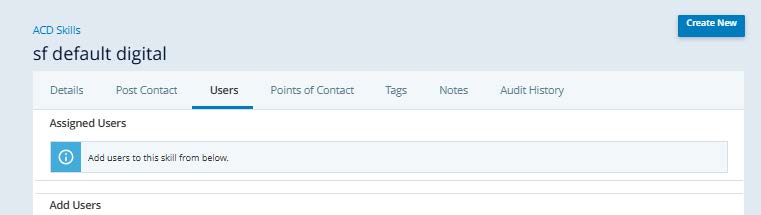
Navigate to the Users tab and ensure not to assign users to this skill at this stage.
-
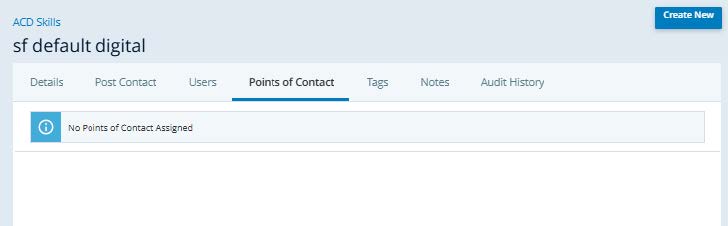
Navigate to the Point of Contact tab and ensure not to assign a Point of Contact (POC).
 View image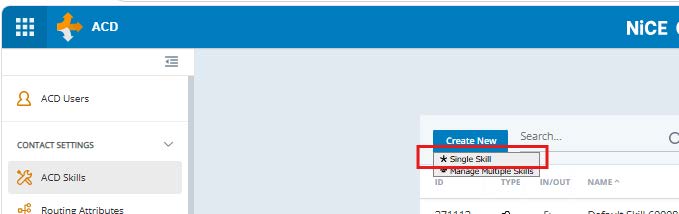
Create and Link the Digital IB Studio Script:
-
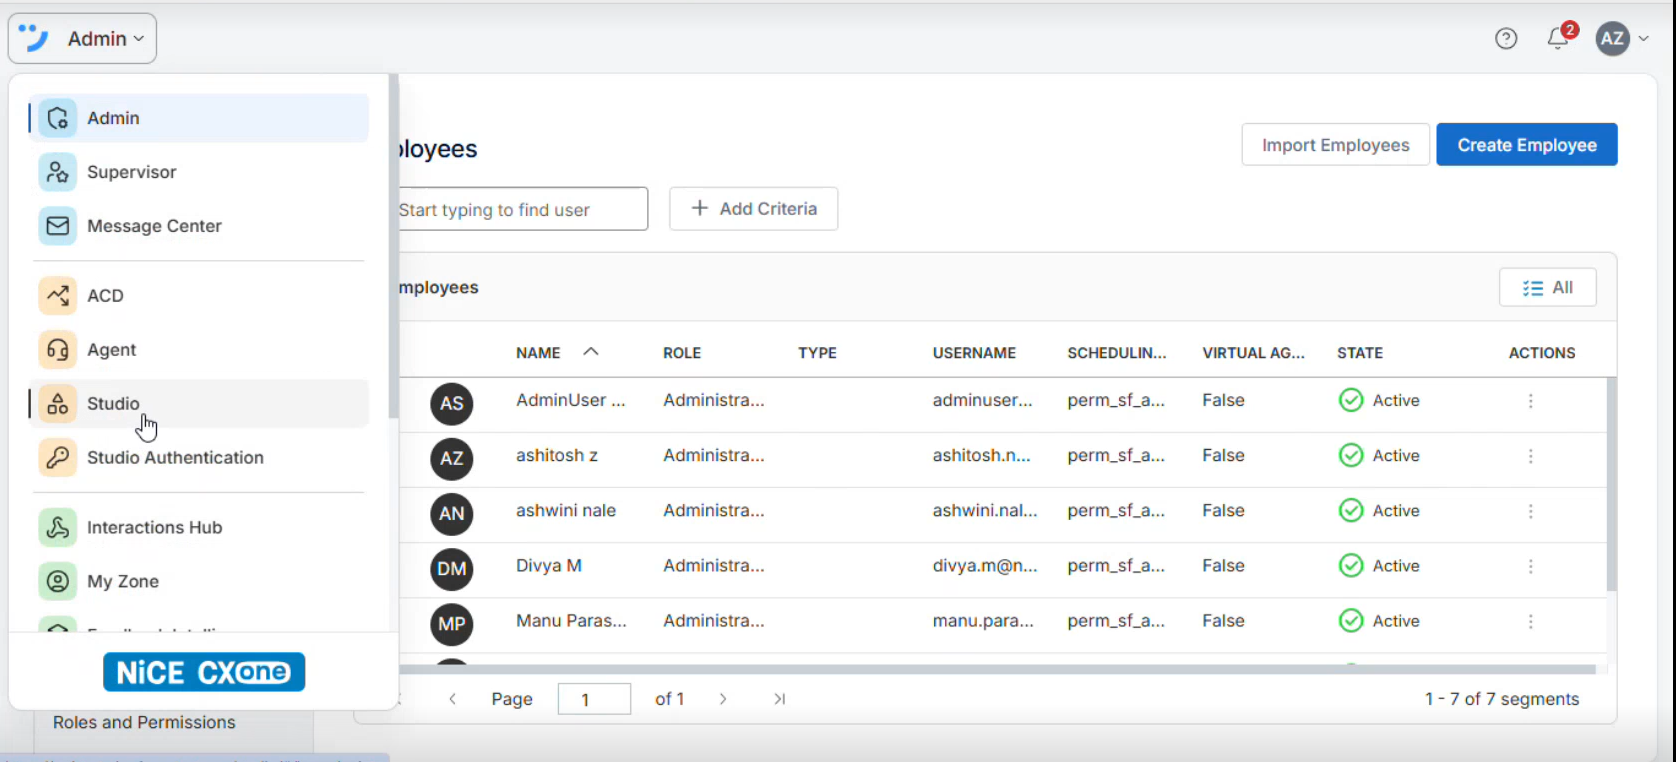
Open NICE CXone Admin and navigate to Studio.
-
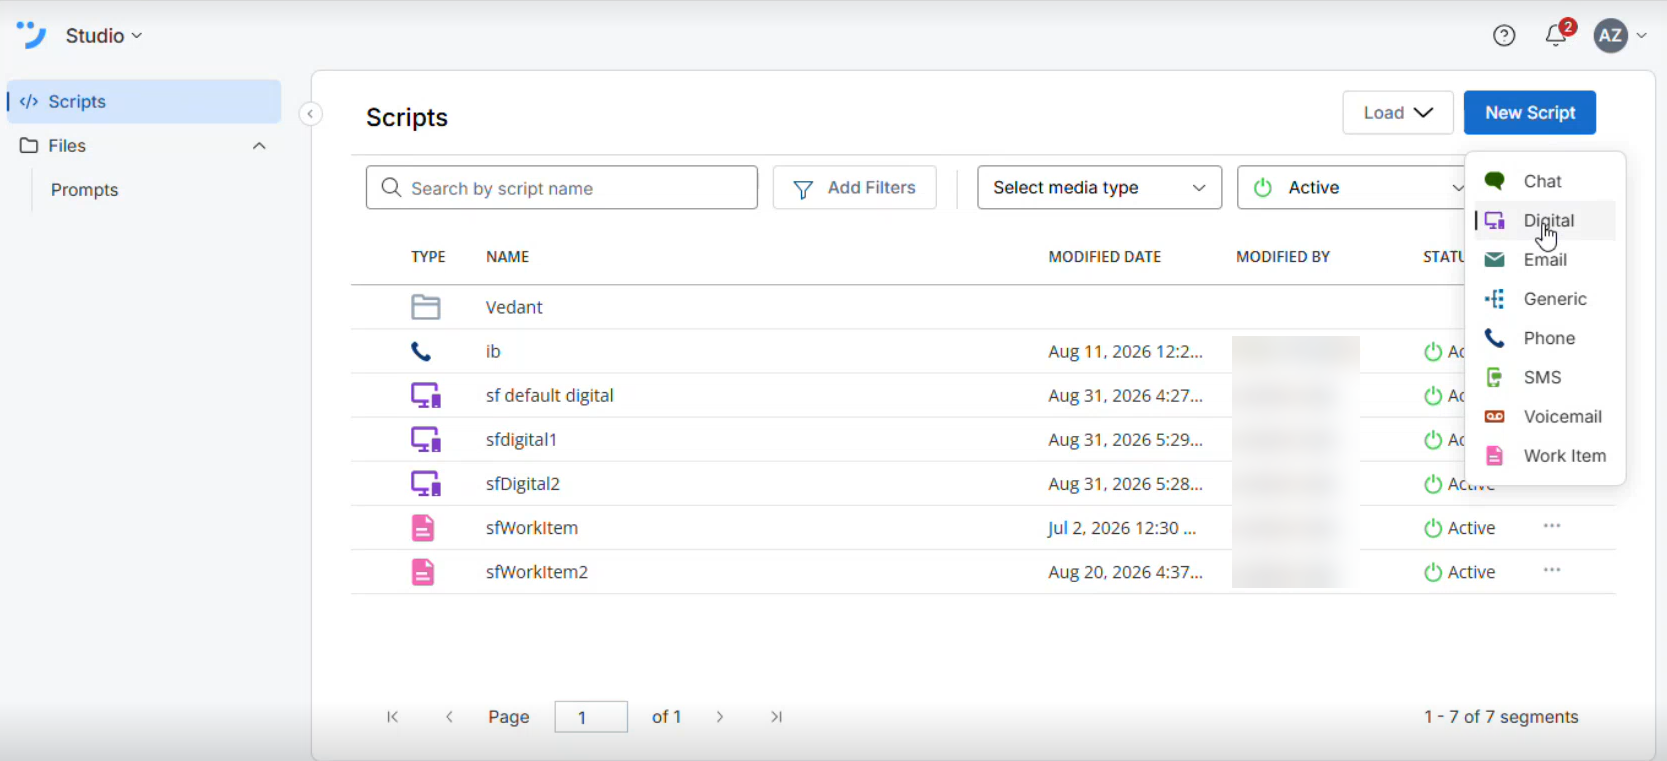
On the Scripts page, click New Script and select Digital.
-
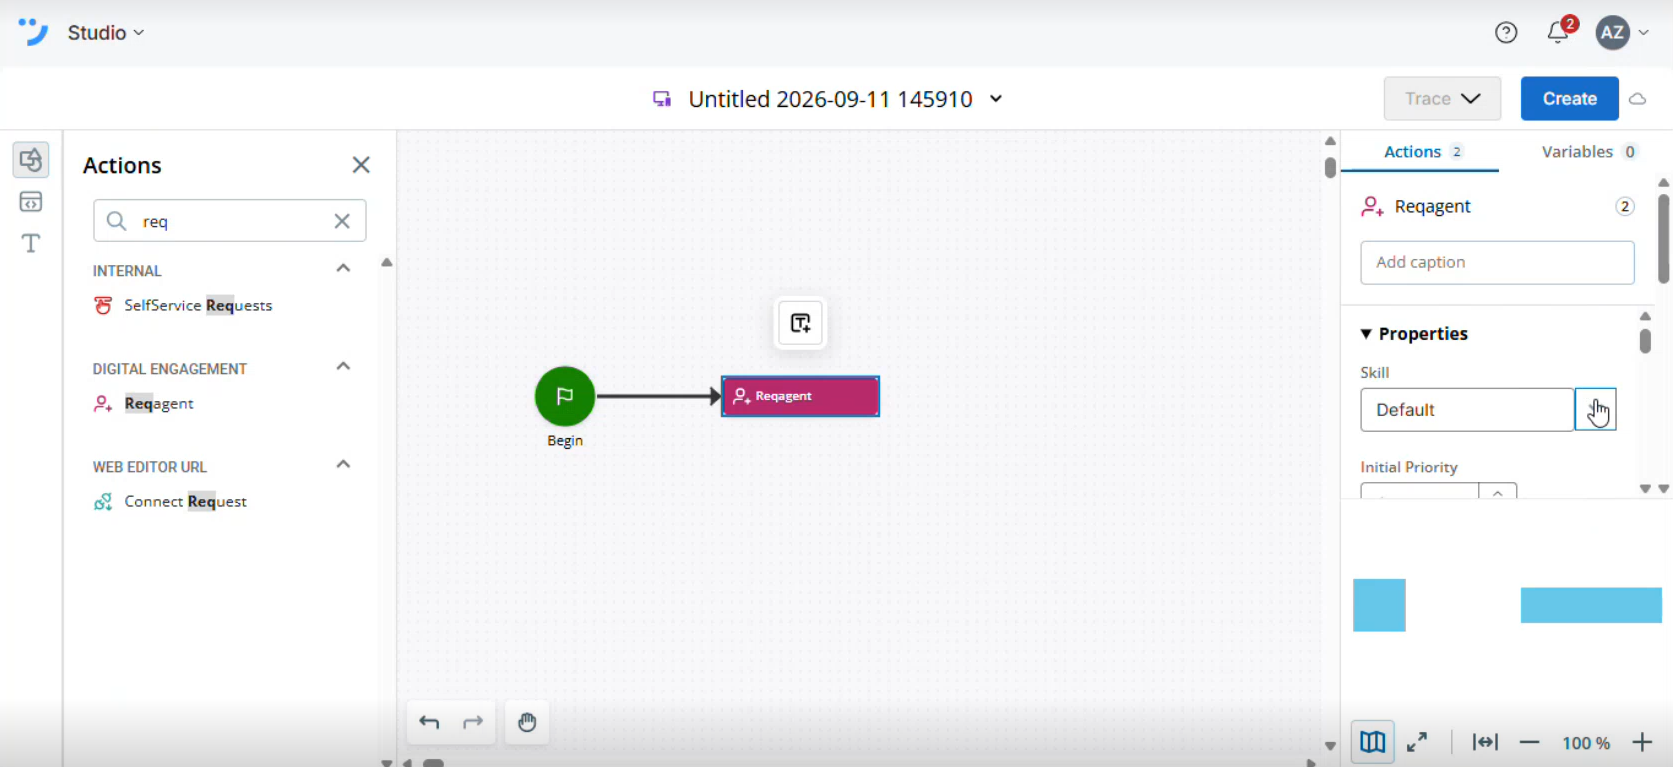
In the Studio canvas, drag the following actions onto the workspace:
-
Begin
-
ReqAgent
-
-
Connect the Begin action to the ReqAgent action.
-
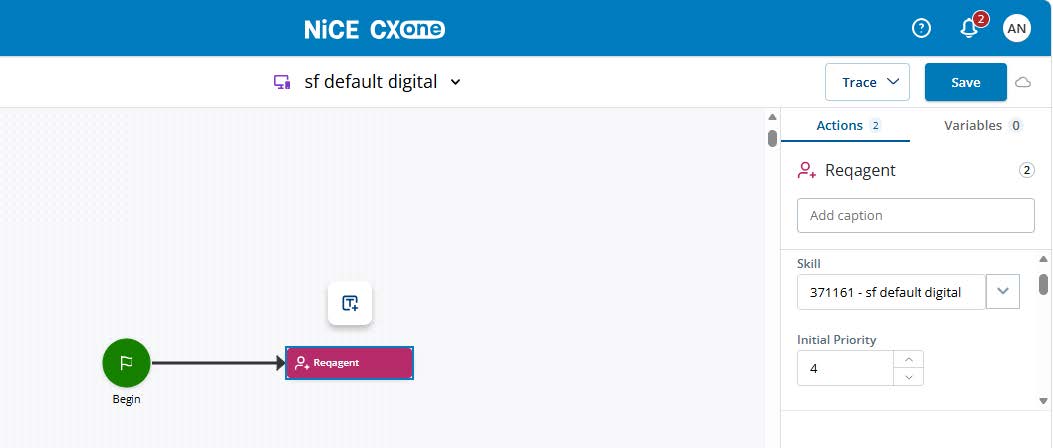
Select the ReqAgent action and configure its properties.
-
In the Skill dropdown list, select the Digital IB skill that was created earlier. Use the skill that was created in the Create Inbound Skill and Studio Script.
-
Set the Initial Priority value to greater than 0 (for example, 1).
-
Save and publish the script.
Call the Create Channel API
Call the DFO Create Channel API using a REST client (such as Postman) with a valid T2 Authentication Token.
API Endpoint (NA1 Region)
Method: POST
URL: https://app-de-na1.niceincontact.com/dfo/3.0/channels
Header: Authorization: Bearer <T2_Auth_Token>
Request Payload
{
"id": "3fa85f64-5717-4562-b3fc-2c963f668888",
"integrationBoxIdentifier": "salesforcevoice_integration_box",
"idOnExternalPlatform": "3fa85f64-5717-4562-b3fc-2c963f669999",
"channelIntegrationId": "3fa85f64-5717-4562-b3fc-2c963f668888",
"realExternalPlatformId": "custom",
"name": "Web Chat",
"isPrivate": true,
"hasTreeStructure": true,
"hasReply": true,
"contentFormat": "html",
"hasAbilityToSendFiles": false,
"hasOutboundFlow": false,
"translationGroup": "phone",
"externalPlatformAvatar": "\"https://external-platform/avatars/channel-id-on-external-platform.jpg\"https://external-platform/avatars/channel-id-on-external-platform.jpg</a>",
"externalPlatformIcon": "facebook-messenger",
"hasAbilityToLike": false,
"hasAbilityToShare": false,
"hasAbilityToDelete": false,
"hasAbilityToTag": false,
"hasAbilityToChangeFrom": false,
"wysiwygEnabled": false,
"isAutomaticSignatureAttached": false,
"isCaseBasedStorage": true,
"hasOutboundTemplates": false,
"hasManualOutboundFlow": false,
"studioScript": "<studio>script<content>",
"hasPublishing": true,
"hasMultipleRecipient": false,
"hasCcAndBcc": false,
"hasVisibleTitle": false,
"hasEditableTitle": false,
"hasVisibleRecipients": false,
"hasAbilityToForwardMessage": false,
"hasAbilityToChangeRecipient": false,
"hasMultipleThreadsPerEndUser": false,
"hasPostAsPlaceholder": true,
"canAgentInviteCustomersToContact": true,
"canReplyToAnyMessage": true
}
Key Field Guidelines
-
id, idOnExternalPlatform, and channelIntegrationId: Generate unique UUID values while maintaining standard UUID format.
-
realExternalPlatformId: Set verbatim to custom.
-
name: Enter the display label for the NICE Chat channel (for example, Web Chat).
Call the Create First Message API
After the Create Channel API returns an HTTP 200 / 201 Success response, initialize the channel by calling the Create First Message API.
API Endpoint (NA1 Region)
Method: POST
URL: https://app-de-na1.niceincontact.com/dfo/3.0/channels/{id}/messages (Replace {id} with the Channel ID returned from Call the Create Channel API.
Header: Authorization: Bearer <T2_Auth_Token>
Request Payload
{
"idOnExternalPlatform": "3fa85f64-5717-4562-b3fc-2c963f662222",
"direction": "inbound",
"createdAtWithMilliseconds": "2028-08-18T21:47:54.817Z",
"thread": {
"idOnExternalPlatform": "1316012"
},
"messageContent": {
"type": "TEXT",
"payload": {
"text": "Hello, can you help me, please?"
}
},
"authorEndUserIdentity": {
"idOnExternalPlatform": "Enhanced Chat Author ID"
}
}
Configure the Digital Point of Contact
-
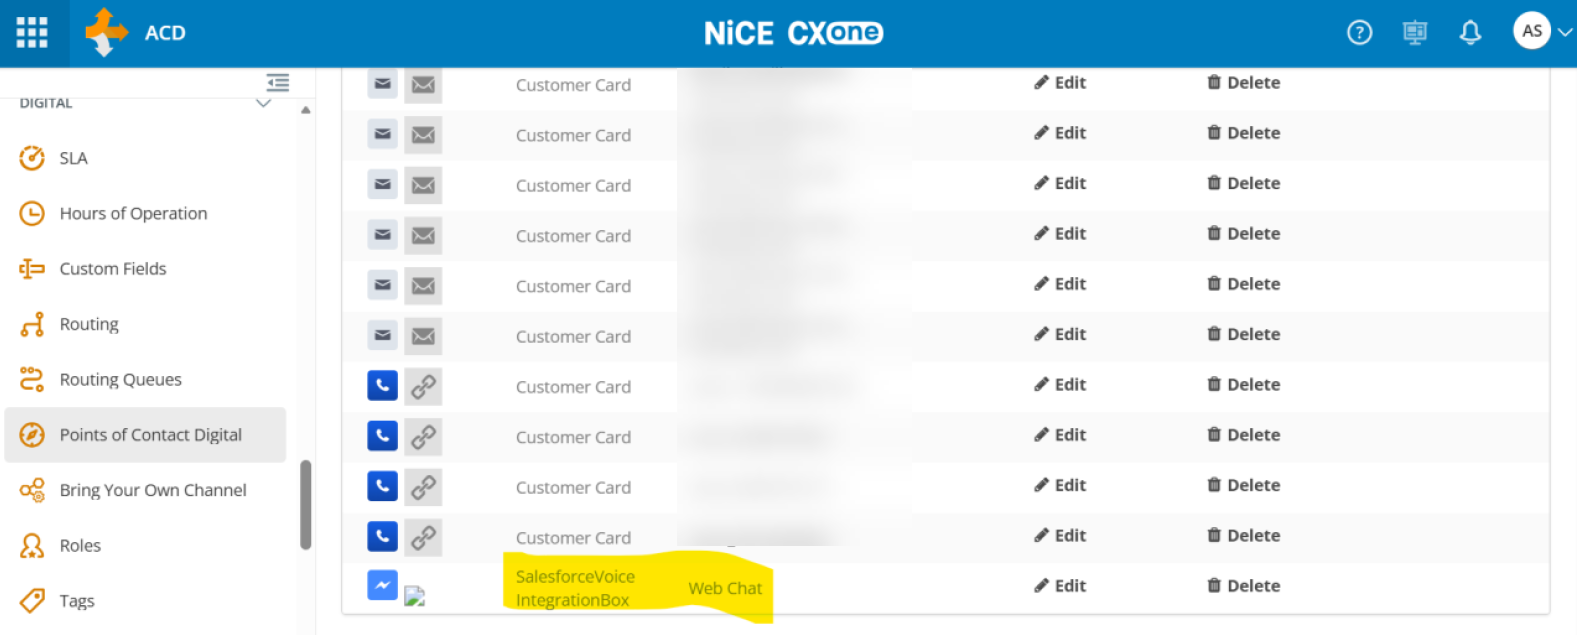
Navigate to ACD > Digital > Points of Contact Digital.
-
Locate the newly created channel in the list and click Edit.
-
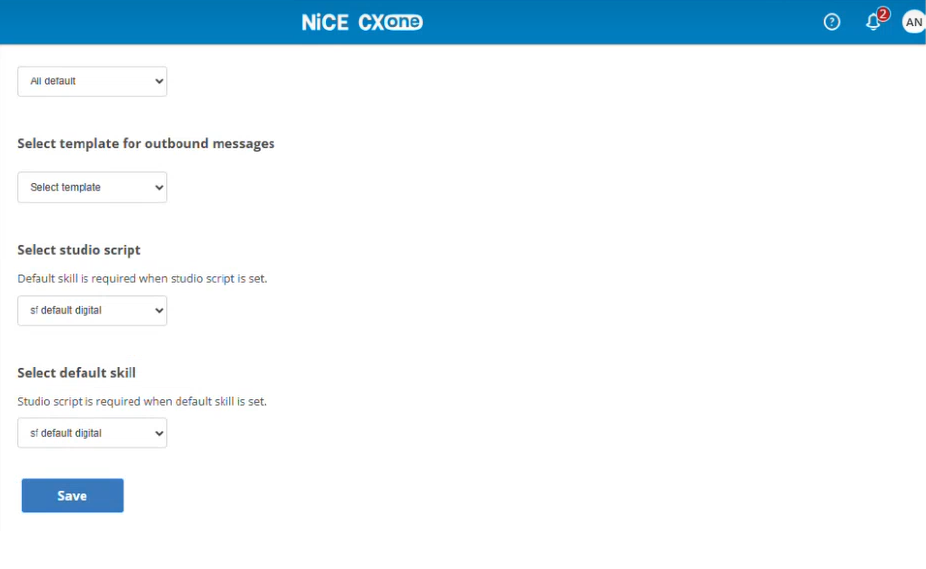
Select the Skill and Studio Script created in Create Inbound Skill and Studio Script.
-
Click Save.
NiCE Agent Configuration
Create Agent Digital IB Skill
-
Go to ACD > ACD Skills.
-
Click Create New, then select Single Skill.
-
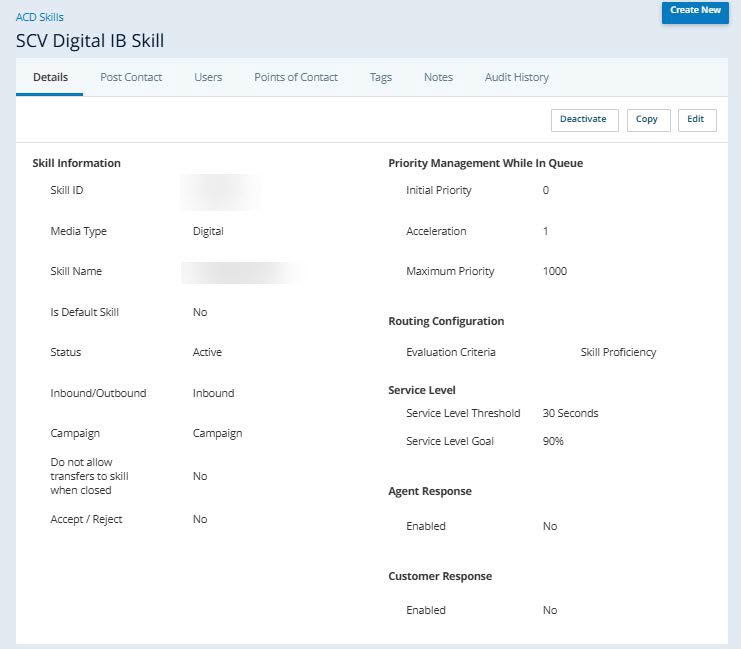
Create a Digital Inbound skill for live agents. Select Digital as the Media Type, enter the required skill information, and then click Create New to create the skill.
-
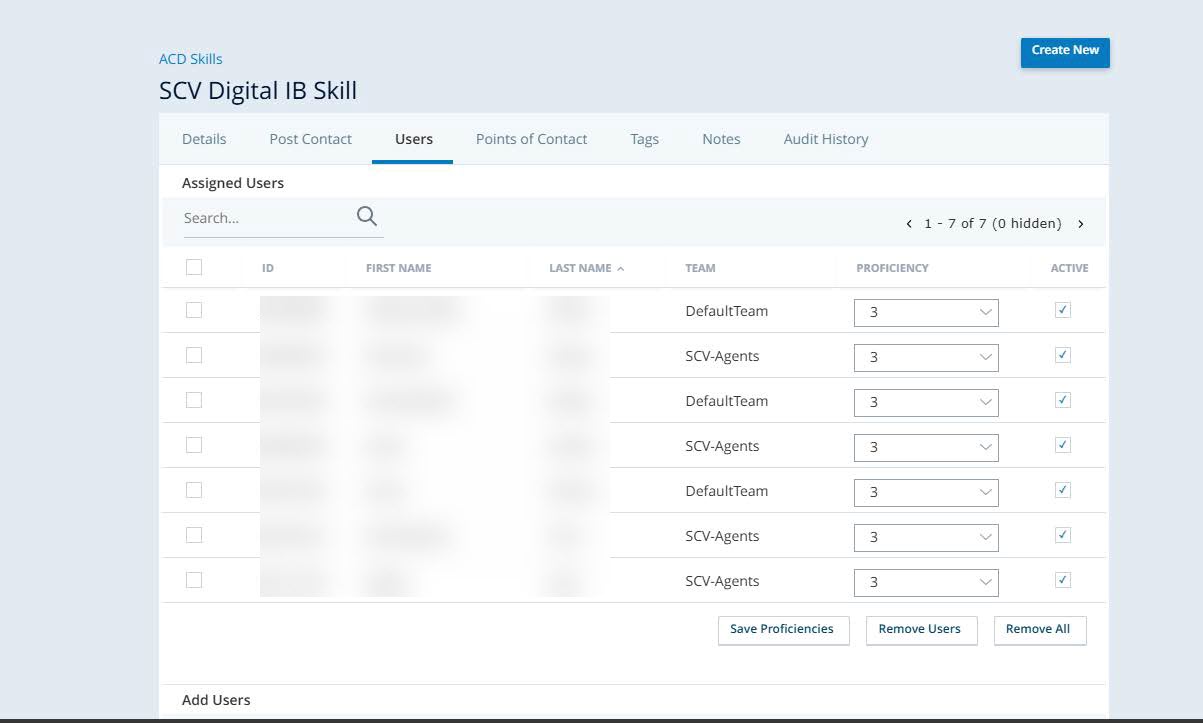
Go to the Users tab and assign appropriate agent users to this skill.
Create and Link Agent Studio Script
Refer to Create and Link the Digital IB Studio Script:
Licensing, Roles, and Employee Attributes
Business Unit Licensing
This task must be completed by a NiCE Account Manager, as customers and partners do not have access to Tenant Management.
-
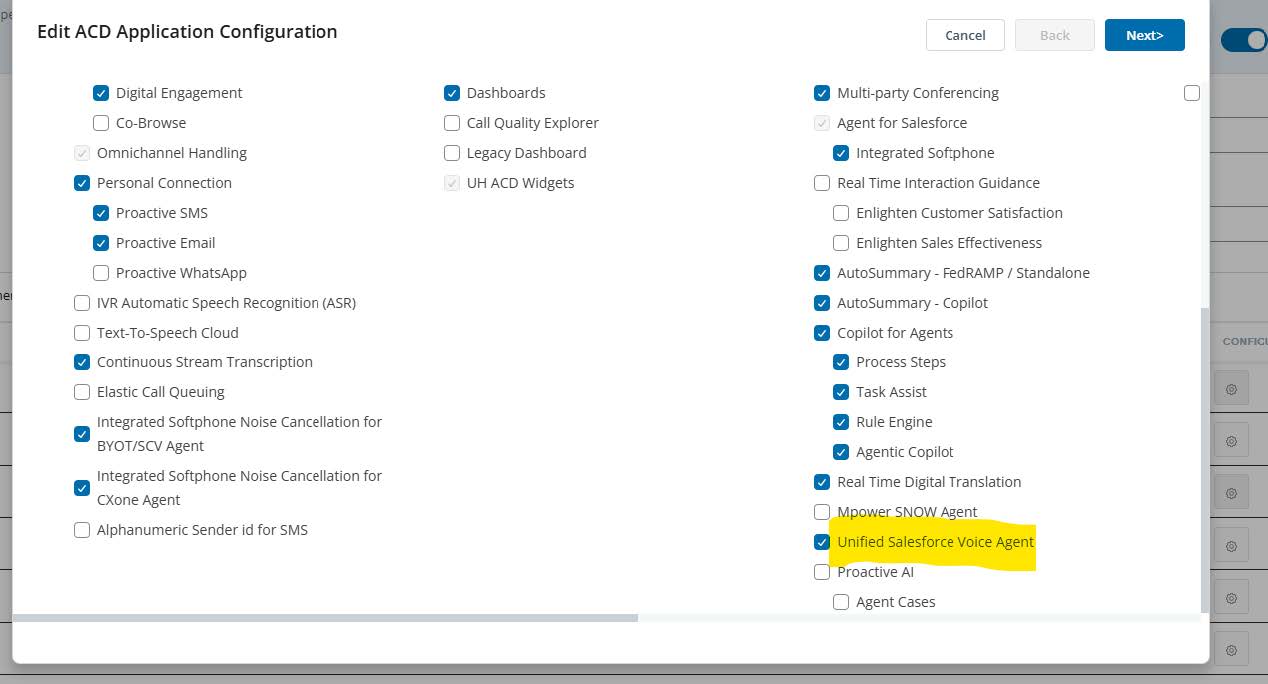
ACD Configuration: Verify that the Unified Salesforce Voice Agent setting is enabled.
-
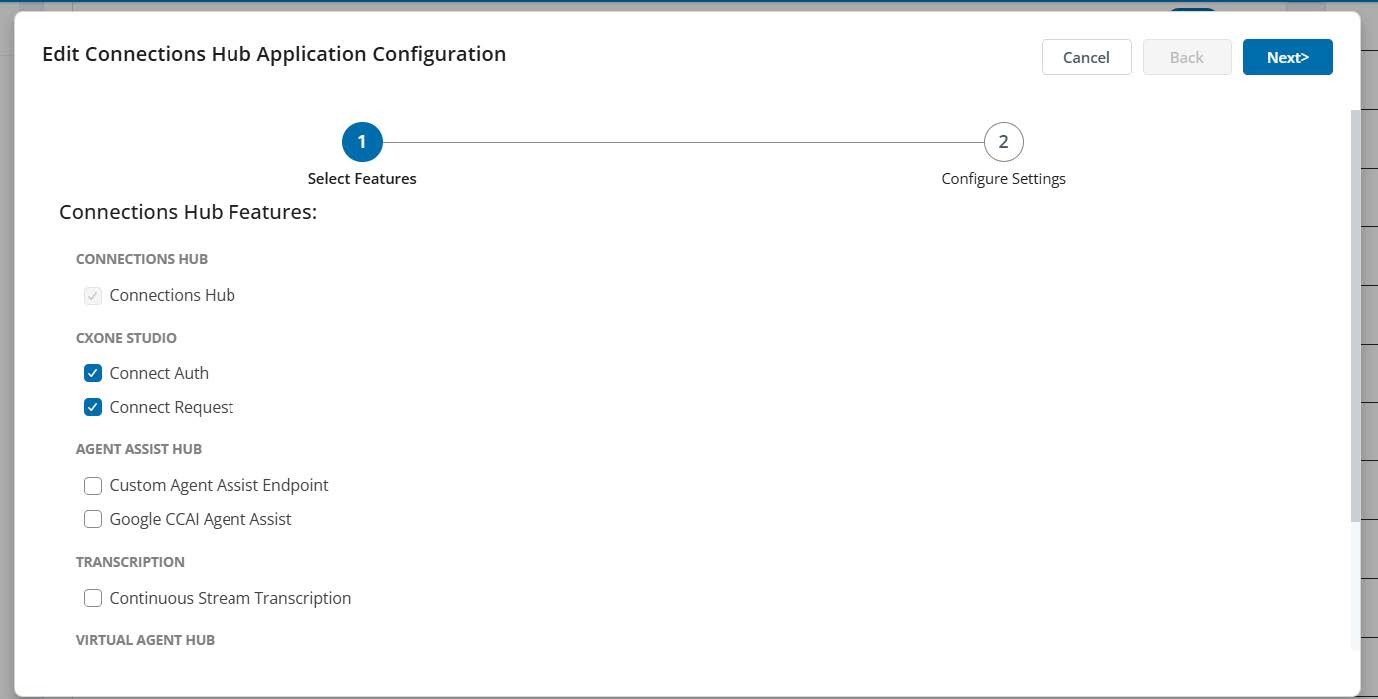
Connection Hub Licenses: Open Connection Hub and confirm that both CXone and Studio licenses are enabled.
Roles and Permissions
-
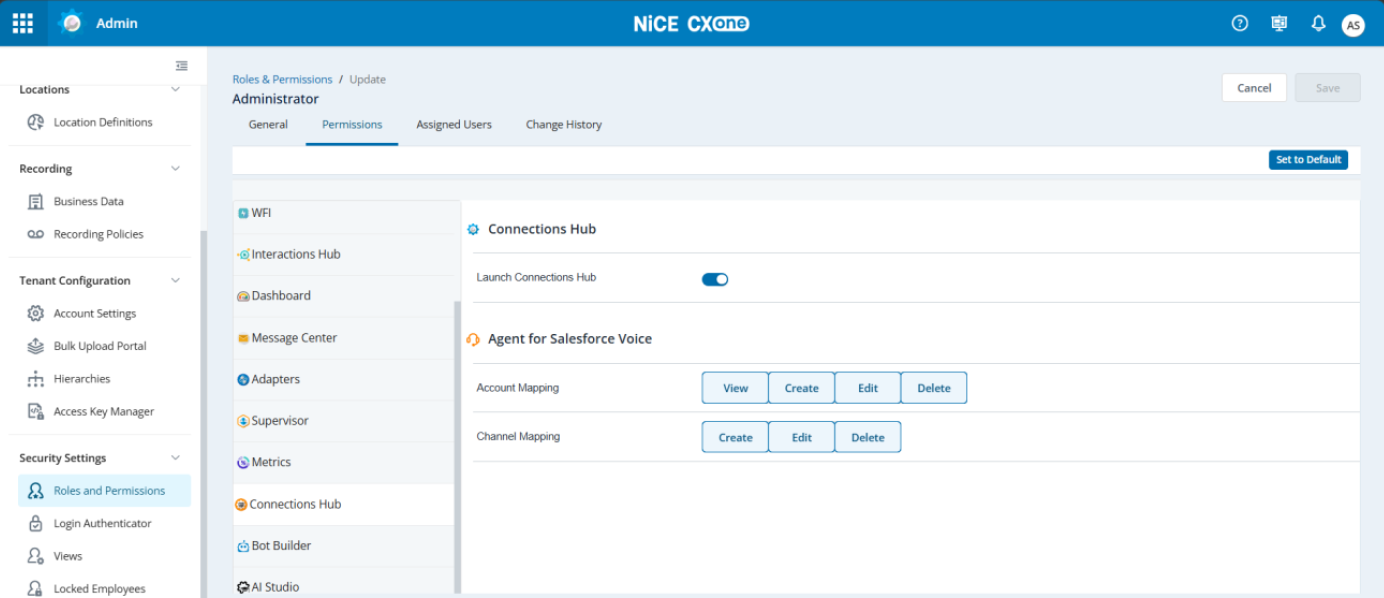
Navigate to Admin > Security Settings > Roles and Permissions > Permissions.
-
In the side navigation panel, select Connections Hub.
-
Verify that all required Connections Hub permissions are enabled.
Employee Attributes
-
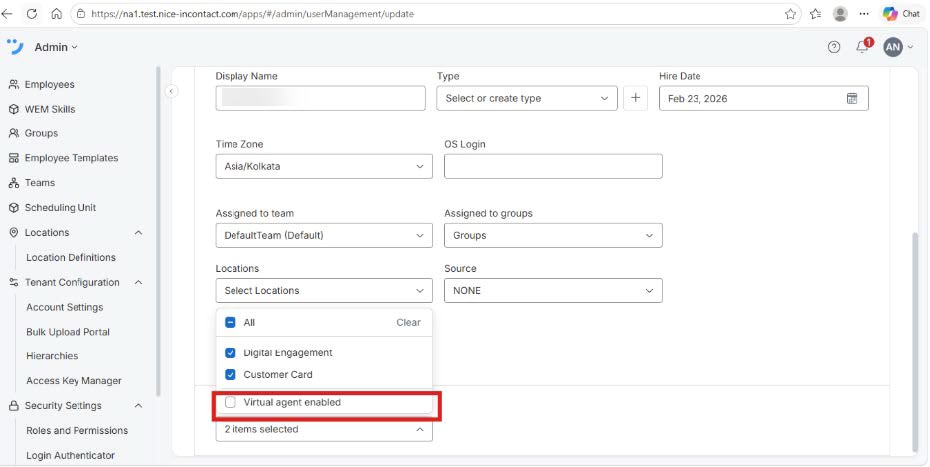
Navigate to Admin > Employees.
-
Select the target employee account.
-
Go to General > Attributes.
-
Clear the Virtual agent enabled checkbox.
-
Click Save.
Connector Setup
Refer to the Set up the connectors section in Salesforce Case Administrator Setup
Salesforce Account and Channel Mapping
Salesforce Account Mapping
-
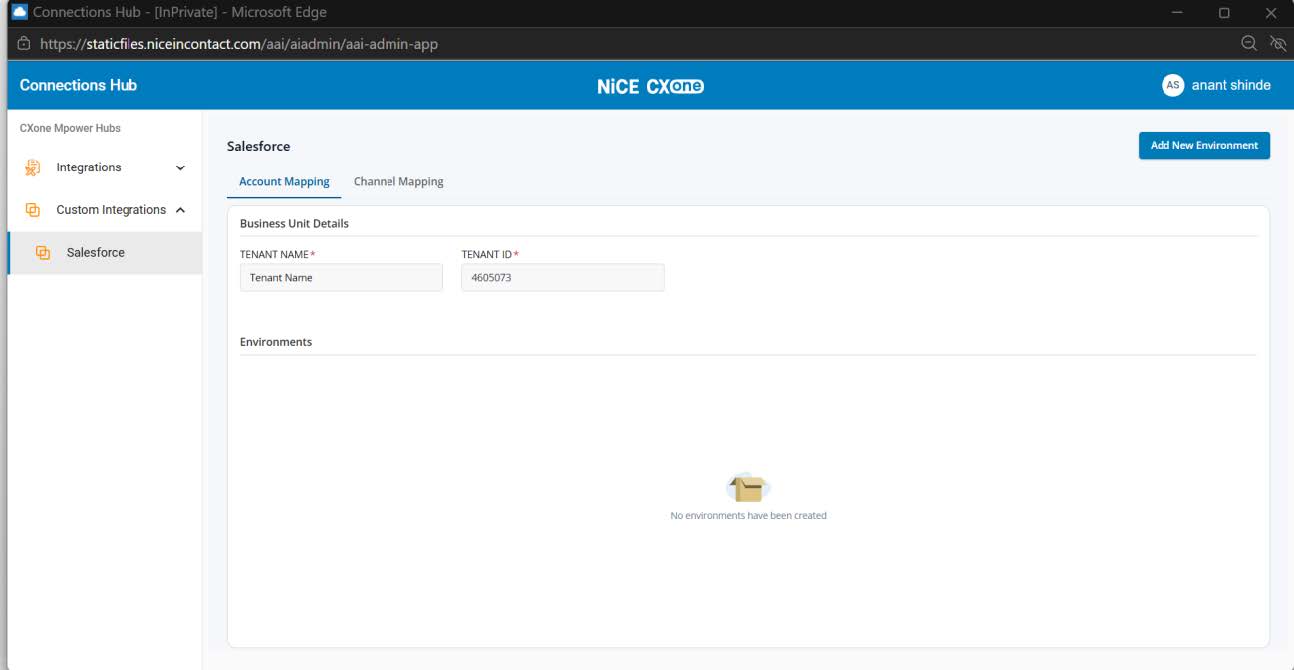
Navigate to Connection Hub > Salesforce>Account Mapping.
-
Click Add New Environment.
-
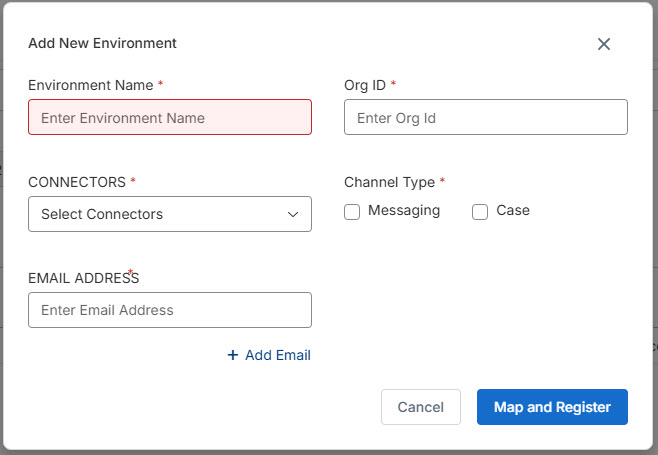
Specify the configuration values:
-
Environment Name: Enter an environment descriptor (for example, Production_SFDC).
-
Org ID: Enter the 15- or 18-character Salesforce Organization ID (obtained from Salesforce Setup > Company Information).
-
Connector: Select the Salesforce Connector created in Connector Setup.
-
Email ID: Enter the administrator notification email address.
-
Channel Type: Select Messaging, Case, or both, depending on the types of digital interactions you want the skill to handle.
-
-
Click Map and Register.
Salesforce Channel Mapping (applicable only when Messaging is selected as the Channel Type)
-
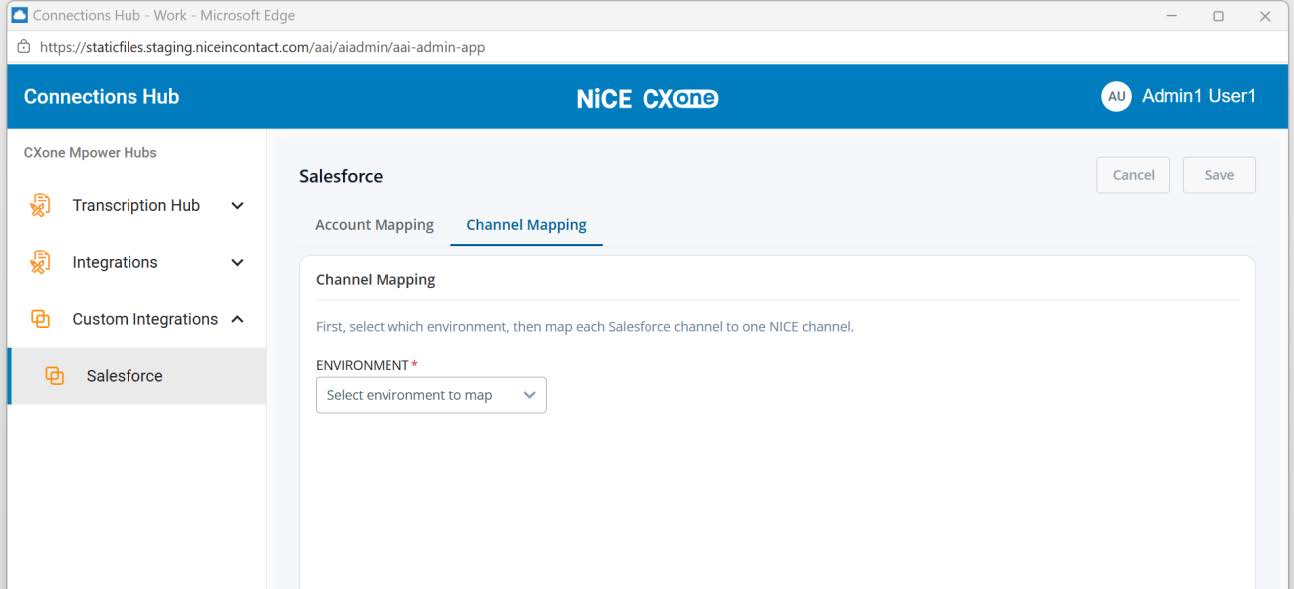
Navigate to Connection Hub > Salesforce>Channel Mapping.
-
Select the mapped environment from the Environment drop-down list.
-
Select the corresponding NiCE digital chat channel from the NICE Channel drop-down list.
-
Click Map and Register.