

Set Up Copilot, Live Transcript, and Contact History in Agent Workspace for Salesforce Voice (Agent for SCV)
Prerequisites
Verify that the following requirements are met before you start:
-
Salesforce edition: Enterprise, Performance, or Unlimited with Service Cloud Voice enabled.
-
Salesforce experience: Lightning Experience (Classic is not supported).
-
CXone tenant access: Administrator role with access to Tenant Management.
-
Copilot product catalog: productId 351 or productId 355 must be available in your tenant's product catalog.
-
Live Transcript product catalog: productId 178 must be available in your tenant's product catalog
-
Managed package: NICE CXone SCV managed package installed in Salesforce (includes the Nice Companion Applications LWC and nice_cxone:contactHistoryPanel component).
Enable the Copilot license
Copilot requires Product Catalog enablement at the tenant level. The feature is active when productId 351 or productId 355 is set to isEnabled = true. Without a valid license, the Copilot tab is hidden from agents.
-
Log in to the Tenant Management portal.
-
In the search box, find your tenant and select it.
-
Go to Applications & Features.
-
Navigate to ACD configuration > Configure.
-
Enable each of the following licenses:
-
Contact Handling > Digital Engagement
-
Continuous Stream Transcription
-
Enlighten Agent Copilot
-
Agent Assist
-
-
Click Save.
Changes may take up to 15 minutes to propagate. Ask the agent to log out and log back in after you save.
Enable the Live Transcript license
Live Transcript requires its own Product Catalog enablement at the tenant level. The feature is active when productId 178 is set to isEnabled = true. Without this license, the Live Transcript tab remains hidden from agents.
-
Log in to the Tenant Management portal.
-
In the search box, find your tenant and select it.
-
Go to Applications & Features.
-
Locate productId 178 in the product catalog and set it to Enabled.
-
Click Save.
Live Transcript and Copilot are independent features. You can enable one without the other. However, both tabs are delivered through the same Nice Companion Applications LWC, so the LWC setup step covers both.
Create a Copilot profile
After you enable the license, create a Copilot profile in CXone to define the AI behaviors and knowledge sources available to agents. Follow the steps in the NICE CXone Help Center: Create Enlighten Copilot for Agents profiles.
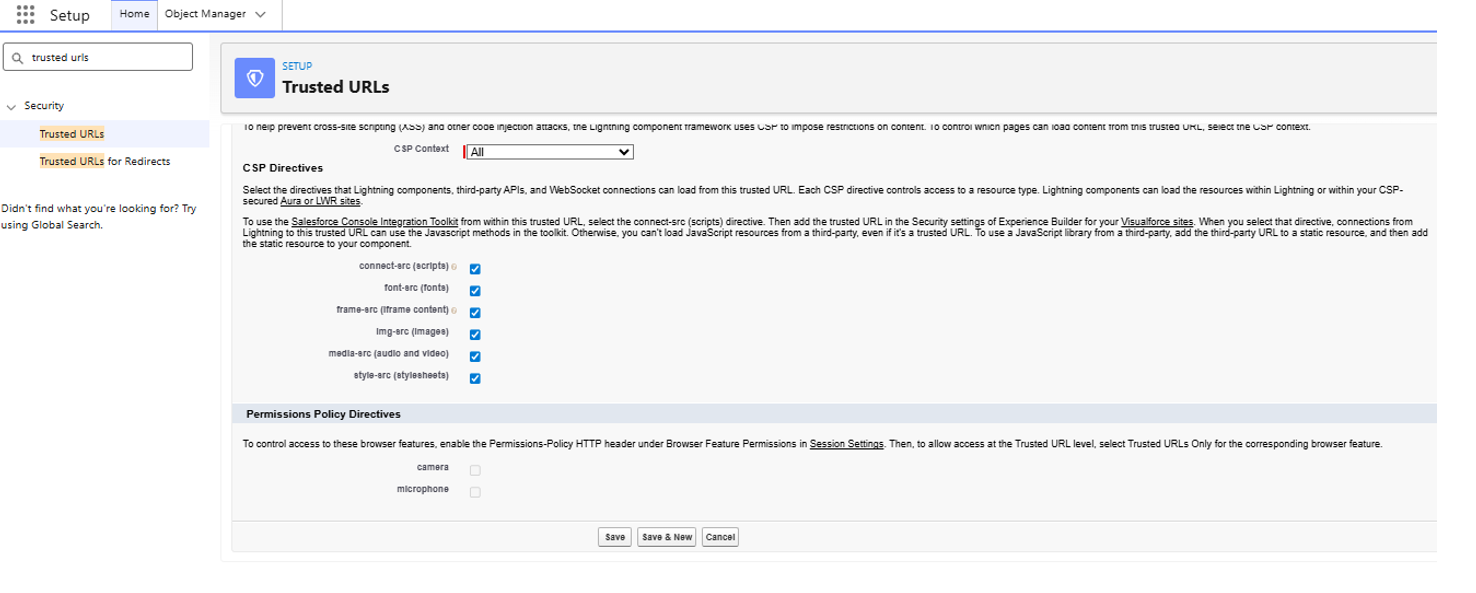
Add Copilot domains to Salesforce Trusted URLs
The Copilot component loads external resources inside Salesforce. You must add the required domains to the Salesforce Trusted URLs list so that Content Security Policy (CSP) does not block them.
Add the Copilot domain
-
In Salesforce Setup, enter Trusted URLs in the Quick Find box, and then select Trusted URLs.
-
Select New Trusted URL.
-
Enter the following fields
Field Value API Name Copilot URL https://copilot.nicecxone.com Active Enabled -
Under CSP Directives, enable all of the following:
-
connect-src (scripts)
-
font-src (fonts)
-
frame-src (iframe content)
-
img-src (images)
-
media-src (audio and video)
-
style-src (stylesheets)
-
-
Select Save & New.
Add the CXone domain
-
On the New Trusted URL form, enter the following values:
Field Value API Name CXoneStaging URL https://cxone.niceincontact.com Active Enabled -
Under CSP Directives, enable the same six directives listed above.
-
Select Save.
Add the Copilot and Live Transcript component to the VoiceCall page
The Copilot and Live Transcript features are delivered as a Lightning Web Component (LWC). You add this component to the VoiceCall record page so that agents can access real-time transcription and AI-assisted guidance during voice interactions.
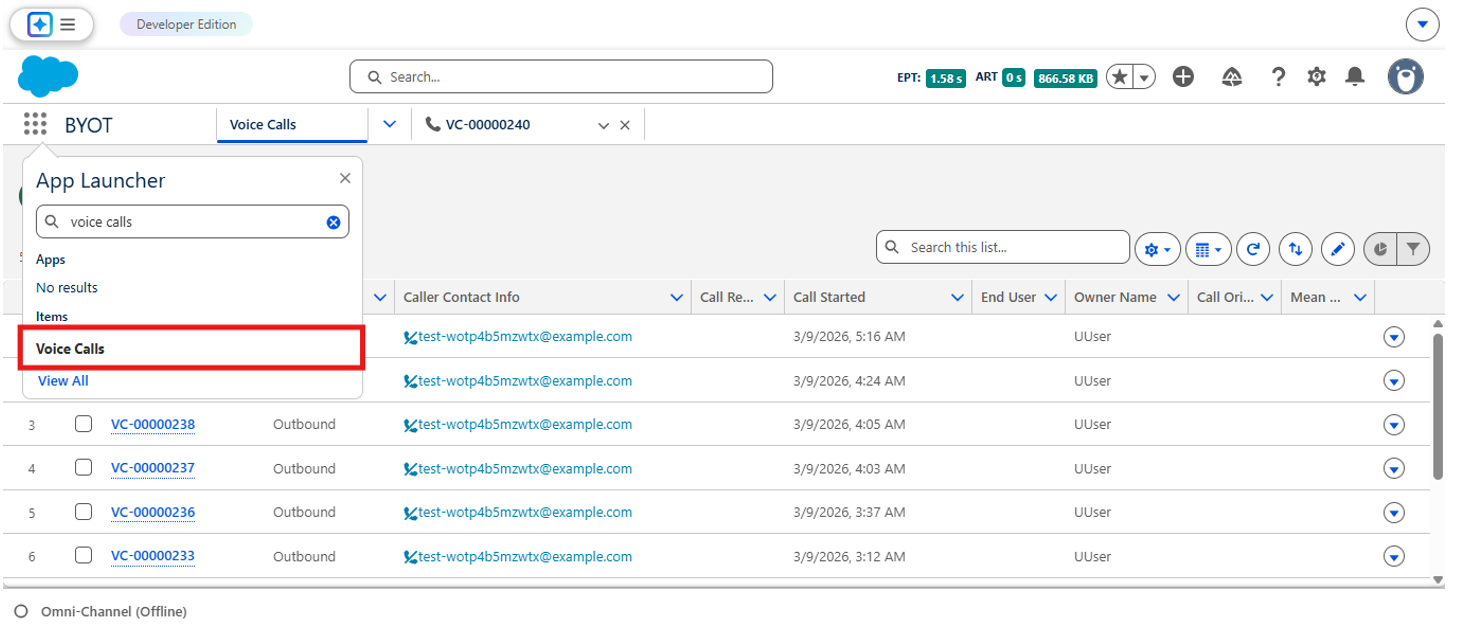
Open a VoiceCall record
-
Select the App Launcher in the Salesforce navigation bar.
-
In the search box, type VoiceCall and select it from the results.
-
Open any existing VoiceCall record.
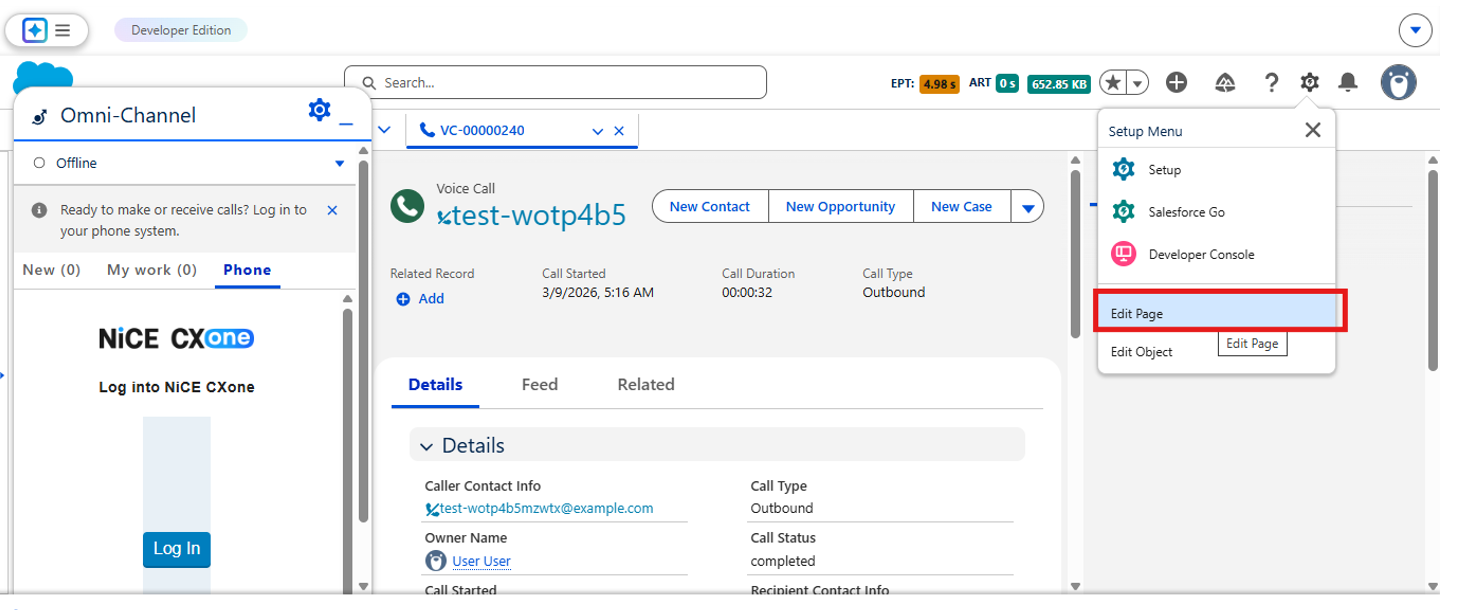
Enter edit mode
-
On the VoiceCall record page, select the gear icon in the upper-right corner.
-
Select Edit Page. The Lightning App Builder opens.
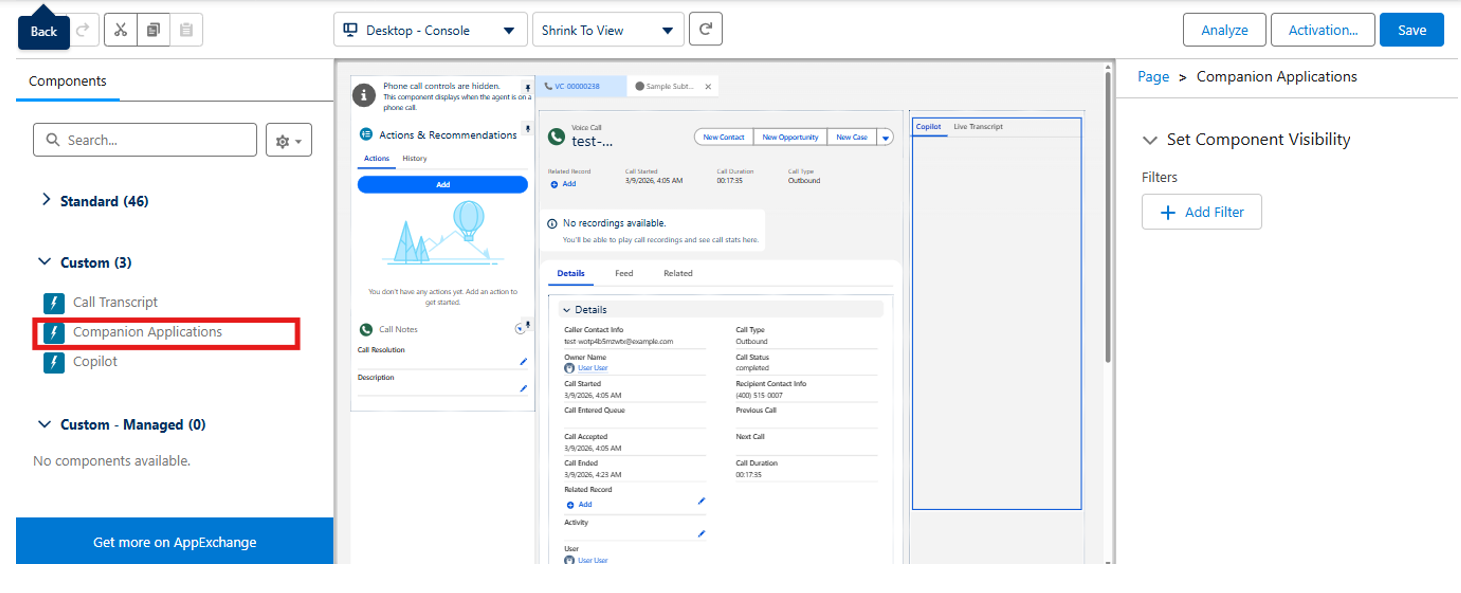
Add the component
-
In the left panel of Lightning App Builder, go to Custom Managed.
-
Locate the Nice Companion Applications component.
-
Drag the component and drop it onto the desired page region (for example, the right panel).
Save and activate the page
-
Select Save.
-
Select Activate.
-
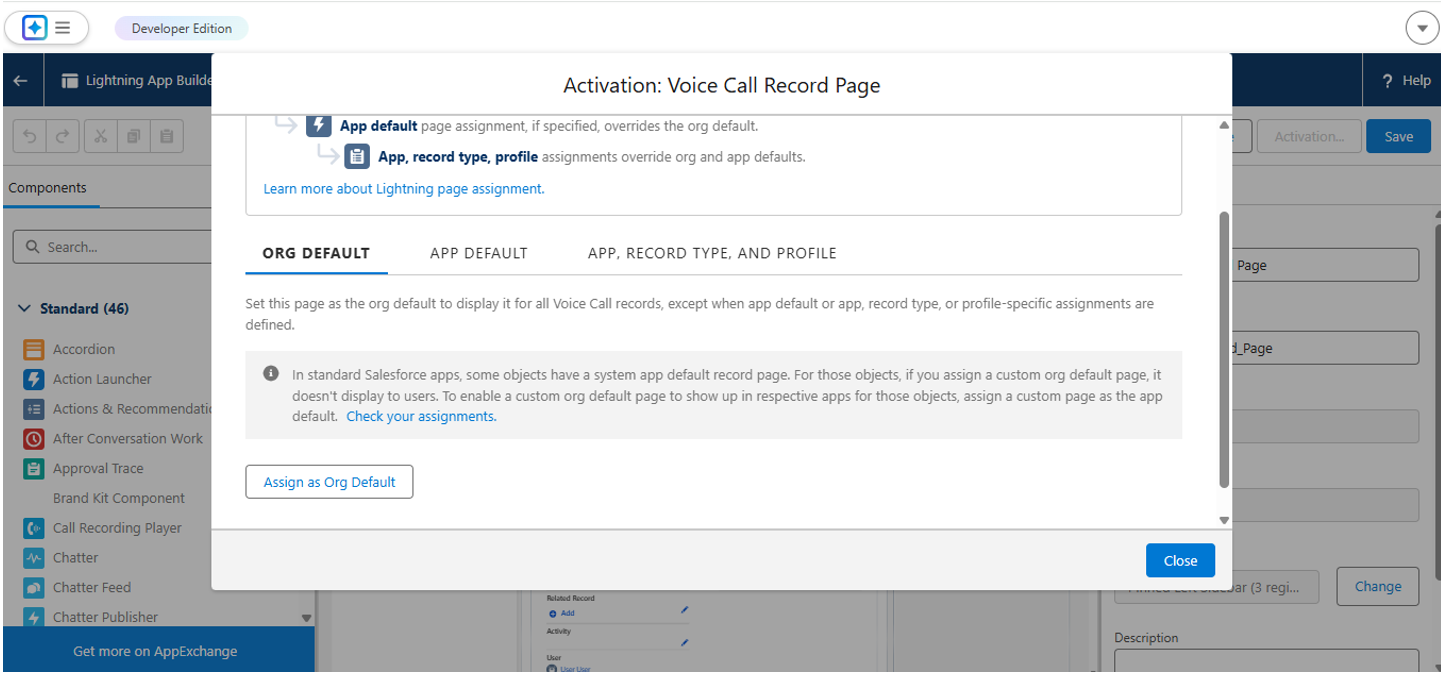
In the activation dialog, complete the following:
-
Select the Org Default tab.
-
Select Assign as Org Default.
-
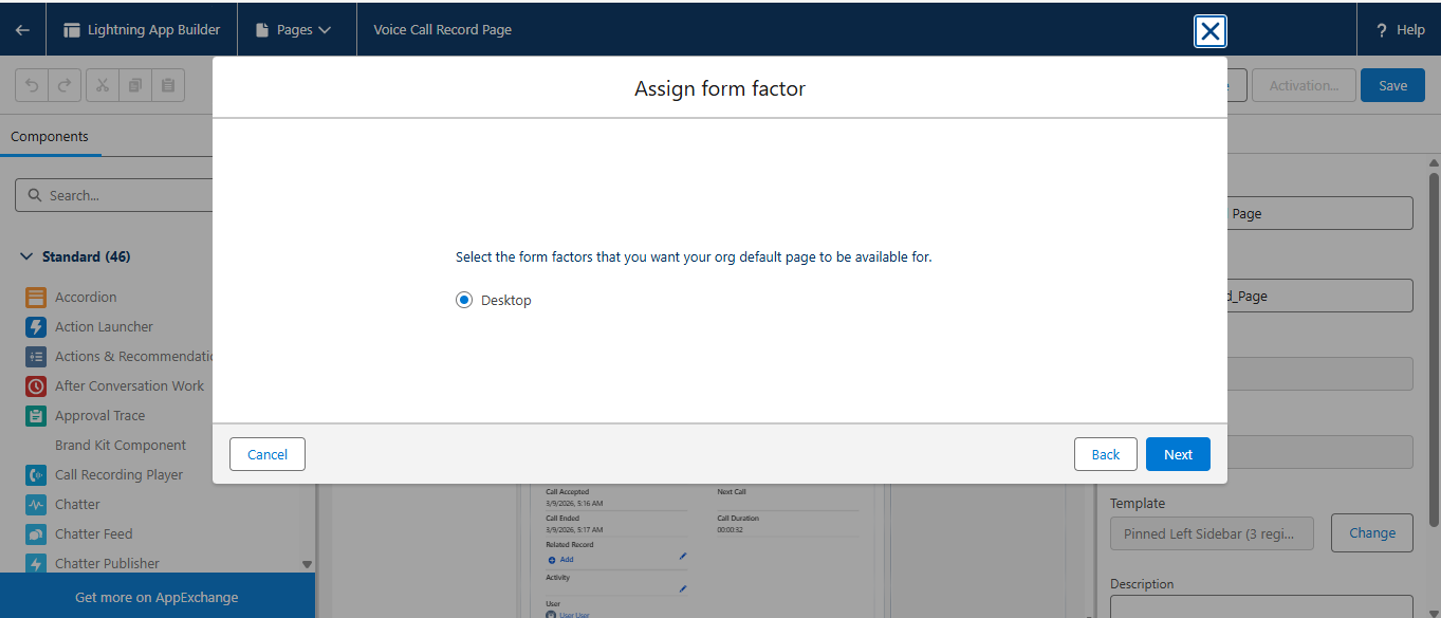
Choose Desktop as the form factor, and then select Next.
-
Review the assignments and select Save.
-
After activation, open a new VoiceCall record to verify that the Copilot and Live Transcript panel appears in the layout.
Set up the Contact History tab
The Contact History component gives agents a consolidated view of past interactions. Setting it up requires three actions: create a Lightning Component tab, add the tab to your app navigation, and verify deployment.
Create a Lightning Component tab
-
In Salesforce Setup, enter Tabs in the Quick Find box, and then select Tabs.
-
Under Lightning Component Tabs, select New.
-
Configure the following fields
Field Value Lightning Component nice_cxone:contactHistoryPanel Tab Label Contact History Tab Style Choose an icon that suits your org’s branding. -
Select Next.
-
On the Add to Profiles page, set visibility to Default On for all profiles (or select specific profiles), and then select Save.
Add the tab to app navigation
-
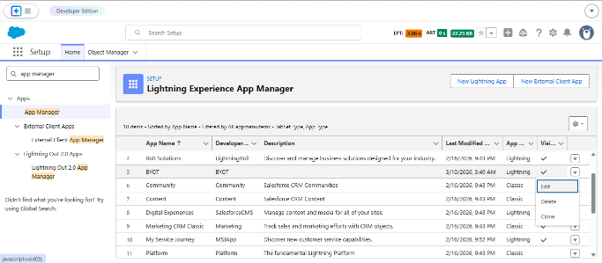
In Salesforce Setup, enter App Manager in the Quick Find box, and then select App Manager.
-
Locate your target app, select the dropdown arrow, and then select Edit.
-
In the Navigation Items section:
-
Move Contact History from Available Items to Selected Items.
-
Use the up and down arrows to set the tab position in the navigation bar.
-
-
Select Save.
Verify deployment
-
Open the App Launcher and select your app.
-
Confirm that the Contact History tab appears in the navigation bar.
-
Select the Contact History tab and verify that historical interaction data loads correctly.