

ServiceNow Digital Chat Setup
Follow the below steps only if you want to use the ServiceNow Digital Chat feature.
NiCE CXone Configuration
Channel Mapping Configuration
This section walks you through configuring channel mappings between ServiceNow and NICE CXone Digital. Channel mapping connects ServiceNow communication channels (such as Chat) to NICE Digital BYOC channels, enabling agents to handle ServiceNow interactions within CXone.
Prerequisites
-
IHF Connectors — Ensure that Integration Hub Framework (IHF) connectors are created and active. Channel mapping requires a valid IHF connector. If connectors are not configured, the system displays an error when you attempt to create a channel mapping rule. Reference Link: ServiceNow – NICE CXone Connector Creation & Configuration
-
UserHub access — You must have administrative permissions to access Connections Hub, ACD, and Roles settings.
-
Tenant Manager access — Required for enabling chat permissions at the tenant level.
For instructions on creating IHF connectors, see the ServiceNow – NICE CXone Connector Creation & Configuration.
Select an Environment for Channel Mapping
In multi-organization configurations, you must select the target environment before defining channel mappings.
-
In CXone UserHub, navigate to Connections Hub > Custom Integrations > Servicenow.
-
Select the Channel Mapping tab in Connections Hub.
-
Locate the Environment dropdown selector at the top of the page.
-
Select the target environment from the list. This selector contains environments previously registered on the Account Mapping tab.
-
After the environment loads, review existing mappings in the grid and proceed with mapping channels for that specific organization.
 View image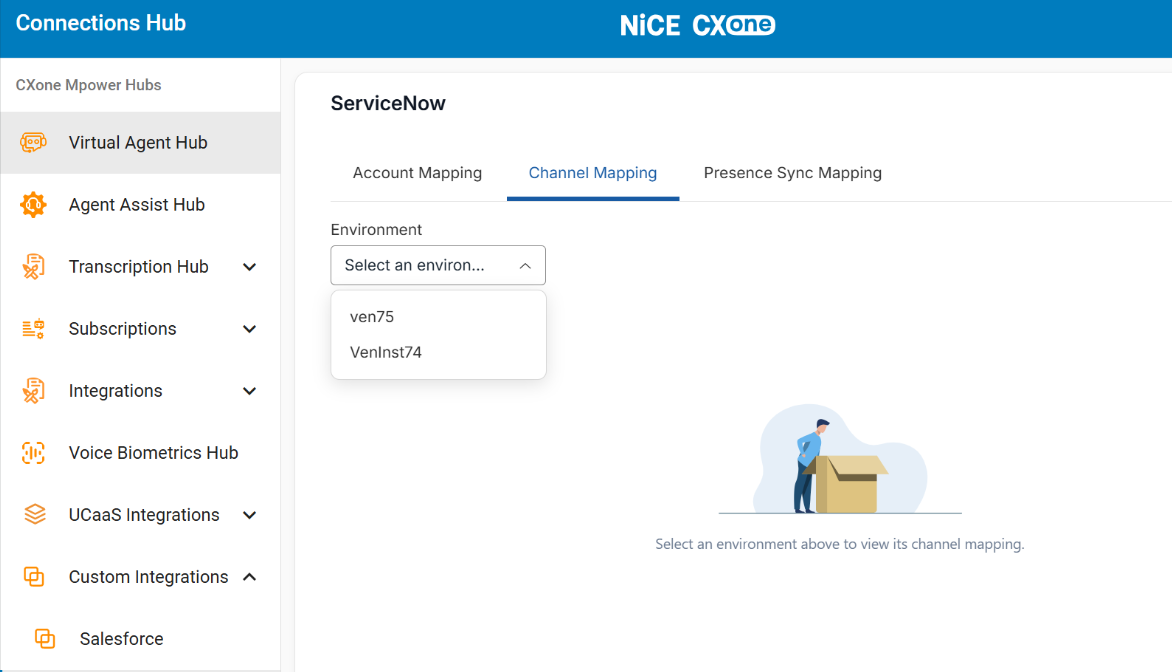
Create and Map a NICE Digital Channel
Use the Channel Mapping interface in UserHub to create a NICE Digital BYOC channel and map it to a ServiceNow channel.
-
Sign in to UserHub.
-
Go to Connections Hub > Custom Integrations > Servicenow.
-
Select the Channel Mapping tab.
-
Select the target ServiceNow Environment/Organization from the Environment dropdown.
-
When an environment is selected, any existing channel mappings for that environment are displayed in the list.
-
If no channel mappings exist, click Create NiCE Digital Channel to create a new mapping.
-
-
Click Create NiCE Digital Channel (If no channel mappings exist).
-
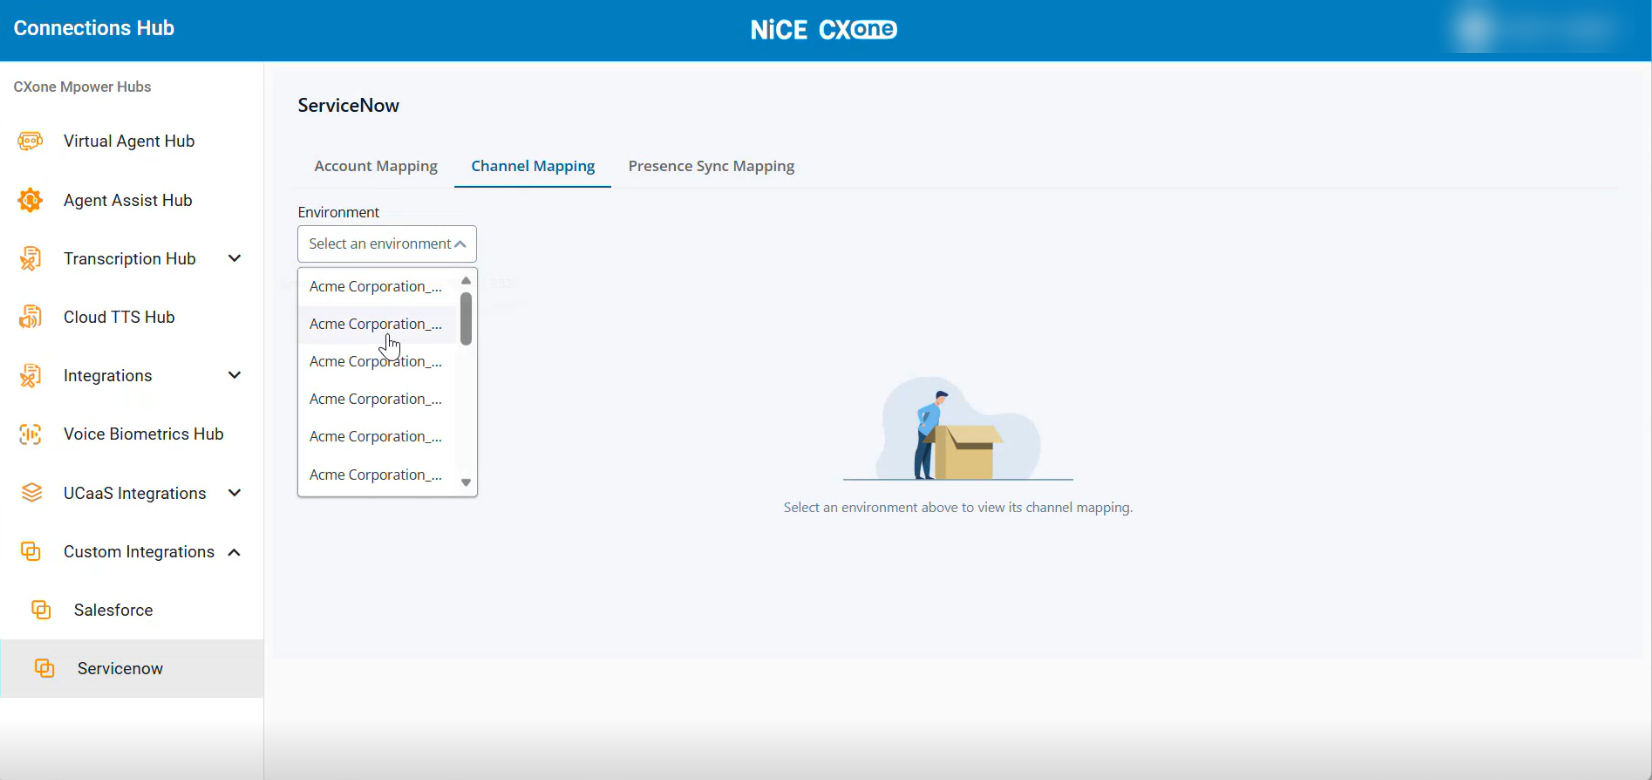
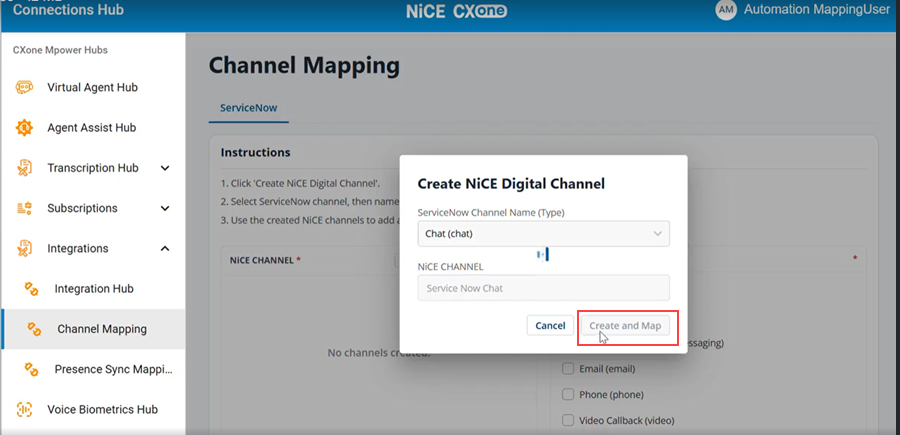
In the Create NiCE Digital Channel dialog, complete the following fields:
Field Action ServiceNow Channel Name (Type) Select the ServiceNow channel from the dropdown list. Example: Chat (chat) NICE CHANNEL
Enter a descriptive name for the NICE digital channel. Example: Service Now Chat
-
Verify that the Create and Map button becomes enabled after you provide valid inputs.
-
Click Create and Map.
After successful creation:
-
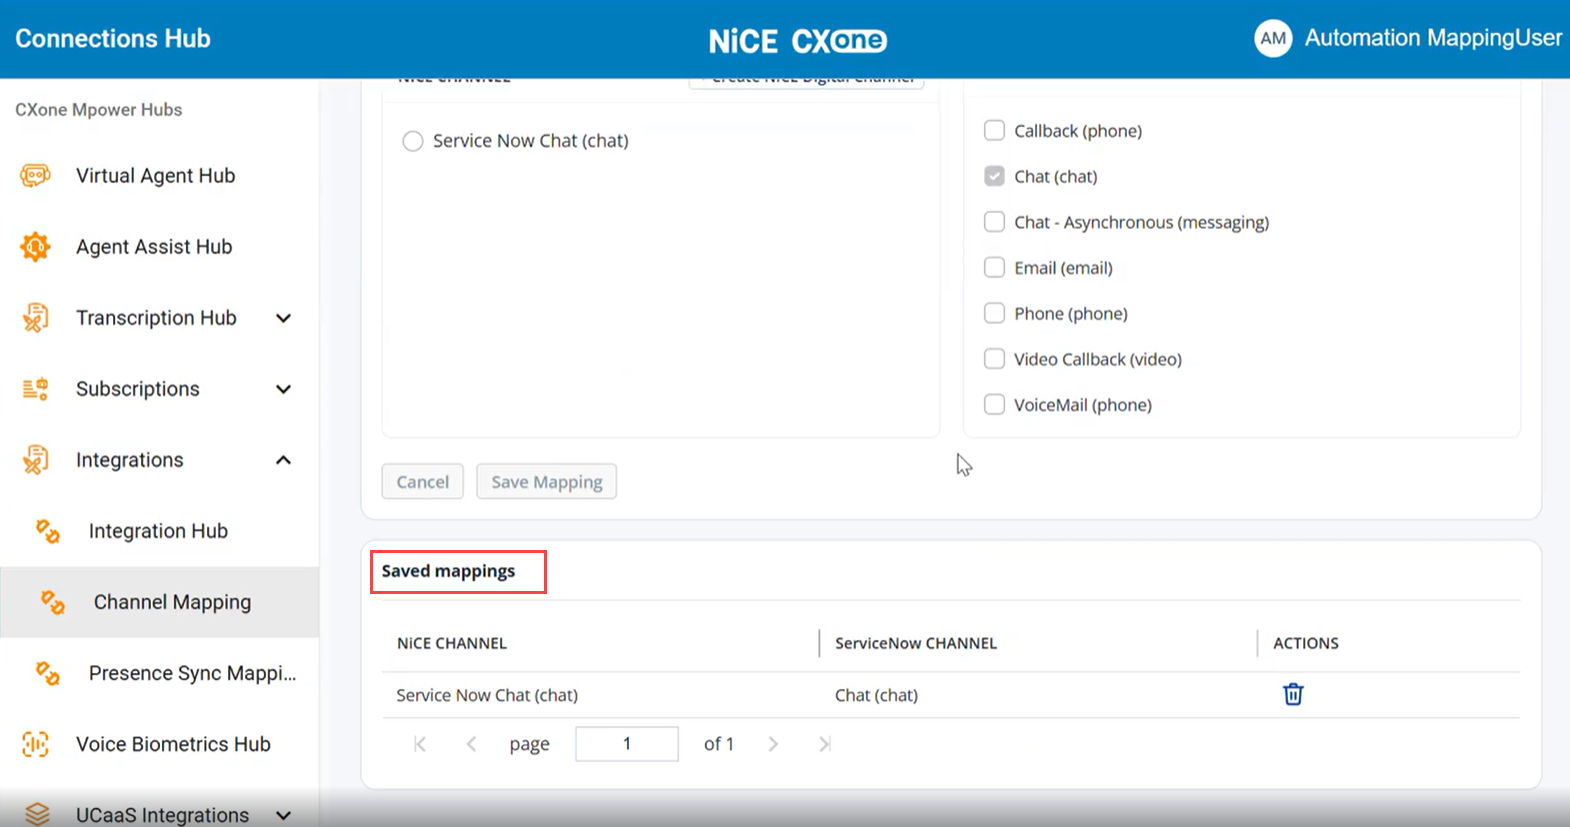
A new NICE Digital BYOC channel is created and mapped to the selected ServiceNow channel.
-
The dialog closes automatically and the Channel Mapping page refreshes.
-
The new channel appears in the NICE CHANNEL panel and is selected automatically.
-
The mapped ServiceNow channel is no longer available for future mappings.
-
The mapping displays in the Saved Mappings section.
-
One NICE channel can be mapped to multiple ServiceNow channels.
-
One ServiceNow channel can only be mapped once.
-
In a multi-org deployment, select the appropriate ServiceNow instance/organization before creating or modifying channel mappings.
-
One NICE channel can be mapped to multiple ServiceNow channels within the selected organization.
-
One ServiceNow channel per organization can only be mapped once.
-
You can map additional ServiceNow channels to an existing NICE channel from the main mapping interface.
Configure the Channel in ACD
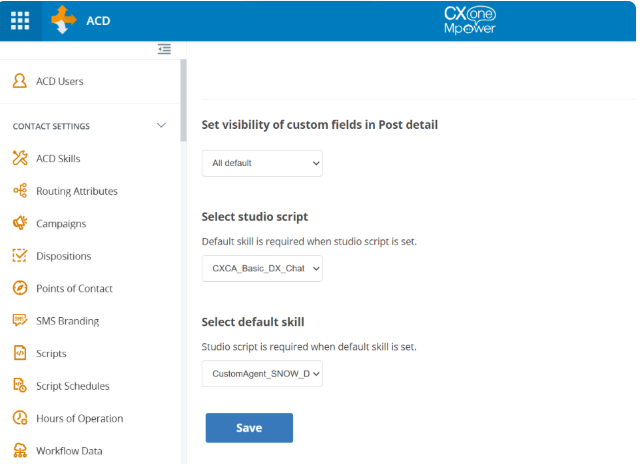
After creating the channel mapping, assign a Studio script and skill to the new BYOC channel in ACD.
-
Sign in to UserHub.
-
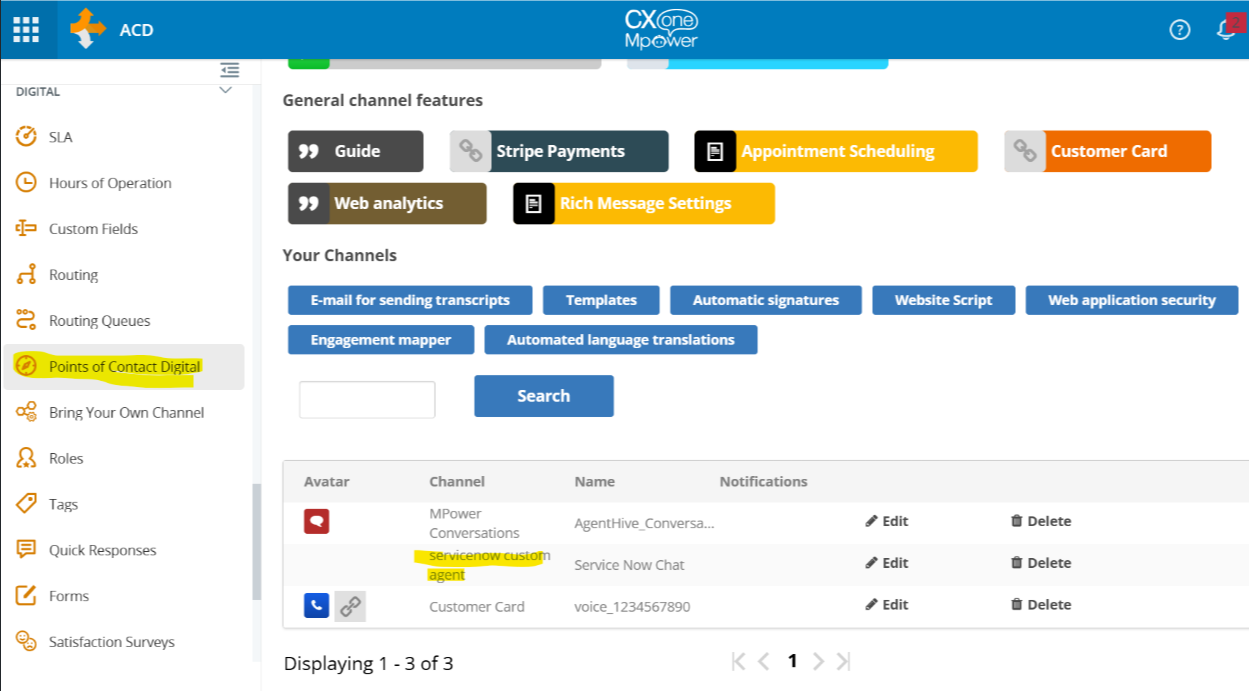
Go to ACD > Points of Contact Digital.
-
In the Channels table, locate the newly created channel (for example, Service Now Chat).
-
Click Edit for the channel.
-
Configure the following settings:
Setting Value Studio Script Select the appropriate script for your workflow. Skill
Select the skill you created for this BYOC channel.
-
Click Save.
Create a Skill for the BYOC Channel
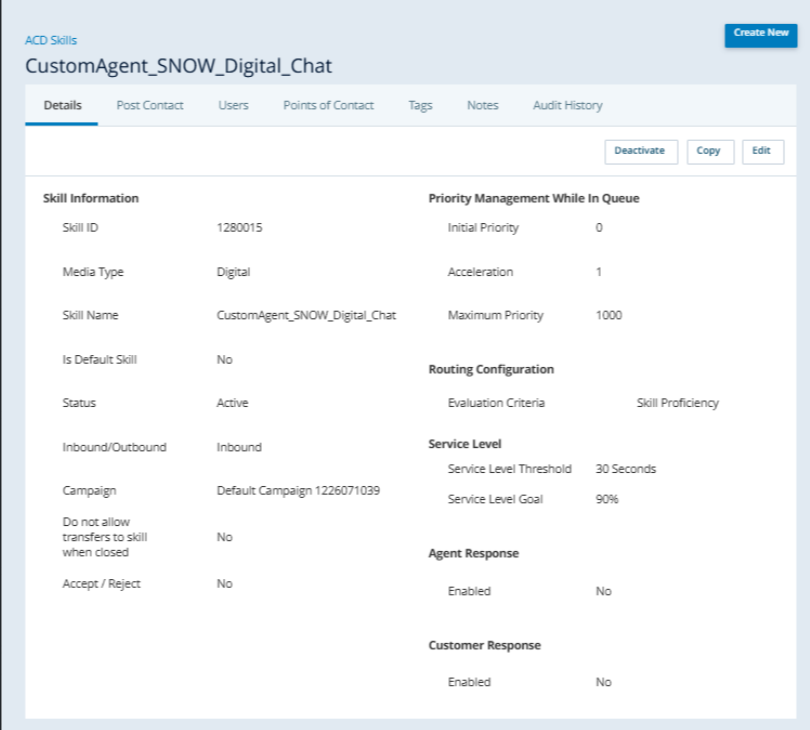
Each BYOC channel requires an associated ACD skill to route interactions to agents.
-
Sign in to UserHub.
-
Go to Applications > ACD > ACD Skills.
-
Click Create New and select Single Skill.
-
Configure the skill with the following details based on your business requirements:
-
Skill Name
-
Media Type
-
Routing Configuration
-
Service Level Threshold
-
Priority Settings
-
Agent Response Settings
-
-
Click Save.
-
Verify that the skill appears in the ACD Skills list.
Enable Permissions for the BYOC Channel
After creating a BYOC channel, enable the required channel permissions for each user role that needs access.
-
Sign in to UserHub.
-
Go to ACD > Roles.
-
Select the user role you want to configure (for example, Administrator, Manager, or Agent).
-
Click the Edit icon for the selected role.
-
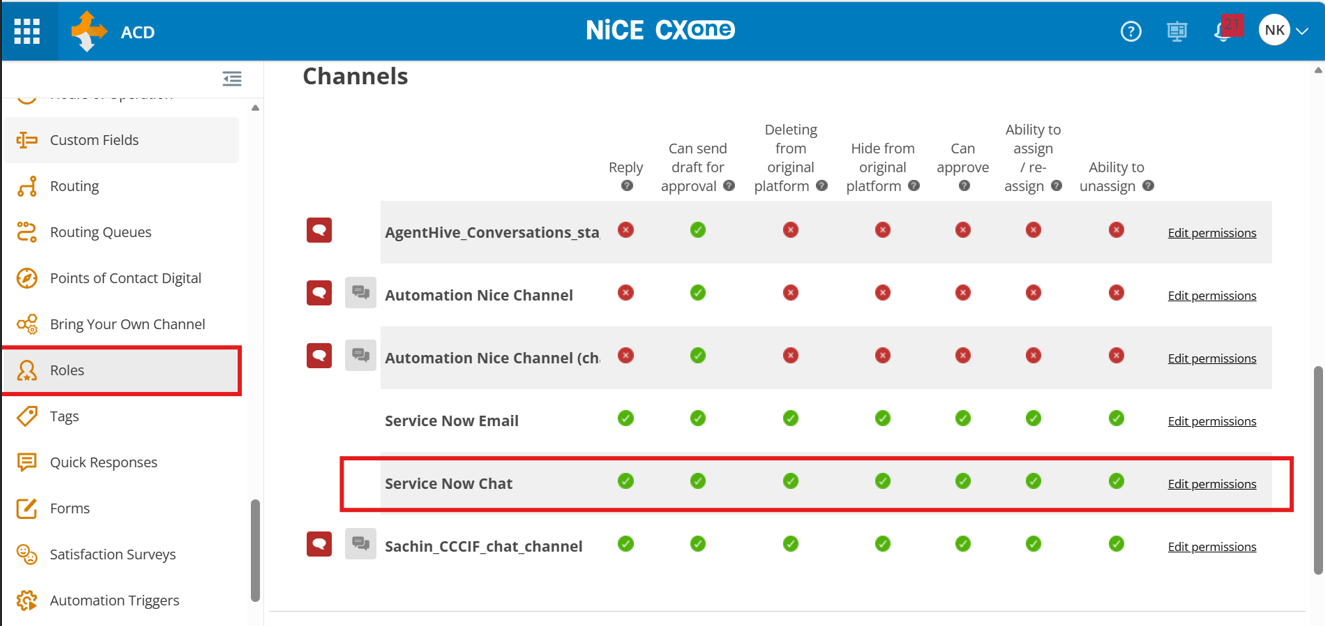
Navigate to the Channels permissions section.
-
Locate the newly created BYOC channel (for example, Service Now Chat).
-
Enable the following permissions:
Permission Description Reply Select Basic Digital Script (or the appropriate script for your workflow). Can send draft for approval
Allows agents to respond to interactions.
Deleting from original platform Allows agents to submit draft responses for review. Hide from original platform Allows hiding messages on ServiceNow. Can approve Allows approval of draft responses. Ability to assign / re-assign Allows assigning interactions to agents. Ability to unassign Allows removing agent assignments from interactions. -
Click Save.
-
Repeat steps 3–8 for all required user roles.
If permissions are not enabled, agents cannot access or manage BYOC interactions for this channel. Ensure permissions are configured for all roles that handle ServiceNow interactions.
Enable Chat Permissions at the Tenant Level
Chat must be enabled at the tenant level in Tenant Manager before agents can handle chat interactions.
-
Sign in to Tenant Manager (TM).
-
Go to Tenants and open the required business unit or tenant.
-
Go to Applications & Features.
-
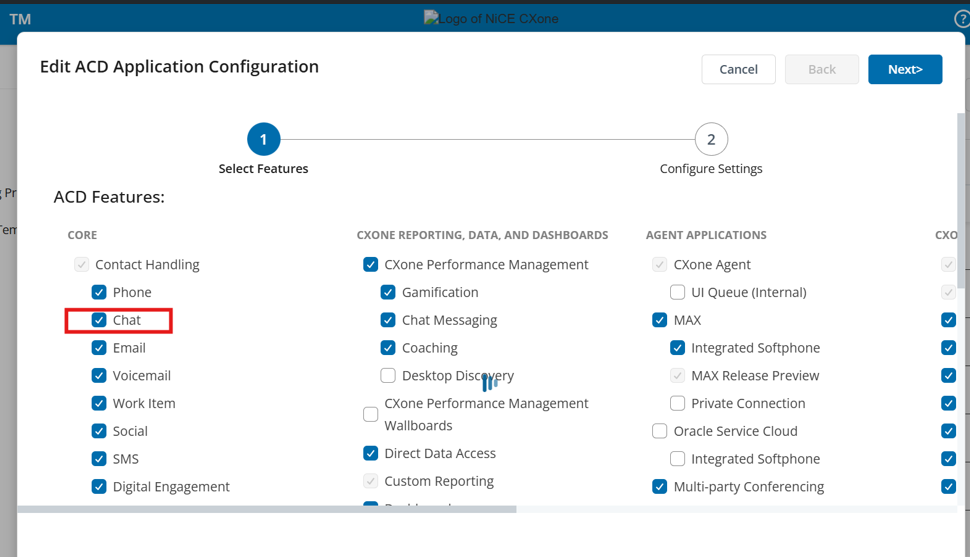
Expand ACD and click the Configure icon.
-
In the Edit ACD Application Configuration dialog, go to the contact handling settings.
-
Under Contact Handling, enable Chat.
-
Click Next, then click Finish.
Update Contact Settings for Users
Enable chat handling for each user who will manage ServiceNow chat interactions.
-
Sign in to UserHub.
-
Go to Applications > ACD > ACD Users.
-
Select the user you want to configure.
-
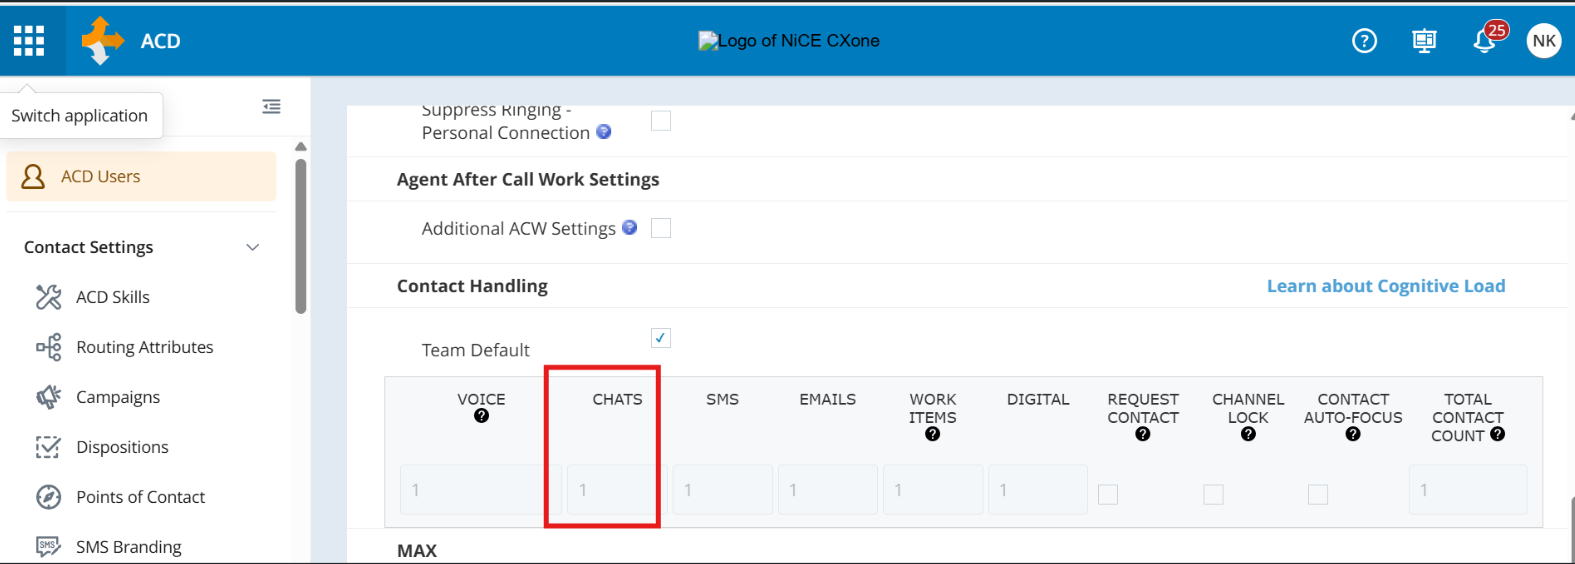
Navigate to Contact Settings.
-
Under Contact Handling, turn on Chat.
-
Set the Cognitive Load value as required for concurrent interaction capacity.
-
Click Save.
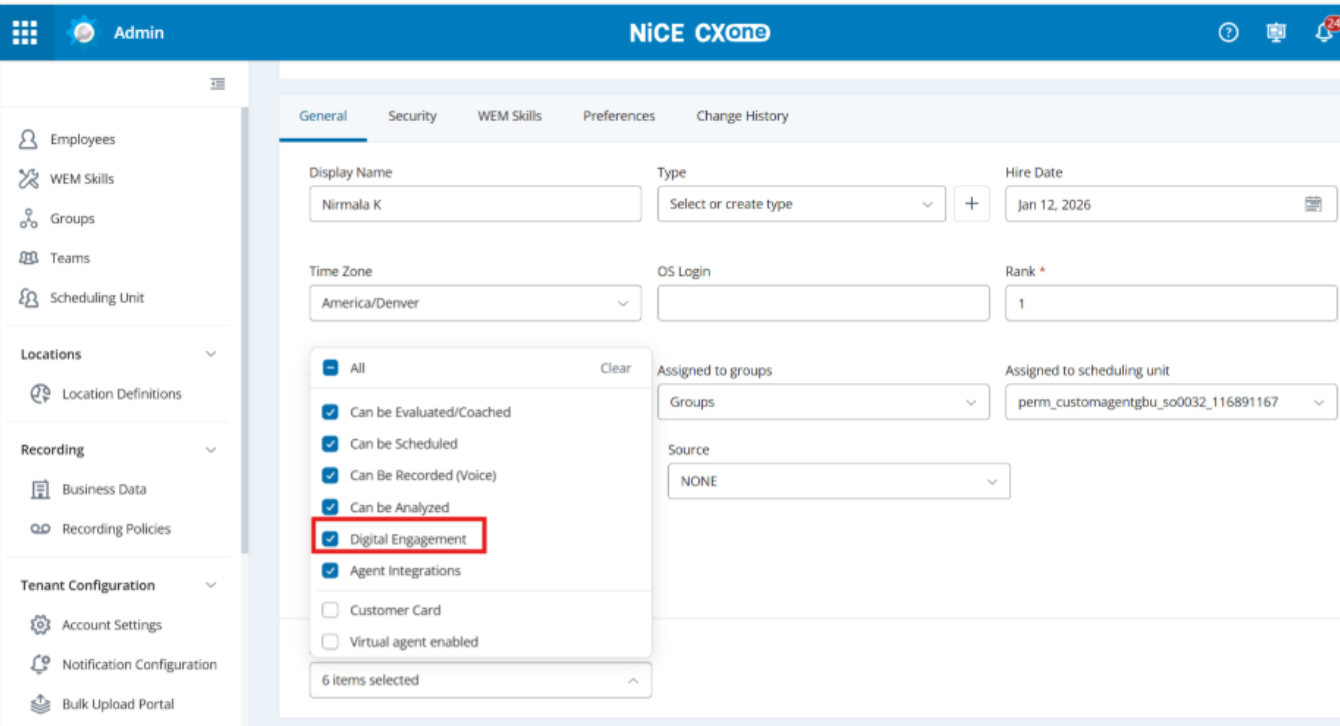
The user must have the Digital Engagement attribute enabled. To verify, go to Applications > Employees, select the employee, and confirm that Digital Engagement is enabled in the General section.
Additional Information
-
ServiceNow channels become available in the ServiceNow instance as part of the scoped app installation.
-
For IHF connector setup instructions, see the ServiceNow – NICE CXone Connector Creation & Configuration.
Configuration Summary
| Step | Location | Action |
|---|---|---|
| Create channel mapping | UserHub > Connections Hub > Custom Integrations > Servicenow > Channel Mapping | Map a ServiceNow channel to a new NiCE Digital BYOC channel. |
| Configure ACD channel | UserHub > ACD > Points of Contact Digital | Assign a Studio script and skill to the channel. |
| Create ACD skill | UserHub > Applications > ACD > ACD Skills | Create a routing skill for the BYOC channel. |
| Enable channel permissions | UserHub > ACD > Roles | Enable chat in the tenant’s ACD configuration. |
| Update user settings | UserHub > Applications > ACD > ACD Users | Enable chat and set cognitive load for each agent. |
Queue Setup
In the CCaaS Admin Console, create the digital queues that route ServiceNow chat interactions to agents. For Digital Chat skills, select NiCE_Chat_Messaging as the Service Channel, and activate each queue. For more information, see Configure CCaaS Admin Console - Import Queues from NiCE in Admin Console.