NiCE Digital Chat Setup (CCCIF)
Follow the below steps only if you want to use the NiCE Digital Chat feature.
CCCIF Chat Configuration Guide for ServiceNow Instance
This section describes how to configure your ServiceNow instance to enable NICE Digital Chat integration using the Contact Center Channel Integration Framework (CCCIF). Follow these steps to set up token verification, message authentication, provider channel updates, trusted media domains, presence states, and queue creation.
Prerequisites
Before you begin, verify that the following requirements are met:
-
You have admin privileges in ServiceNow to create and modify records.
-
The following ServiceNow plugins are installed:
Plugin Plugin ID Virtual Agent API sn_va_as_service Conversational Messaging
com.glide.messaging.awa
After you install the plugins listed above, install or upgrade the NICE Unified Agent application to the latest supported version.
Configuration Steps
Create a Token Verification Record
A secure token authenticates inbound and outbound messages between NICE and ServiceNow.
Navigation
All Menu → token_verification.list
-
Select New.
-
Complete the following fields
Field Value Name Token Name Description
NICE Digital Chat integration authentication token
Token Secure token value (Auto Generated) -
Select Submit or Update.
Record the token name for use in the next step.
 View image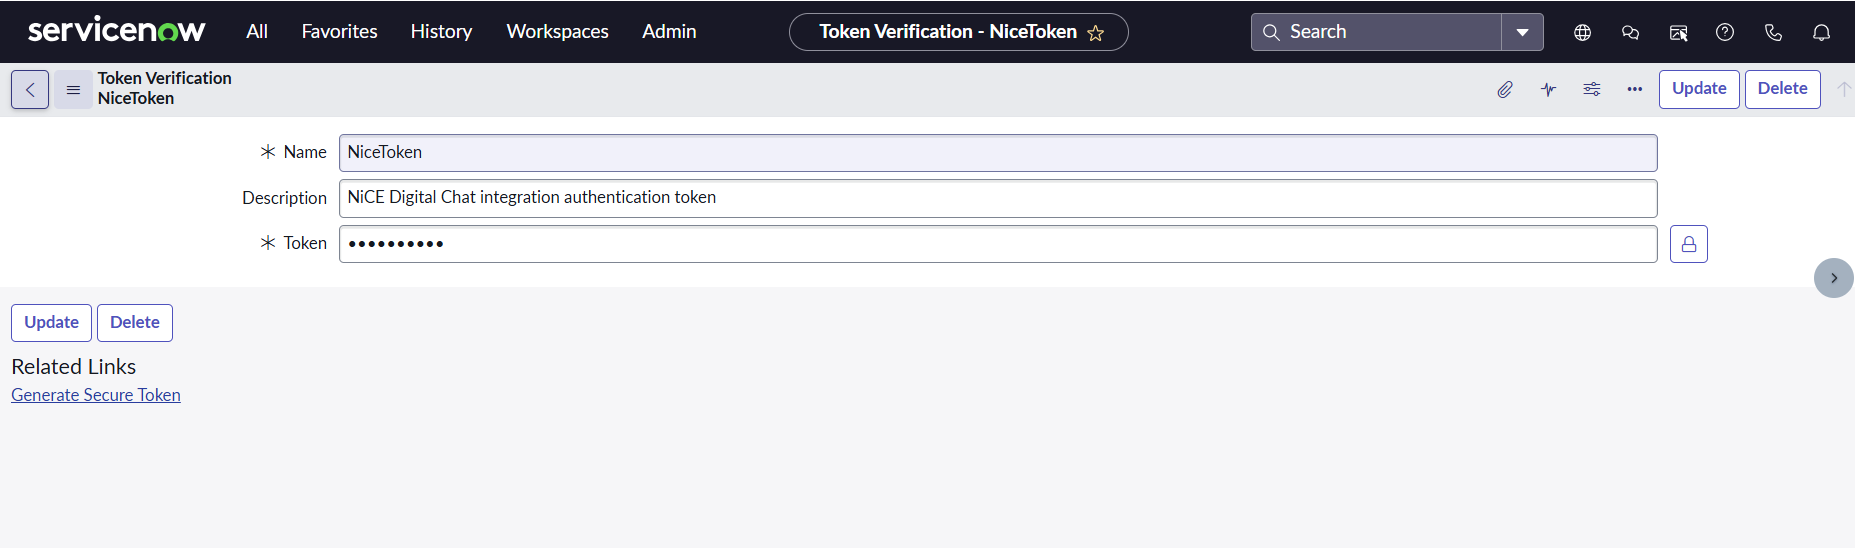
Create a Message Authentication Record
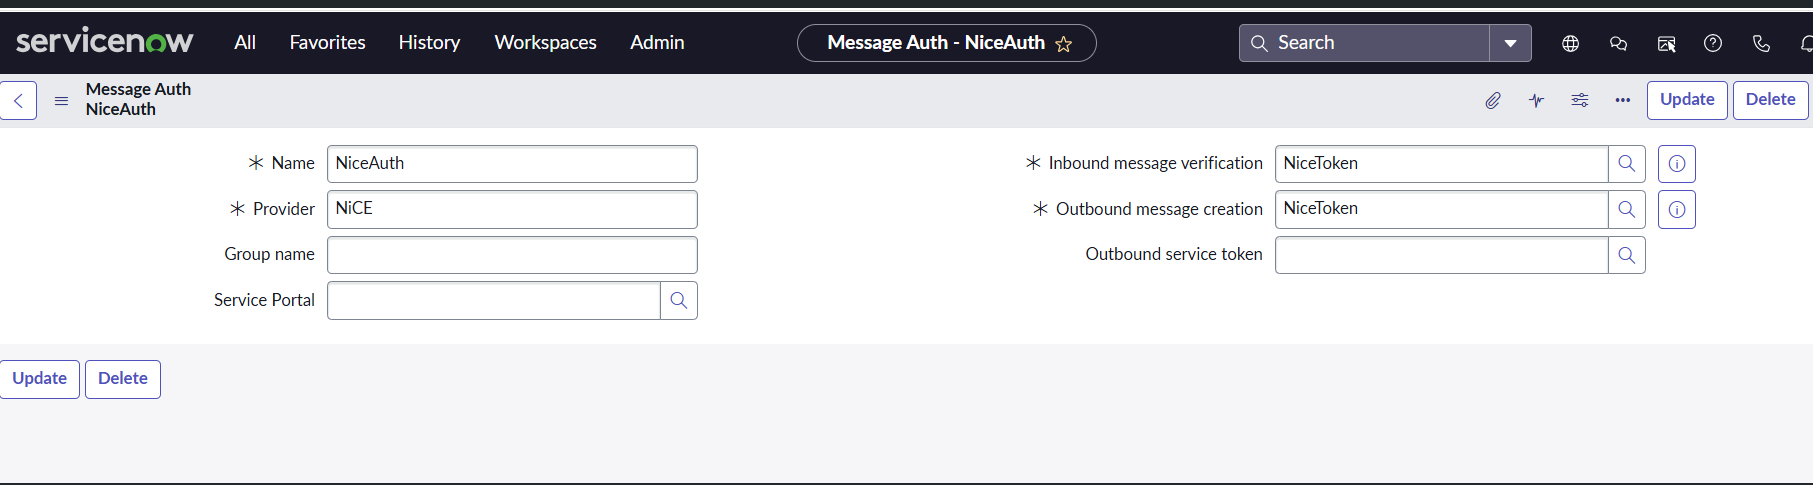
Link the token you created in Create a Token Verification Record to a Message Authentication record for the NICE provider.
Navigation
All Menu → message_auth.list
-
Select New.
-
Complete the following fields
Field Value Name Enter a descriptive message authentication name. Provider
NiCE
Inbound Message Verification Select the token created in Create a Token Verification Record. Outbound Message Verification Select the token created in Create a Token Verification Record. -
Leave all other optional fields empty.
-
Select Submit orUpdate.
Update the Provider Channel Identity
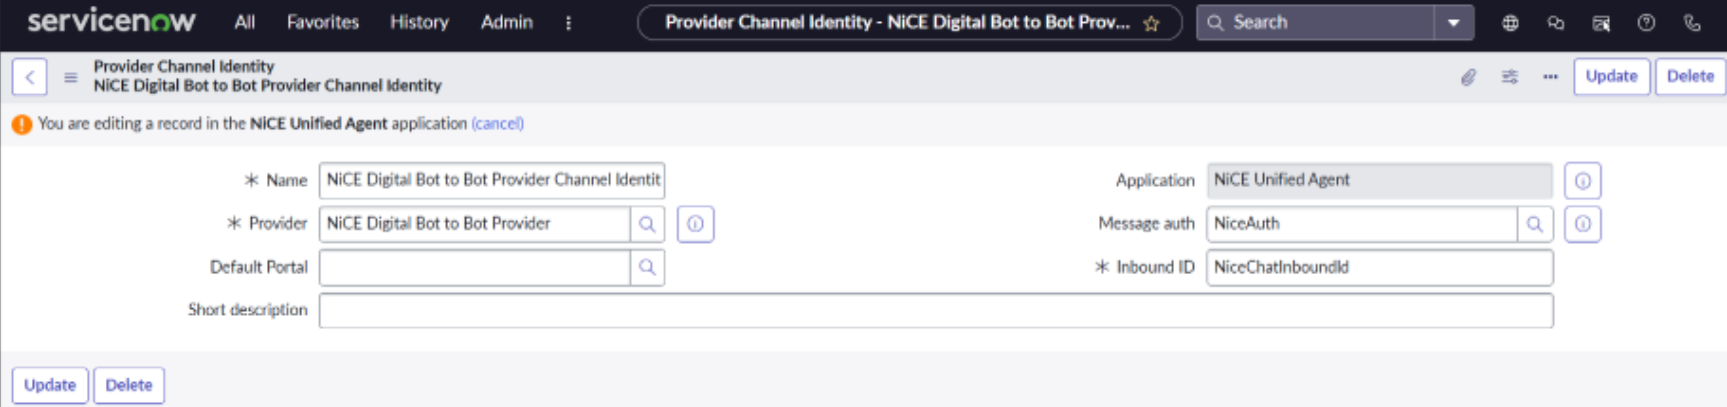
Associate the Message Authentication record with the NiCE provider channel.
Navigation
All Menu → sys_cs_provider_application.list
-
Open NiCE Digital Bot to Bot Provider Channel Identity.
-
In the Message Auth field, select the Message Authentication record you created in Create a Message Authentication Record.
-
Select Submit or Update.
Update Trusted Media Domains
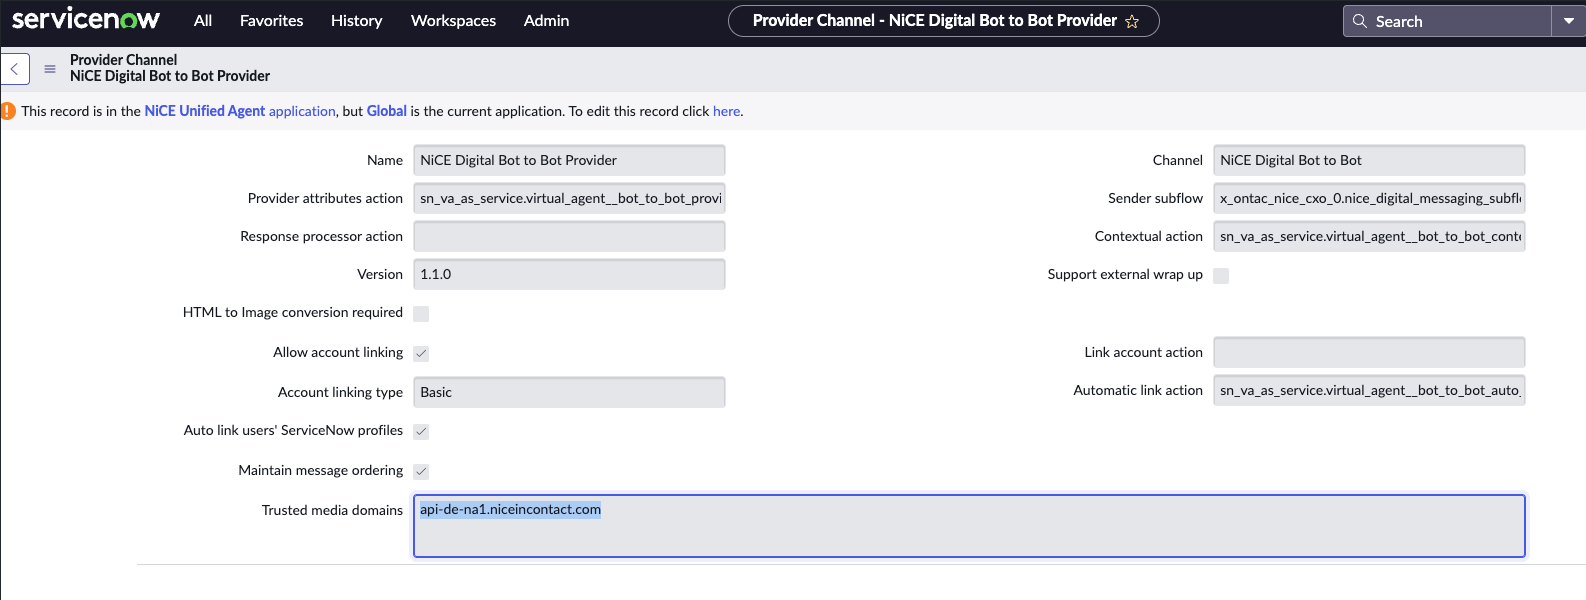
Update the trusted media domains for the NiCE Digital Bot to Bot Provider provider channel so media URLs are allowed for the correct production region.
Navigation
All Menu → sys_cs_provider.list
-
Open NiCE Digital Bot to Bot Provider.
-
In the Trusted media domains field, enter the domain URL that corresponds to your production region.
For the DE NA1 production region, use api-de-na1.niceincontact.com.
-
Select Update to save the record.
Configure Presence States
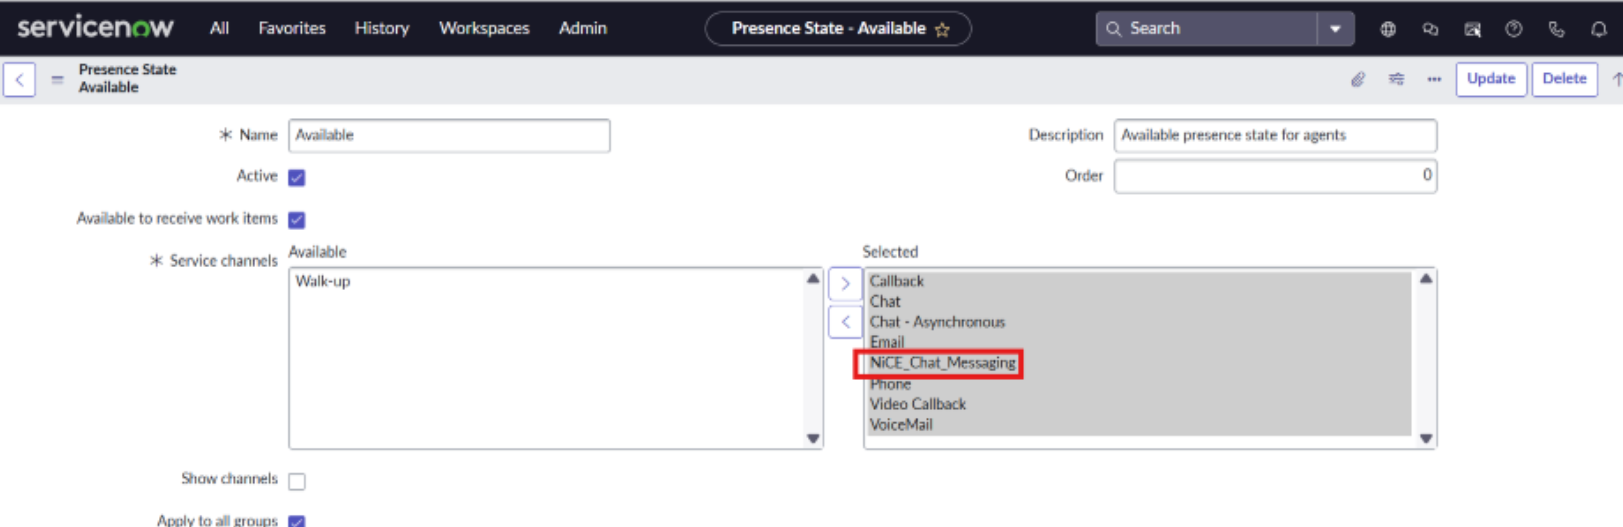
Agents receive Digital Chat contacts only when the correct service channel is mapped to their presence state.
Navigation
All Menu → Presence State
-
Open the desired presence state (for example, Available or Working).
-
Under Service Channels, move NiCE_Chat_Messaging to the selected list.
-
Select Update.
Repeat this step for each presence state that should receive Digital Chat contacts.
System Property Configuration
Navigation: All Menu → sys_properties.list
-
Search for system property com.glide.cs.conversation_idle_timeout.
-
Open it and update the Value field as 2592000 ( 30 days in seconds)
Create Queues
Queues should be created using the Contact Center Admin Console.
-
Fetch the NiCE Skills from CXone.
-
Select the skills to create queues for.
-
In the Service Channel list, select NiCE_Chat_Messaging for Digital Chat skills.
-
Complete the queue creation process, and then activate the queue so it can begin receiving Digital Chat contacts.
Queues are created in the CCaaS Admin Console. For detailed steps, see Configure CCaaS Admin Console – Step 4: Import Queues from NiCE in Admin Console.
If the queue is not activated, agents will not receive Digital Chat contacts through the queue.
CCCIF Chat Configuration for NiCE CXone
Overview
This section provides the configuration steps required in NiCE CXone to support NiCE Digital Chat integration using the Contact Center Channel Integration Framework (CCCIF). It focuses on the CXone-side setup needed to connect with the ServiceNow instance and enable Digital Chat routing through the integration.
Prerequisites
Before proceeding with the NiCE CXone configuration, ensure:
-
The ServiceNow and NiCE CXone connector creation is completed.
-
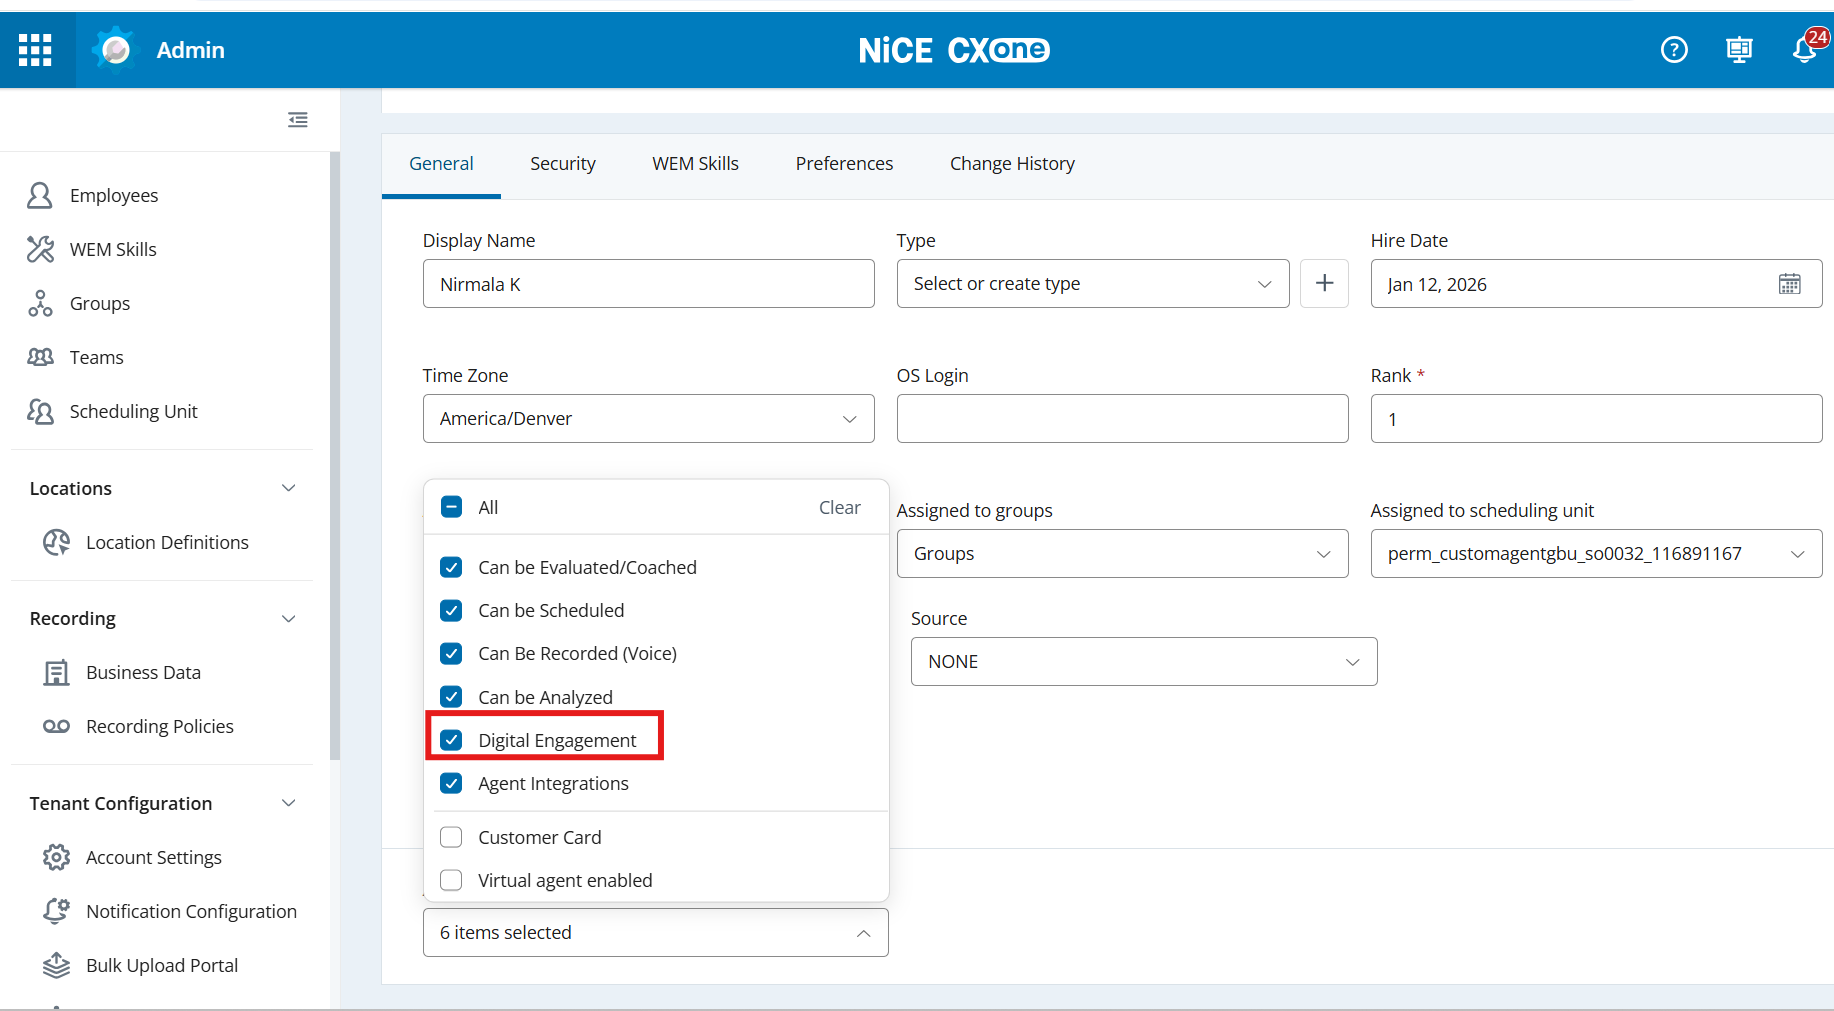
Digital Engagement attribute is enabled for the user. To verify:
-
Navigate to Applications > Employees.
-
Select the target employee record.
-
Under the General section, confirm that the Digital Engagement attribute is set to Enabled.
-
NiCE CXone Configuration
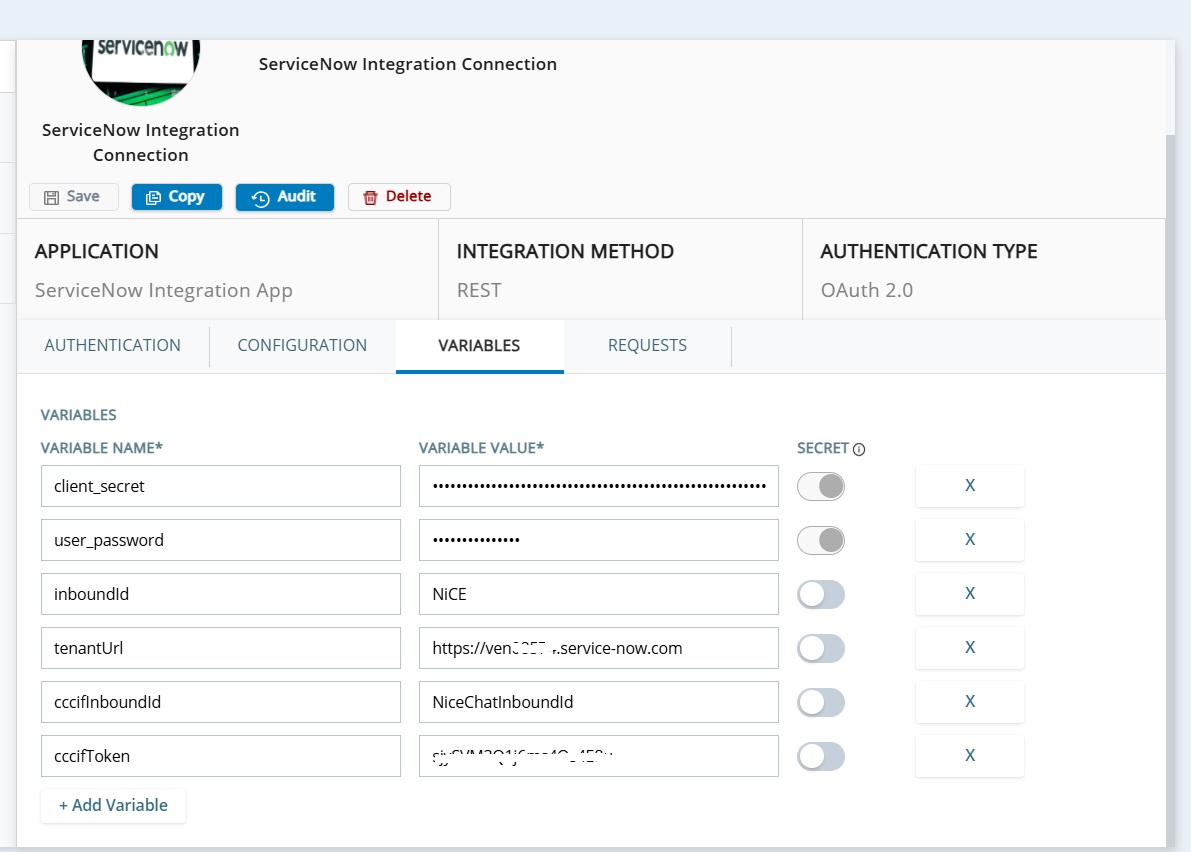
Update ServiceNow Integration Connector
Navigation
Add the required CCCIF variables to the existing ServiceNow Integration Connection in CXone. These variables enable the chat integration to authenticate and route messages correctly.
Navigation
UserHub → Applications → Connections Hub → Integrations → Integration Hub
-
Open the ServiceNow Integration Connection corresponding to the specific ServiceNow instance being configured for CCCIF Digital Chat
-
Select the Variables tab.
-
Add the following variables:
Variable
Value
cccifToken Enter the secure token value created in the ServiceNow Token Verification record.
For details, see the NiCE Digital Chat Setup (CCCIF)
-
Select Save to apply the connection configuration.
Ensure the cccifToken value matches exactly the token configured on the ServiceNow side. A mismatch will cause authentication failures during chat routing.