

Nodes in a AI Agents (Cognigy) flow represent actions or logic that your virtual agent executes. Editing a node allows you to configure its properties, update parameters, or adjust its behavior within the flow.
The Retrieve Knowledge node enables the AI Agents (Cognigy) to fetch relevant information from connected knowledge sources, such as Knowledge Hub, during an interaction. It processes the user’s query, searches the configured knowledge base, and returns the most relevant content to generate accurate and context-aware responses.
For a given flow, you can configure only one Retrieve Knowledge node, which can be linked to a single Knowledge Hub knowledge base. Configuring multiple knowledge nodes within the same flow is not currently supported.
Launch AI Agents (Cognigy) through NiCE CXone
-
Click the app selector
 go to General and select Automation.
 -
Inside Automation, select Cognigy AI.
Add Retrieve Knowledge Node in AI Agents (Cognigy)
-
In AI Agents (Cognigy), select Build > Flows.
-
From the list, select the Flow you want to edit, for example, SayHelloAndHandover.
-
If the project contains multiple flows, select Main Flow from the flow selector at the top. The Flow opens in the Chart view, where you can add and configure nodes.
-
In the Flow editor, select the plus (+) icon where the Retrieve Knowledge node should be added.
-
Select the By Function tab > CXone category > Retrieve Knowledge. The node is added to your flow.
-
Click on the node to open the Edit Node panel on the right side.
-
The Edit Node panel displays configurable fields specific to the node type.
-
For a Retrieve Knowledge node, you will see the following fields:
|
field Name |
definition |
notes |
|---|---|---|
| Knowledgehub ID | Enter the Knowledge Hub ID from AI Studio’s Knowledge Hub. Each knowledge base has a unique Knowledge Hub ID that you can copy and paste here. This ID determines which knowledge source will be used to retrieve answers. |
|
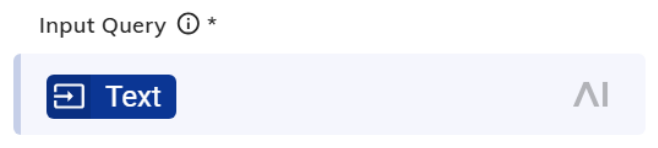
| Input Query | Indicates the end user’s question that will be used to search the knowledge base for an answer. |
|
| Query | ||
| Query Persona | Describes the persona you want AI to adopt when generating the summary. | Do not use this field if you are using Prompt Editor and have set a Prompt Manager Profile ID as Prompt manager already have persona set up in it. |
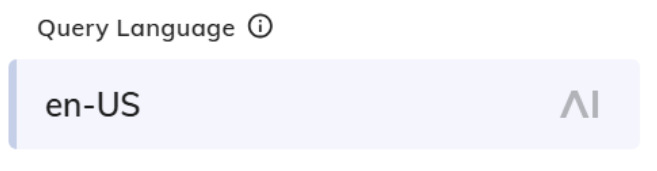
| Query Language | Select the language for the generated summary. This setting only affects the output language. |
Select the language you want LLM to respond in.
|
| Knowledge Hub | ||
| Filter | Specify criteria to select which knowledge articles should be included in the Knowledge Hub, based on their metadata. |
Defines JSON-based retrieval filters that apply attribute conditions to restrict which documents are returned, supporting single conditions and nested logical groups using andAll/orAll. Supports multiple operators (equals, notEquals, numeric comparisons, in/notIn, startsWith) over string, number, and boolean attributes so you can build simple or complex filters like, {"equals": {"key":"PageRestriction", "value":"Public" } } For details, refer to the Filter Operator section. |
| Max Articles | Defines the maximum number of articles to retrieve from the knowledge base for generating the response. | |
| Prompt | Creates a custom prompt to control tone and provide context for your knowledge base. Do not use this field if you are using Prompt Editor and have set a “Prompt Manager Profile ID.” | |
| Model ARN | Select the LLM model to use for generating the knowledge response. |
Available options are, amazon.nova-pro-v1:0, amazon.nova-lite-v1:0, and anthropic.claude-haiku-4-5-20251001-v1:0. If you are using Prompt manager ID then you do not need Model ARN in this field as prompt managers already has following models selected:
|
| KB Answers | ||
| Prompt Manager Profile ID | Enter the profile ID from AI Studio’s Prompt Manager. This lets you manage and edit your prompt directly within Prompt Manager. |
|
| Max Words for Answers | Set the maximum length for the generated knowledge response. | |
| Max Links | Sets the maximum number of citation links to include in the generated response. | |
| Result Storage | ||
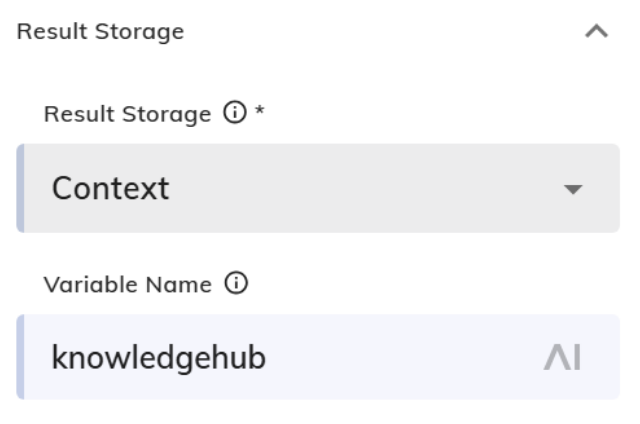
| Result Storage | Specify where the retrieved content should be stored. |
|
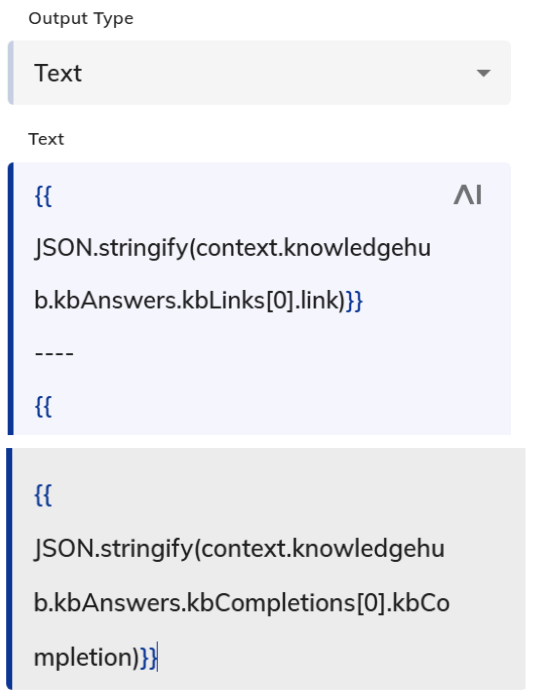
| Variable Name | Enter the name of the variable where the stored content will be saved. |
The LLM response is stored in this variable, and the values are displayed in the chat based on the configurations shown in the screenshot.
Say Node:
|
| Error Handling | ||
| Log to System | Enable logging errors to the system logs. | Logs can be viewed on the Logs page of your Project. The parameter is inactive by default. |
| Select Error Handling Approach | Define how to handle errors that occur during the request. |
Based on your requirement, you can select one of the following Error Handling options:
|
| Error Message (Optional) | Enter a custom message to display when an error occurs. This field is optional. | This parameter is active when the Continue Flow Execution option in Select Error Handling Approach is selected. Optional message to output if knowledge retrieval fails. |
| Debug Settings | ||
| Debug Settings | For performance reasons, debug logging will only be active when testing from the Interaction Panel and when Debug Mode is enabled in it. | |
| Log Request Body | Enable or disable logging of the request body sent to the Knowledge Hub. | |
| Log Request | Enable or disable logging of the time taken for the request to complete. | |
| Latency Mocking | Enter the mock code to use when mocking is activated for the Node. | Mocking lets you change the behavior of a Node by replacing its logic with mock code without changing the original Node settings. This approach allows you to keep the original Flow logic and mock Node behaviors to test specific Flow conditions in the Simulator, the Interaction Panel, and Endpoints without reconfiguring Nodes. Mocking provides the Mock Code field in every Node’s settings in the Node editor. This field supports JavaScript code to access the Input, Context, and Profile objects, and api.say function. The mock code entirely overrides the configured Node’s execution logic at run-time. For details refer to the Mocking topic. |
| Settings | ||
| Label | Defines a custom name of the Node. | |
| Comment | Free text field. | |
| Analytics Step | The Step is recorded in Cognigy Insights and Cognigy.AI OData endpoint, once the Node is passed | |
Manage Node Options in the Edit Node Panel
Use the More options  menu in the Edit Node panel to perform additional actions on a node. These actions help you copy identifiers, manage node status, or set the starting point for a flow.
Copy a Node ID
Copy the unique identifier of a node for use in API calls or debugging.
-
In the Edit Node panel, select the node you want.
-
Click the More options
icon. -
Select Copy Node ID.
The node ID is copied to your clipboard.
Delete a Node
Remove the node from the flow permanently.
-
In the Edit Node panel, select the node you want to delete.
-
Click the More options
icon. -
Select Delete.
Confirm the deletion when prompted.
Deleting a node cannot be undone. Recreate the node if needed.
Disable a Node
Temporarily deactivate a node without removing it from the flow.
-
In the Edit Node panel, select the node you want to disable.
-
Click the More options
icon . -
Select Disable.
The node remains in the flow but will not execute until you enable it again.
Set a Node as Entrypoint
Define a node as the starting point for the flow.
-
In the Edit Node panel, select the node you want to set as the entry point.
-
Click the More options
icon. -
Select Set Entrypoint.
The flow will start from this node instead of the default start node.
Filter Operator
This section covers the generalized syntax for both single and multiple operators:
-
Single Condition
{"<operator>": {"key": "<metadata-key>",
"value": <value>
}
}
-
Multiple Conditions — AND (all must match)
{"andAll": [
{ "<operator>": { "key": "<metadata-key>", "value": <value> } },{ "<operator>": { "key": "<metadata-key>", "value": <value> } }]
}
-
Multiple Conditions — OR (any one must match)
{"orAll": [
{ "<operator>": { "key": "<metadata-key>", "value": <value> } },{ "<operator>": { "key": "<metadata-key>", "value": <value> } }]
}
-
Nested — AND with OR inside (complex logic)
{"andAll": [
{ "<operator>": { "key": "<metadata-key>", "value": <value> } },{"orAll": [
{ "<operator>": { "key": "<metadata-key>", "value": <value> } },{ "<operator>": { "key": "<metadata-key>", "value": <value> } }]
}
]
}
-
Valid Operators — Replace <operator> with one of:
|
Console Symbol |
API Filter Name (<operator>) |
Supported Data Type |
Plain English |
|---|---|---|---|
|
= |
equals | String, Number, Boolean | Is exactly equal to |
|
!= |
notEquals | String, Number, Boolean | Is not equal to |
|
^ |
startsWith | String, Number, Boolean | Begins with |
|
> |
greaterThan | Number | Is greater than |
|
>= |
greaterThanOrEquals | Number | Is greater than or equal to |
|
< |
lessThan | Number | Is less than |
|
<= |
lessThanOrEquals | Number | Is less than or equal to |
|
: |
in | String list | Is one of the list |
|
!: |
notIn | String list | Is not one of the list |
-
Substitution Reference
| placeholder | replace with |
|---|---|
|
<operator> |
Any API Filter Name from the table above |
|
<metadata-key> |
Uri, Title, PageRestriction, Tags, etc. (case-sensitive) |
|
<value> (String) |
"Public" |
|
<value> (Number) |
2023 |
|
<value> (Boolean) |
true or false |
|
<value> (String list) |
["value1", "value2"] — only for in and notIn |
-
<metadata-key>: Defines in the Knowledge Hub. This value can vary by KMS connector.
-
<Value>: Must match the value sent by the KMS.
andAll and orAll require a minimum of two conditions inside the array.
-
Valid Operators Reference
|
API Filter Name (<operator>) |
Supported Data Type | Meaning |
|---|---|---|
|
equals |
String, Number, Boolean | Is exactly equal to |
|
notEquals |
String, Number, Boolean | Is not equal to |
|
startsWith |
String, Number, Boolean | Begins with |
|
greaterThan |
Number | Is greater than |
|
greaterThanOrEquals |
Number |
Is greater than or equal to |
|
lessThan |
Number | Is less than |
|
lessThanOrEquals |
Number | Is less than or equal to |
|
in |
String list | Is one of the list |
|
notIn |
String list | Is not one of the list |