To connect WordPress to a knowledge base, you must either provide your credentials to NiCE Professional Services or enter them in Knowledge Hub yourself. This page describes how to connect WordPress to Knowledge Hub using the WordPress Connector with Knowledge Hub, enabling secure and efficient synchronization of process data across platforms. This connector supports incremental synchronization, transferring only new or updated records during each run.
The WordPress connector currently supports only the help object. Only articles stored under the help object in WordPress are synchronized and accessible in Knowledge Hub. Content stored under any other object is not supported by the connector at this time.
Prerequisites
Before you begin, make sure the following requirements are met:
-
The WordPress site is active, contains the content you want to use, and has the REST API enabled.
-
You can sign in to WordPress as an administrator and create an application password from your Profile.
-
You have access to the Knowledge Hub application in NiCE CXone so you can configure the WordPress connector.
If you do not have the required WordPress permissions, contact your WordPress administrator.
Required WordPress Parameters:
To configure the WordPress connector to the Knowledge Hub, you need the following details:
-
Username – Your WordPress administrator username used for the connection.
-
Website – The main domain URL of your WordPress site. This value is used as the Base URL in the connector configuration.
-
New Application Password Name – An Application Password generated for the administrator account. This value is used as the Password in the connector configuration.
How to Retrieve the WordPress Parameters
-
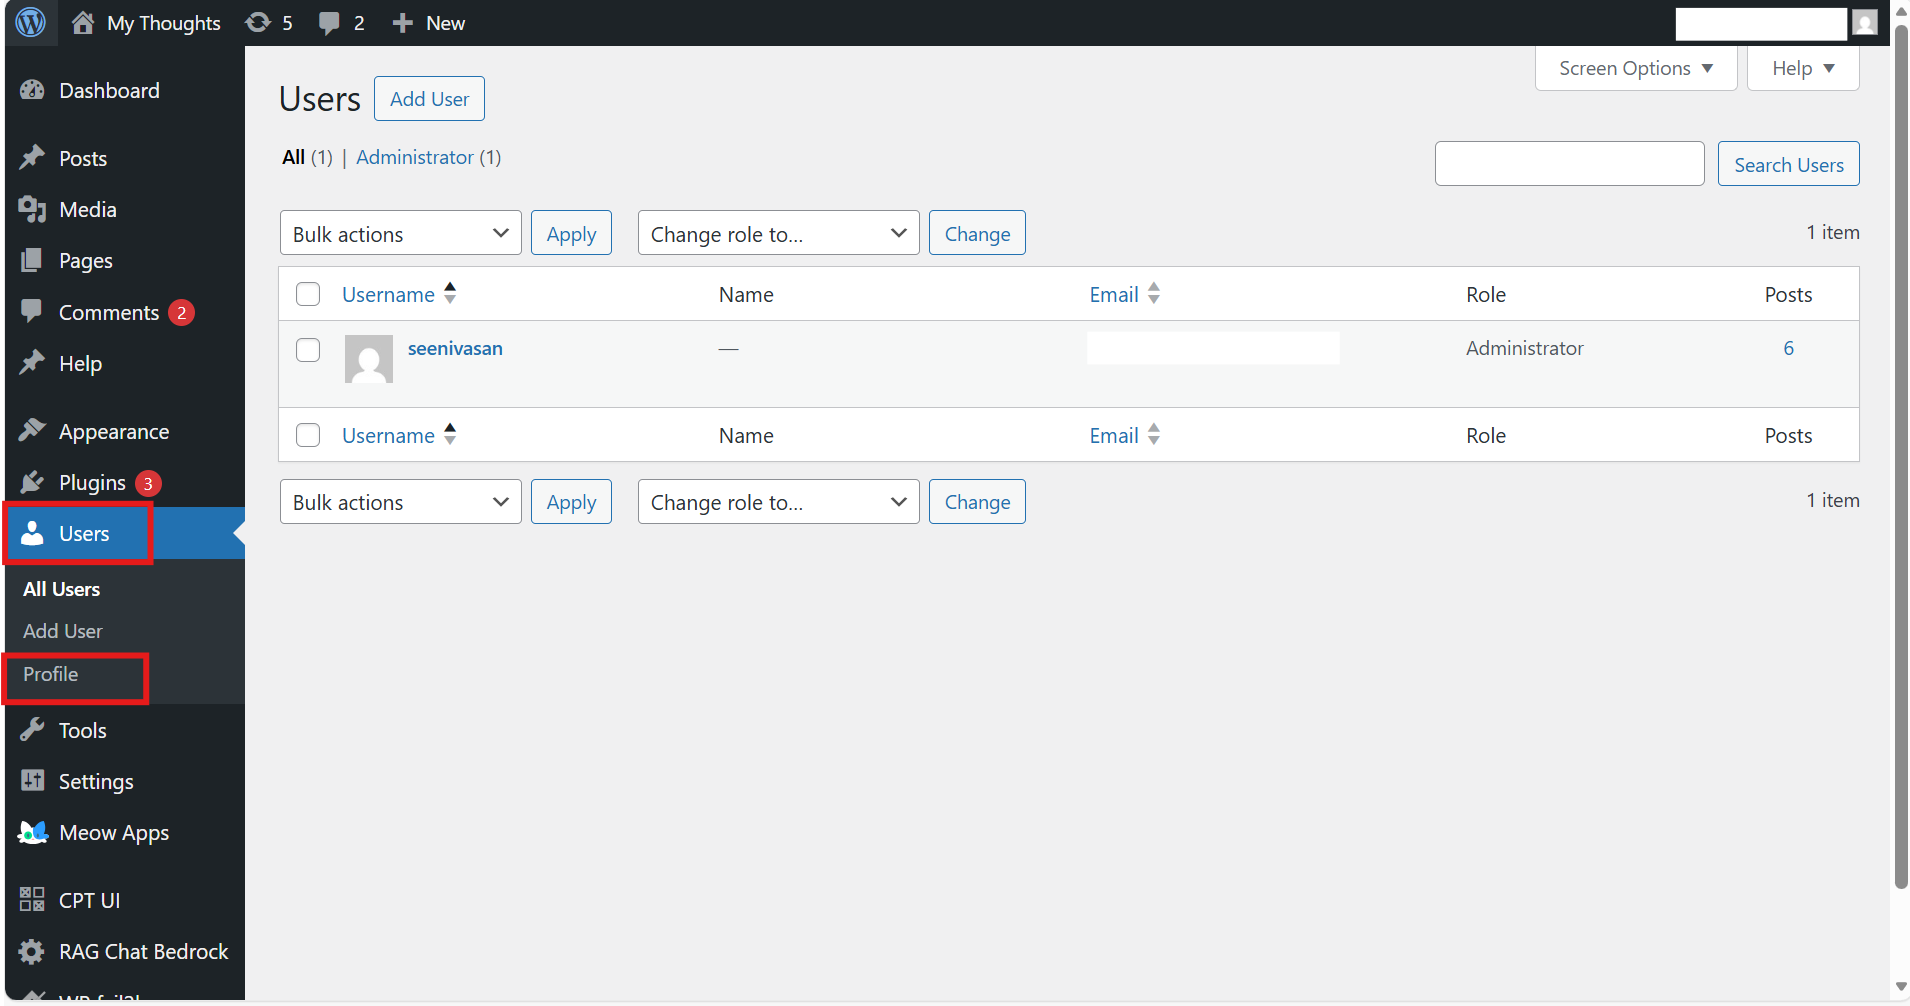
Navigate to https://yourdomain.com/wp-admin and log in with your admin credentials.
-
In the left panel, go to Users, and select Profile.
-
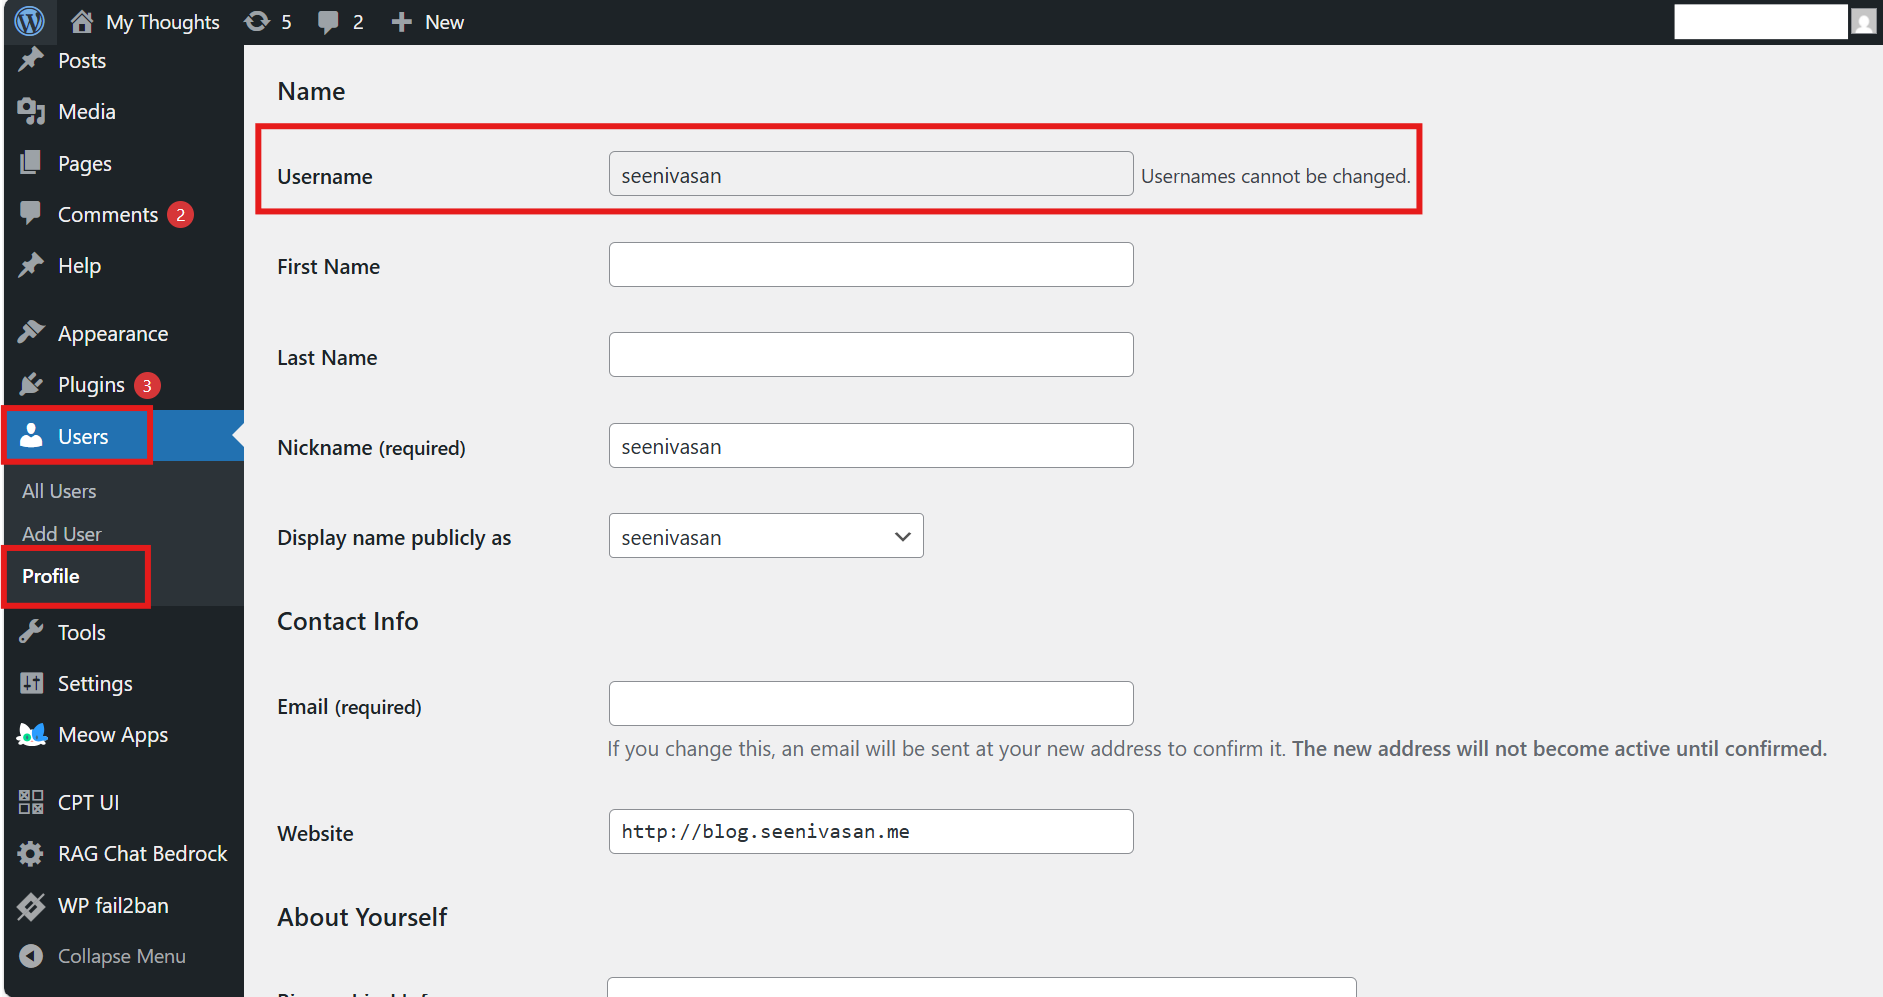
On the Profile page, in the Name section, locate the Username field.
-
Copy the Username field value exactly as displayed. Enter this value as Username in the connector configuration.
The Username cannot be modified. Copy it exactly as displayed, even if it differs from the Username, you typically use to sign in. The connector requires this exact value.
-
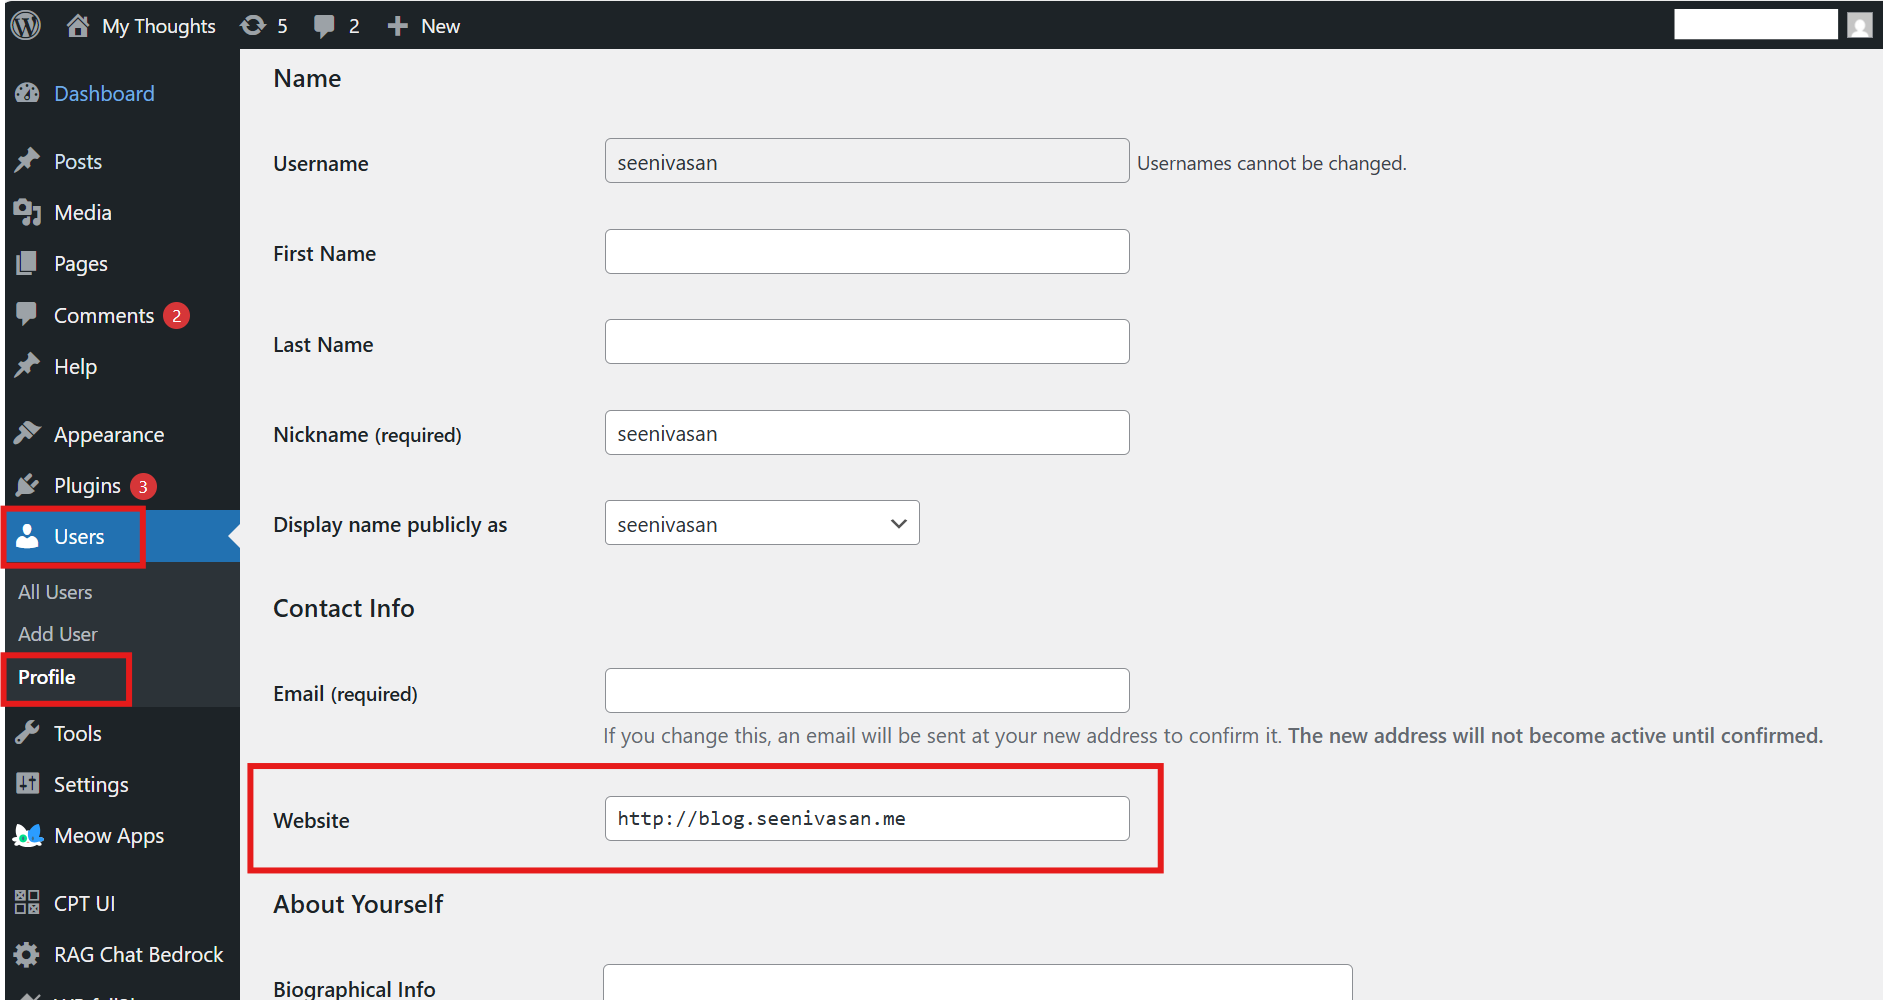
In the Contact Info section, locate the Website field.
-
Copy the Website field value exactly as displayed. Enter this value as Base URL in the connector configuration.
If your site uses HTTPS, the address will start with https://. Copy it exactly as displayed in the Website field. The connector requires this exact value.
-
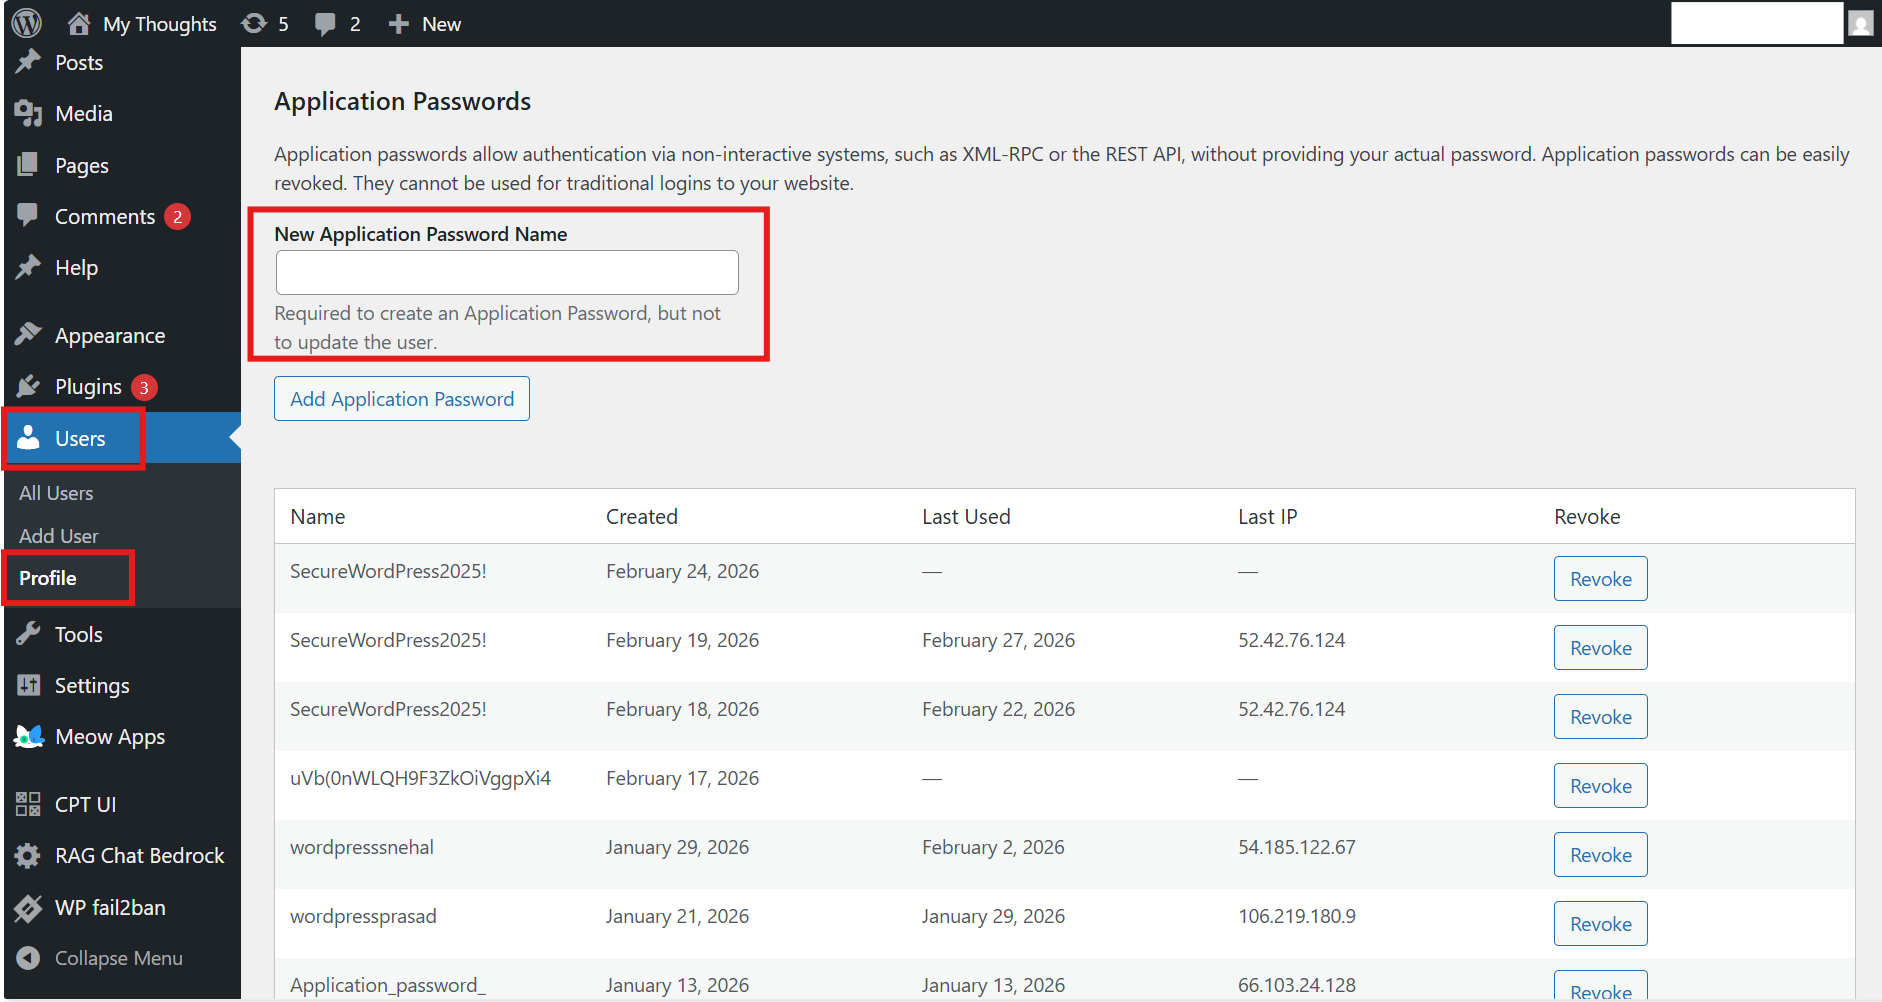
In the Application Passwords section, locate the New Application Password Name field and enter your own password.
-
Select Add Application Password. WordPress generates a new application password. Copy this password and store it in a secure place. Enter this value as Password in the connector configuration.
Application passwords allow authentication via non-interactive systems, such as XML-RPC or the REST API, without using your main actual password. You can revoke an application password at any time if it is no longer needed. Application passwords cannot be used to sign in to the WordPress admin interface.