

To connect Guru to a knowledge base, you must either provide your Guru credentials to NiCE Professional Services or enter them in Knowledge Hub yourself. This page describes how to generate those credentials, also called OAuth tokens. You should treat the OAuth tokens like passwords. Be sure to store them in a secure location. If you lose them, you'll have to regenerate them.
This method is a developer effort. It requires knowledge of Python and Guru admin privileges.
Complete each of these tasks in the order given.
Install Python
Complete this task if you don't already have Python installed on your computer.
-
Run the installer. Select the box for Add python.exe to PATH, then click Install Now.
Generate an OAuth User Token
Generate an OAuth user token in Guru.
-
In Guru, go to Apps and Integrations.
-
On the Apps and Integrations page, click the API Access tab.
-
Click Generate user token.
-
On the Generate New User Token page, select a User from the drop-down list.
-
Click Generate token.
-
Save the token that appears.
Create an OAuth Client
Create an OAuth client to generate a client ID and client secret.
-
Navigate to the OAuth2 Clients section in your Guru account settings.
-
Create a new OAuth2 client to generate the client_id and client_secret. See the Guru documentation for more information.
-
Save the client_id and client_secret values.
Customize the Python Script
NiCE provides a Python script that you must customize with values specific to your configuration.
-
Open a text editor and start a file named generate_oauth_tokens.py.
-
Copy and paste the lines of code from this TXT file into your Python file.
-
Near the top of the file, under # Configuration details for Guru OAuth - Hardcoded values , customize these values:
-
Set client_id to the value from when you created an OAuth client.
- Set client_secret to the value from when you created an OAuth client.
-
Set token_file_path to a local path. For example:
token_file_path = r"C:\Users\xyz\Desktop\guru_credentials.txt"
-
-
Save the changes to the script.
Run the Python Script
Next, run your Python script to generate the OAuth tokens you need.
-
Run the generate_oauth_tokens.py script at the command prompt or in a terminal window.
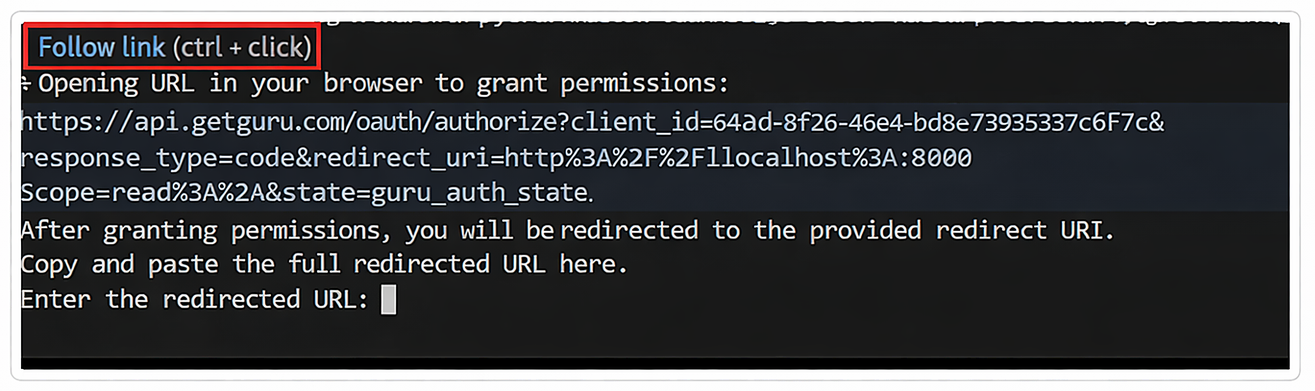
When the script runs, you will see a constructed URL that appears as follows:
-
Control-click to follow the link. Confirm that you want to open the external website.
-
When the Grant Permission to My Guru OAuth Client popup appears, click Grant Permission.
You are then redirected to the http://localhost:8000 where you can get the OAuth code.
-
In the http://localhost:8000 URL, look for the part that says code=. The value after code= is your authorization code.
-
Copy the entire URL the script generates. Paste it into the terminal when prompted for the redirected URL and press Enter.
The action will store the token in the specified path in your script.
The access token is valid for an hour.
-
Copy the tokens the script generates and store them in a secure location.

-
You only need to grant permission one time. On subsequent attempts, you will be redirected directly to the http://localhost:8000 to obtain the authorization code.
-
Tokens will look similar the following:
-
Auth code: 175eb4b8-ddf2-4c00-96cc-bba88b7e7790
-
Access token: Email:66a5734f-9d69-4e09-9a51-a398348a5e67
-
Refresh token: 2f11a6cb-6697-4e0a-a11e-1fcbfeaee3a8
-
Access and Refresh Token Expiration
Your access token is valid for 1 hour. The refresh token is valid for 2 to 24 hours, depending on your configuration. Make sure to monitor token expiration and request new tokens as needed to maintain uninterrupted access.