

To connect ServiceNow to a knowledge base, you must either provide your ServiceNow credentials to NiCE Professional Services or enter them in Knowledge Hub yourself.
To integrate ServiceNow with Knowledge Hub, you must configure OAuth authentication and generate secure credentials. These credentials include a Client ID, Client Secret, Access Token, and Refresh Token.
This guide provides a structured, end-to-end process divided into two parts:
-
Part 1: Configure OAuth in ServiceNow and generate client credentials
-
Part 2: Generate OAuth tokens using a Python script
This method is a developer effort. It requires knowledge of Python and ServiceNow admin privileges and access to a ServiceNow instance.
Complete each of these tasks in the order given.
Install Python
Complete this task if you don't already have Python installed on your computer.
-
Run the installer. Select the box for Add python.exe to PATH, then click Install Now.
Configure OAuth in ServiceNow
-
Go to ServiceNow Developers
 and sign in.
 -
Open your ServiceNow instance.
-
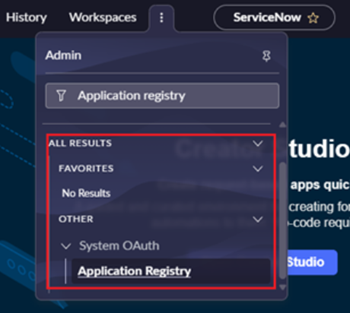
In the Application Navigator, navigate to, System OAuth > Application Registry.
Alternatively, search for Application Registry.
-
On the Application Registries page, click New.
-
Select Create an OAuth API endpoint for external clients, and then click Next.
-
In Name, enter a descriptive name for the OAuth application.For example, “CXone Knowledge OAuth”.
-
Click Submit to create the application.
Copy and Store Client ID and Client Secret
When you create and configure an OAuth application, ServiceNow automatically generates the client ID and client secret. These are two of the credentials needed to connect ServiceNow to Knowledge Hub.
-
In the OAuth application you created, locate the Client ID and Client Secret fields.
-
Copy the client ID and client secret and store them in a secure location.
ServiceNow only shows the client secret for an OAuth application once. If you lose it, you'll need to regenerate it.
Configure the OAuth Token Settings
-
Open the OAuth application record that you created.
If it is not already open, navigate to System OAuth > Application Registry, and then select your application.
-
In Refresh Token Lifespan, enter the number of seconds before the refresh token expires.
-
Recommended value: 31,536,000 (1 year)
-
Default value: 8,640,000 (100 days)
-
-
In Access Token Lifespan, enter the number of seconds before the access token expires.
-
Example value: 7,200 (2 hours)
-
Default value: 1,800 (30 minutes)
-
-
In Redirect URL, enter the redirect endpoint in the following format:https://{instance_name}.service-now.com/oauth_redirect.do.
For example: https://dev1103.service-now.com/oauth_redirect.do
-
Click Update to save the configuration.
1. Configure OAuth Scopes
To, add the required OAuth scopes to your OAuth application in ServiceNow.
-
Open the OAuth application that you created in ServiceNow.
-
In the related lists section, click OAuth Scopes.Click the search bar or list area to navigate to Authentication Scopes.
-
Click New to add a scope.
-
In Name, enter useraccount.
-
Click Submit.
-
Repeat steps 3 through 5 to add the following OAuth scopes:
-
openid
-
profile
-
email
-
offline_access
Enter each scope exactly as shown.
-
Generate OAuth Tokens Using the Python Script
This section explains how to use a Python script to generate the access token and refresh token after completing the OAuth application setup. Before you begin, make sure you have the following:
-
ServiceNow instance URL.
-
Redirect URL configured in the OAuth application.
-
Client ID and client secret from the OAuth application.
-
Required scopes added to the OAuth application.
Prepare Values for the Python Script
-
Open a text editor.
-
Copy and paste the following template into the file:
redirect_uri = 'https://{instance_name}.service-now.com/oauth_redirect.do' client_id = '6f9d3c8e0a0a4b7fb2c9e4a1b3c12345' client_secret = 'Zx91LmPqA3JvYwS7D9FhK2C4X8R0bE' instance = 'dev12345' token_url = f"https://<instance-name>.service-now.com" -
Update redirect_uri with the redirect URL configured in your OAuth application. For example, if your instance URL is https://dev1103.service-now.com/oauth_redirect.do, set redirect_uri = https://dev1103.service-now.com/oauth_redirect.do.
-
Update client_id with the Client ID from your OAuth application.
-
Update client_secret with the Client Secret from your OAuth application.
-
Update instance with your ServiceNow instance name (subdomain). For example, if your production instance URL is https://classics.service-now.com, then set instance = 'classics'.
-
Update the token_url with your ServiceNow instance URL. For example, token_url = f"https://<instance-name>.service-now.com".
Run the Python Script
Finally, run a Python script to test the OAuth integration and retrieve your ServiceNow access token, refresh token, and OAuth code.
-
Open a text editor and start a Python file.
-
Copy and paste the lines of code from this TXT file into your Python file.
-
3. Update the required values in the script with the OAuth tokens you prepared.
-
Save the file.
-
Open the script in an IDE, such as , VS Code,PyCharm,or run it from a terminal python generate_servicenow_tokens.py
-
Copy the authorization URL displayed in the console.
-
Open the authorization URL in a web browser.
-
Click Allow to authorize access to your ServiceNow instance.
-
After authorization, copy the full redirected URL from the browser address bar.The URL contains a code parameter. For example, https://<redirect-url>?code=<authorization_code>..
-
Return to the terminal or IDE. Paste the redirected URL when prompted, and press Enter.
-
Locate the generated file, servicenow_credentials.txt.
-
Open the file and verify that it contains:
-
Authorization code
-
Access token
-
Refresh token
-
-
Store the file in a secure location.
-
Your access token, refresh token, and OAuth code are generated in a file named servicenow_credentials.txt. That file is automatically saved to your desktop. The file contains:
-
Auth code: <authorization_code>
-
Access token: <access_token>
-
Refresh token: <refresh_token>
-
-
Store this file securely. You will use these values to configure the ServiceNow connector.
Troubleshoot Common Errors
-
Invalid client: If you receive this error, verify that the client_id and client_secret attributes match the values in the Client ID and Client Secret fields of your OAuth application. Also, check that the OAuth application is active.
-
Invalid scope: If you receive this error, make sure you've added all five required scopes to your OAuth application. Verify that each scope is spelled correctly and properly URL-encoded, with no spaces.
-
Invalid grant: If you receive this error, check if your refresh token has expired. Also, verify that the refresh token is correctly included in the request.
-
Redirect URL mismatch: If you receive this error, make sure the redirect URL in your request exactly matches the value of the Redirect URL field in your OAuth application.
-
Python or library issues:
-
Python not recognized: Reinstall Python and ensure Add Python to PATH is selected.
-
ModuleNotFoundError: No module named 'requests'”: Run pip install requests.
-
Access and Refresh Token Expiration
By default, ServiceNow access tokens expire after 30 minutes, and refresh tokens expire after 100 days. However, you can manually extend the access token’s lifespan to up to 1 year or even longer, if needed. To do this:
-
Go to your OAuth provider configuration in ServiceNow.
-
Update the access token expiration settings in the relevant script or property.
-
Review the changes with your security team to ensure they align with your organization’s policies.