

This page contains instructions that both you and your account representative must perform.
Enable Multi-Region Business Continuity Plan (Business Continuity Plan) for a Tenant
Required Permissions: TM Admin
Prerequisites:
-
Identify with the customer which region the Multi-Region BCP tenant should exist in.
-
Create an additional tenant for the customer.
-
When naming this tenant, it may be useful to indicate that this is a Multi-Region BCP tenant.
-
Because data syncs from the primary to Multi-Region BCP tenant, you do not need to configure anything in this tenant.
-
-
Copy the ID of the Multi-Region BCP tenant, which is in the Multi-Region BCP tenant's General tab in Tenant Management.
An account representative must complete this section.
- Enable Multi-Region Business Continuity Plan (Business Continuity Plan) for the primary tenant in NiCE CXone:
- Click the app selector
 and select TM.
 - Locate and select the primary tenant on the Tenants page.
- Click the Applications & Features tab.
- Enable Multi-Region BCP and confirm that you want to enable it. A configuration pop-up displays.
- Enable Multi-Region BCP Configurations and Multi-Region BCP Tenant Enablement, then click Next.
- Map the tenant to a Multi-Region BCP tenant:
- For Available Regions, select which region the Multi-Region BCP tenant is hosted in.
- For DR Tenant, select the Multi-Region BCP tenant. This ID can be found in the tenant's General tab in Tenant Management.
- Click Validate to verify that the mapping can complete successfully. The validation must be successful in order to continue.
- Click Generate Passkey. A user must enter this passkey when switching between a primary and Multi-Region BCP tenant. Therefore, you may need to share this passkey with an administrator of the primary tenant. You, or the administrator, must keep this passkey somewhere secure, just like a password. This passkey is required when enabling the Multi-Region BCP tenant, which directs traffic from the primary to the Multi-Region BCP tenant. Therefore, you may need to share this passkey with an administrator of the primary tenant.
- Click Finish.
- Click Save to save the Multi-Region BCP configuration in the tenant's settings.
- Click the app selector
- Enable Multi-Region Business Continuity Plan (Business Continuity Plan) for the Multi-Region BCP tenant:
- In the list of tenants, select the Multi-Region BCP tenant.
- Click the Applications & Features tab.
- Enable Multi-Region BCP and confirm that you want to enable it. A configuration pop-up displays.
- Enable Multi-Region BCP Configurations and Multi-Region BCP Tenant Enablement, then click Next. When the Configure Settings page displays, notice that the mapping is already configured.
- Click Finish. You do not need to generate a new passkey since you already generated one through the primary tenant. Passkeys are shared between tenants mapped to each other, so if you generate a passkey here, it will negate the one you already created. This means that this latest passkey must be used to switch between tenants.
- Click Save to save the Multi-Region BCP configuration in the tenant's settings.
- Enable Multi-Region BCP permissions for the primary tenant:
- In the list of tenants, select the primary tenant.
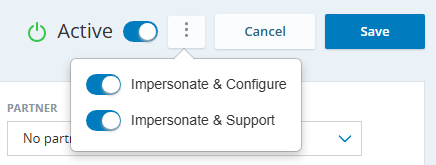
- Click the options menu and select Impersonate & Support. Confirm the impersonation, which opens the Adminapplication in the primary tenant.
Click Roles and Permissions and select the Administrator role.
On this Permissions tab, select Multi-Region BCP.
Enable View and Edit for both Multi-Region BCP permissions.
Click Save.
After completing these steps, a primary tenant administrator can start syncing data from the primary to Multi-Region BCP tenant.
After mapping a primary to a Multi-Region BCP tenant, they share the same passkey. This means that if you generate a new passkey in the Multi-Region BCP tenant's settings, that new passkey becomes the current one and must be used when switching between the primary and Multi-Region BCP tenants.
Start Syncing Data to a Multi-Region BCP Tenant
Required Permission: Multi-Region BCP > Multi-Region BCP Configurations > Configurations > Edit
After Multi-Region Business Continuity Plan (Business Continuity Plan) has been set up, you can initiate the synchronization process. This syncs data from your primary NiCE CXone system to your Multi-Region BCP system. Data syncs on a daily basis, according to your configuration.
In the following instructions, you first choose a default sync configuration, then optionally choose any deviations as a custom selection.
-
Click the app selector
and select Admin. -
Click Sync Configuration in the left menu.
-
Click Enable Sync. The Sync Settings section appears, where you can set up a default or custom sync configuration.
-
In the Default Configuration tab, choose how often you want your data to sync to the Multi-Region BCP tenant.
-
 If you want to sync specific data at a different cadence, you can add a custom configuration
-
Click the Add Custom Configuration tab.
-
For Application, select the NiCE CXone application that you want to sync data from.
-
For Entity, choose a data entity from the selected application that you want to sync.
-
For Sync Scheduling, select how often you want the entity to sync. Currently, you can only sync individual entities on a daily basis.
-
Click Add and repeat these steps to specify additional entities.
-
-
Click Save.
If you make changes to your primary tenant the same day that you experience an issue and need to switch to the Multi-Region BCP tenant, you may need to manually replicate the changes in the Multi-Region BCP tenant. This is because the sync process occurs, at most, once per day.
Give Users Access
Required Permission: Multi-Region BCP > Multi-Region BCP Configurations > Configurations > Edit
By default, no employee profiles have access to the Multi-Region BCP tenant. You can grant access to users in two ways:
-
Individual Employees: Each employee profile has a Multi-Region BCP tab with the Multi-Region BCP Type field where you can assign their level of access.
-
Multiple Employees: Use the Multi-Region BCP Type column in the employee bulk upload template.
The following instructions explain how to give individual users access.
- Click the app selector and select Admin.
Go to Employees.
Select your desired employee profile.
Click the Multi-Region BCP tab.
Select the level of access you want the employee to have for Multi-Region BCP Type:
No Access: The user account does not have access to the Multi-Region BCP tenant. By default, all employees have no access.
Single Access: The user account can only access whichever tenant is active. So, they can only log in to the Multi-Region BCP tenant when you've switched to the Multi-Region BCP tenant and it's active.
Multiple Access: The user account can choose which tenant to log in to. This type of access should be given to administrators, who you want to be able to log in to the Multi-Region BCP tenant at any time. These users will have an updated login page. When logging in, a selector will let them choose between the primary and Multi-Region BCP tenant. This selector will also show which tenant is currently active. This will help them easily know whether the Multi-Region BCP tenant is active or not.
Save your changes.
Update Studio Scripts
Required Permissions: Multi-Region BCP > Multi-Region BCP Configurations > Configurations > Edit, ACD > Studio > Scripts > Create/Edit, Admin > Access Key > Create
If you have Studio development workflow stages enabled and configured, you also need permissions for each stage and each type of action.
Because the IDs of entities in the Multi-Region BCP system are not the same, this impacts your Studio scripts. When a script syncs, it retains any unique IDs you've used in the script. For example, you may have referenced a specific skill ID in the script. In this scenario, the script would be referencing the ID of the skill in your primary system. This means you need to update any unique IDs in the Multi-Region BCP version of the script.
Script developers can use the following checklist when reviewing and updating scripts. This is a generic list; depending on how you've crafted your own scripts, you may need to check additional items.
Keep in mind the following when managing scripts:
-
If you use Desktop Studio, you can use the advanced search to find all instances of certain IDs.
-
You can use the variables tab to find all instances of variables in the script.
-
In general, best practice is to avoid hard-coding IDs and specific base URLs.
-
For IDs, you may want to implement a dynamic switch before certain IDs are referenced. For example, if you have 50 different entry scripts that lead to 5 queue scripts. You could add a check for which tenant the script is running in. Depending on the tenant, you could switch from one ID to another.
-
For API requests, best practice is to programmatically generate details, like the region used in the request base URL. You can learn more about API discovery on the developer portal
 .
.
-
-
Depending on your system, certain IDs may be stored off-platform, like in a CRM
Third-party systems that manage such things as contacts, sales information, support details, and case histories.. These IDs may not need to be updated, but this may be something you'd want to test to ensure it works in the Multi-Region BCP tenant. -
You may want to review the Studio help section for more information about scripting. For example, the Work with Scripts and Work with Actions in Scripts pages may be useful.